How to Change a Headlight on a Honda Civic Step by Step
Changing a headlight on a Honda Civic is a simple DIY job you can finish in under 30 minutes. This guide walks you through every step, from picking the right bulb to aligning your new headlight. You will save money, gain confidence, and keep your Honda Civic shining bright on the road.
Changing a headlight on a Honda Civic might sound intimidating, but it is one of the easiest car repairs you can do at home. Whether your low beam is flickering or your high beam has gone dark, swapping out the bulb takes just a few simple steps. You do not need to be a mechanic or own fancy equipment. With the right bulb and a little patience, your Honda Civic will be back to full brightness in no time.
Many people pay a shop $50 to $100 for this quick job. But once you learn how to do it yourself, you will never pay for it again. This guide covers everything you need to know. We will go through the tools you need, the step-by-step process, common mistakes, and tips to make the job even easier. Let us get started.
Key Takeaways
- Easy DIY Project: You do not need special tools or a mechanic to swap a Honda Civic headlight bulb.
- Right Bulb Matters: Using the correct headlight bulb type ensures proper brightness and fit.
- Safety First: Always disconnect the battery and let the headlight cool before starting.
- Clean Connections: Cleaning the headlight connector prevents flickering and future problems.
- Alignment Is Key: Proper headlight alignment keeps you safe and avoids blinding other drivers.
- Know When to Call a Pro: Some issues like a blown fuse or wiring problem need a professional.
📑 Table of Contents
- Why Changing Your Honda Civic Headlight Matters
- What You Need Before Starting
- Step-by-Step: Removing the Old Headlight Bulb
- Installing the New Headlight Bulb
- Testing and Aligning Your New Headlight
- Common Honda Civic Headlight Problems
- When to See a Professional
- Tips to Make Headlight Replacement Even Easier
- How Much Does It Cost to Change a Honda Civic Headlight?
- Final Thoughts
Why Changing Your Honda Civic Headlight Matters
Your headlights are one of the most important safety features on your car. They help you see the road at night and let other drivers see you. When a headlight bulb goes out, it is not just an inconvenience. It is a safety risk. Driving with a burned-out headlight can also get you pulled over and fined in many states.
Replacing the bulb early also protects the headlight housing from moisture damage. When a bulb is dead for a long time, condensation can build up inside the assembly. This can cause rust and fogging that costs much more to fix. A quick headlight replacement keeps your entire assembly in good shape.
How Often Should You Replace Headlight Bulbs?
Most halogen headlight bulbs last between 450 and 1,000 hours of driving. That usually means about one to two years of normal use. If you drive a lot at night, you may need to replace them more often. LED headlight bulbs last much longer, sometimes up to 30,000 hours. But even LEDs can fail over time.
Keep an eye on your headlights during your regular Honda Civic maintenance routine. If you notice one side looking dimmer than the other, it is time to check the bulb. Catching a failing bulb early means you never have to drive with reduced visibility.
What You Need Before Starting
Before you open the hood, gather everything you need. Having the right tools and parts ready saves time and frustration. Here is your checklist:
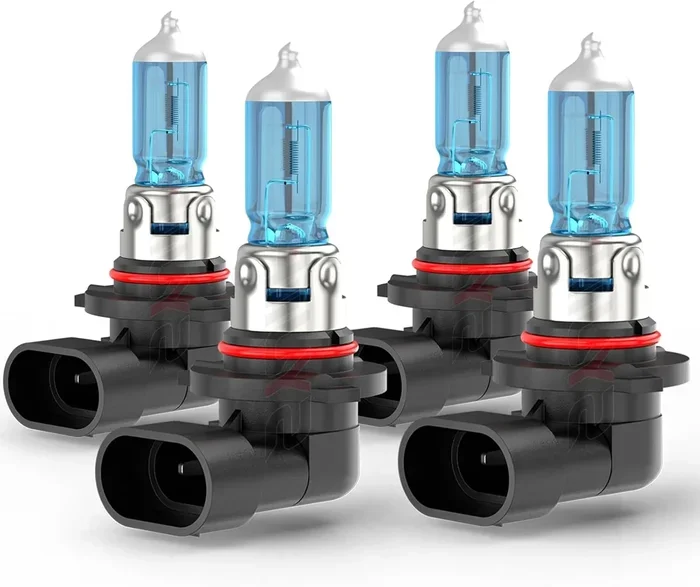
- The correct headlight bulb: Check your Honda Civic owner manual for the exact bulb type. Most models use an H11 bulb for the low beam and an H9 or H11 for the high beam. Some older models may use a different size.
- A clean cloth or gloves: The oil from your fingers can damage a new bulb. Always handle the glass part with gloves or a soft cloth.
- A Phillips or flathead screwdriver: Depending on your model year, you may need one or the other to remove the headlight assembly cover.
- A flashlight: You will be working in tight spaces, so good lighting helps a lot.
- Dielectric grease (optional): This protects the connector from moisture and makes future replacements easier.
Finding the Right Bulb for Your Honda Civic
Not all Honda Civics use the same bulb. The bulb type changes depending on the model year and trim level. For example, a 2012 Honda Civic might use a different bulb than a 2019 model. Always double-check your owner manual before buying a replacement.
You can also check the number printed on the old bulb. Look for markings like H11, 9005, or 9006. Write this down and match it when you buy the new one. Auto parts stores carry a wide range of headlight bulb types, and the staff can usually help you find the right one.
Step-by-Step: Removing the Old Headlight Bulb
Now comes the actual work. Follow these steps carefully, and you will have the old bulb out in just a few minutes.
Step 1: Turn Off the Car and Let It Cool
Make sure the engine is off and the keys are out of the ignition. Headlight bulbs get very hot while running. Wait at least 10 minutes for them to cool down. Touching a hot bulb can cause burns or crack the glass.
Step 2: Open the Hood and Locate the Headlight Assembly
Pull the hood release lever inside your car and secure the hood with the prop rod. Look behind the headlight assembly on the side where the bulb is burned out. You will see a plastic cover or connector holding the bulb in place.
Step 3: Disconnect the Battery (Recommended)
This is a safety step many people skip. Before touching any electrical connections, disconnect the negative battery terminal. This prevents short circuits and protects your car’s electrical system. Use a wrench to loosen the clamp and pull the cable off the terminal.
If you are not comfortable doing this, you can skip it, but be careful not to touch any metal parts inside the engine bay while the bulb connector is plugged in.
Step 4: Remove the Electrical Connector
The headlight bulb is held in place by a plastic connector. Squeeze the tabs on the connector and gently pull it away from the bulb base. Some connectors have a small locking tab that you need to push down first. Take your time and do not force it.
Step 5: Remove the Retaining Clip or Ring
Most Honda Civic headlight bulbs are held in by a metal spring clip or a plastic retaining ring. Squeeze the clip tabs or twist the ring counterclockwise to release it. Once it is loose, carefully pull the old bulb straight out of the housing.
Step 6: Handle the Old Bulb Safely
Place the old bulb in a safe spot. Do not throw it in your regular trash unless your local rules allow it. Many auto parts stores accept old bulbs for recycling.
Installing the New Headlight Bulb
With the old bulb out, you are ready to install the new one. This part is just as easy, if not easier.
Step 1: Prepare the New Bulb
Take the new bulb out of its packaging. Hold it by the plastic base, not the glass. If you accidentally touch the glass, wipe it clean with rubbing alcohol and a soft cloth. Any oil on the glass can create hot spots that shorten the bulb’s life.
Step 2: Insert the New Bulb
Slide the new bulb into the headlight housing, matching the base with the connector. Push it in gently until it sits snugly in place. Do not force it. The bulb should fit naturally without any wobbling.
Step 3: Reattach the Retaining Clip or Ring
Place the spring clip or ring back over the bulb and secure it. Make sure it clicks into position or locks tightly. A loose clip can cause the bulb to vibrate and eventually fail prematurely.
Step 4: Reconnect the Electrical Connector
Plug the electrical connector back onto the bulb base. You should hear a click when it locks in place. Give it a gentle tug to make sure it is secure.
Step 5: Apply Dielectric Grease (Optional)
If you have dielectric grease, apply a thin layer to the connector before plugging it in. This keeps moisture out and prevents corrosion. It is a small step that pays off over time, especially if you live in a rainy or humid area.
Step 6: Reconnect the Battery
If you disconnected the battery earlier, now is the time to reconnect it. Place the cable back on the negative terminal and tighten the clamp. Make sure it is secure and will not wiggle loose.
Testing and Aligning Your New Headlight
Once the new bulb is installed, you need to test it and make sure it is aimed correctly. A bulb that is not aligned properly can blind oncoming drivers or reduce your visibility.
Step 1: Turn on the Headlights
Start the car and turn on the headlights. Check both the low beam and high beam. The new bulb should light up immediately and evenly. If it flickers or does not turn on, double-check the electrical connection.
Step 2: Check the Beam Pattern
Park your Honda Civic about 25 feet from a wall or garage door. Turn on the low beams and look at the light pattern on the wall. The beam should be flat and level, with a slight upward angle on the right side (to illuminate road signs). If the beam is pointed too high or too low, you need to adjust it.
Step 3: Adjust the Headlight Alignment
Most Honda Civic headlight assemblies have an adjustment screw on the back or side of the housing. Use a screwdriver to turn the screw and raise or lower the beam. Turn the screw slowly and check the pattern on the wall after each adjustment.
If you are unsure about alignment, many auto parts stores offer free headlight alignment checks. It is worth getting right because misaligned headlights are both unsafe and illegal in many states.
Common Honda Civic Headlight Problems
Sometimes replacing the bulb does not fix the problem. Here are some common issues and what they mean.
Flickering Headlights
If your new headlight flickers, the problem is usually a loose connection or a corroded connector. Unplug the electrical connector and clean the contacts with a wire brush or electrical contact cleaner. Plug it back in firmly and test again.
Another common cause is a failing headlight relay or a blown fuse. Check your fuse box under the hood and look for the headlight fuse. If it is blown, replace it with a new one of the same amperage.
One Headlight Is Brighter Than the Other
This usually means the new bulb is not seated properly or the connector is not fully plugged in. Remove the bulb, check the connection, and reinstall it. If both bulbs are the same age and one is noticeably dimmer, the dimmer one may be a different bulb type or a lower-quality replacement.
Headlight Lens Is Foggy or Yellowed
A foggy headlight lens reduces visibility and makes your car look old. This happens from UV exposure and road debris. You can restore the lens using a headlight restoration kit, which includes sandpaper and a protective sealant. Clean the lens first, then sand it lightly, and apply the sealant. This is a great addition to your Honda Civic maintenance routine.
Moisture Inside the Headlight Housing
If you see water or condensation inside the headlight, the seal has likely been broken. This can happen after a bulb replacement if you accidentally cracked the housing or did not reseat the cover properly. A small amount of moisture may dry on its own, but persistent water inside can damage the reflector and electrical connections.
When to See a Professional
Most headlight changes are straightforward, but there are times when you should call a mechanic. If the new bulb does not work after a proper installation, there may be a wiring issue or a faulty connector. If you notice burning smells, smoke, or visible damage to the headlight assembly, stop immediately and seek help.
A full car diagnostic can reveal underlying electrical problems that are not visible on the surface. If you have already replaced the bulb and the issue persists, a diagnostic test can save you time and money by pinpointing the real cause. Sometimes the problem is not the bulb at all but the headlight fuse, the relay, or the wiring harness.
Also, if your Honda Civic is still under warranty, check with your dealer before doing the repair yourself. Some warranty work must be done at an authorized service center. You can also ask Can I Take My Acura To A Honda Dealership if you own a related Honda brand vehicle and want to know about dealership service options.
Tips to Make Headlight Replacement Even Easier
Here are some extra tips from experienced DIYers that make the job smoother:
- Work during daylight: You will see better and avoid frustration in the dark.
- Take photos before you start: Pictures of the old setup help you remember how everything connects.
- Keep the old bulb packaging: It has the bulb type printed on it, which makes buying replacements easy.
- Replace both bulbs at once: If one headlight is dim, the other is likely close behind. Replacing both ensures even lighting.
- Keep a maintenance log: Write down the date you replaced the bulbs. This helps you track when they need replacing next.
How Much Does It Cost to Change a Honda Civic Headlight?
The cost depends on the bulb type and where you buy it. A single halogen headlight bulb costs between $15 and $40 at most auto parts stores. LED bulbs cost more, typically $30 to $80 each. If you go to a shop, labor adds $50 to $100 on top of the bulb cost.
Doing it yourself saves you the labor fee entirely. Even if you buy a premium LED bulb, you still save money compared to a shop visit. And the satisfaction of finishing the job yourself is a nice bonus.
Final Thoughts
Changing a headlight on a Honda Civic is one of the most rewarding DIY repairs you can do. It takes less than 30 minutes, costs very little, and keeps you safe on the road. Once you have done it a couple of times, you will wonder why you ever paid someone else to do it.
Remember to always use the correct bulb type, handle the new bulb carefully, and check your alignment after installation. These small steps make a big difference in how well your headlights perform. With this guide, you have everything you need to get the job done right the first time. Grab your tools, pop the hood, and give it a try. Your Honda Civic will thank you.
Frequently Asked Questions
What type of headlight bulb does a Honda Civic use?
Most Honda Civics use an H11 bulb for the low beam. Some models use a 9005 or 9006 bulb for the high beam. Always check your owner manual or the number on the old bulb to confirm the correct type before buying a replacement.
Can I drive my Honda Civic with a burned-out headlight?
It is not recommended. Driving with a burned-out headlight reduces your visibility and is illegal in most states. You may get pulled over and fined. Replace the bulb as soon as possible to stay safe and compliant with the law.
How long does it take to change a headlight on a Honda Civic?
Most people finish the job in 15 to 30 minutes. If you are doing it for the first time, it might take a little longer while you get familiar with the process. Having the right tools and bulb ready before you start helps speed things up.
Should I replace both headlight bulbs at the same time?
Yes, it is a good idea. If one bulb has burned out, the other is likely close to failing too. Replacing both ensures even lighting on the road and saves you a future trip to the auto parts store. It is a small extra cost that prevents uneven visibility.
Why is my new headlight bulb flickering after installation?
Flickering is usually caused by a loose electrical connector, a corroded contact, or a bulb that is not seated properly. Unplug the connector, clean the contacts with electrical contact cleaner, and plug it back in firmly. If the problem continues, check the headlight fuse or relay.
Do I need to reset anything after changing a Honda Civic headlight?
No, there is no reset required after a headlight bulb replacement. Simply turn on the headlights and check that both the low beam and high beam work properly. If your car has a maintenance reminder light, it will not be affected by a headlight change.
=== INTERNAL LINKS ===
If you want to learn more about Honda Civic maintenance, check out our guide on how to open the gas cap on a car for another easy DIY task. Also, if your headlight issue persists after a bulb replacement, you may want to schedule a full car diagnostic to check for underlying electrical problems. And for more tips on keeping your Honda running well, see whether leaving a car door open drains the battery, which is a common concern for Honda Civic owners.