How Do You Turn Off the Check Engine Light After Oil Change
The check engine light often comes on after an oil change due to a loose gas cap, leftover diagnostic codes, or a sensor reset issue. You can usually turn it off yourself with a simple OBD-II scanner or by tightening the gas cap and driving a few cycles. Knowing how to handle the check engine light after an oil change saves you time and unnecessary trips to the mechanic.
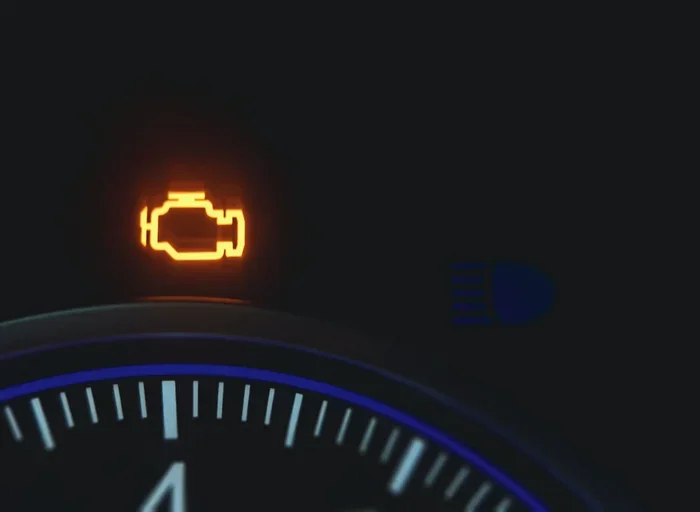
You just got your oil changed. You hop in the car, start the engine, and boom — the check engine light is glowing on your dashboard. It is a scary moment. Your mind starts racing. Did the mechanic do something wrong? Is your engine in trouble? The good news is that this happens more often than you think, and it is usually nothing serious.
In this guide, we will walk you through exactly how to turn off the check engine light after an oil change. We will cover the most common reasons the light comes on, the tools you need, and step-by-step fixes you can do at home. Whether you are a DIY car owner or someone who just wants to understand what is happening, this article has you covered.
The check engine light after oil change is a topic that confuses a lot of drivers. But once you understand the basics, it becomes much less intimidating. Let us break it all down for you.
Key Takeaways
- A loose gas cap is the most common reason the check engine light stays on after an oil change.
- An OBD-II scanner lets you clear diagnostic trouble codes quickly and easily at home.
- The check engine light may go off by itself after a few driving cycles if the issue was minor.
- Never ignore the light if it flashes or stays on for more than a few days after an oil change.
- Resetting the oil life system is different from clearing the check engine light and requires a separate process.
- Common mistakes like not tightening the gas cap or using the wrong oil can trigger the light.
- When in doubt, see a mechanic to run a full diagnostic and rule out serious problems.
📑 Table of Contents
- Why Does the Check Engine Light Come On After an Oil Change?
- Common Reasons the Check Engine Light Stays On After an Oil Change
- How to Turn Off the Check Engine Light After an Oil Change
- Can You Clear the Check Engine Light Yourself?
- When to See a Mechanic About the Check Engine Light
- Preventing the Check Engine Light From Coming On After an Oil Change
- How Long Does It Take for the Check Engine Light to Go Off?
- Understanding Diagnostic Trouble Codes
- Check Engine Light After Oil Change: Is It Normal?
- Conclusion
Why Does the Check Engine Light Come On After an Oil Change?
Your car is a complex machine. It has dozens of sensors monitoring everything from fuel mixture to oxygen levels. When something even slightly out of place happens, the car’s computer flags it. An oil change is one of those events that can trigger a response from the system.
Here is the thing — the check engine light does not always mean something is broken. Sometimes it just means the car detected a temporary glitch. After an oil change, several things can cause the light to pop on.
The Gas Cap Was Loose or Removed
During an oil change, the technician may need to access areas near the fuel system. Sometimes the gas cap gets bumped or not tightened properly. A loose gas cap lets fuel vapors escape, which triggers the evaporative emission system (EVAP) code. This is the number one reason the check engine light comes on after routine maintenance.
The Oil Life System Needs Resetting
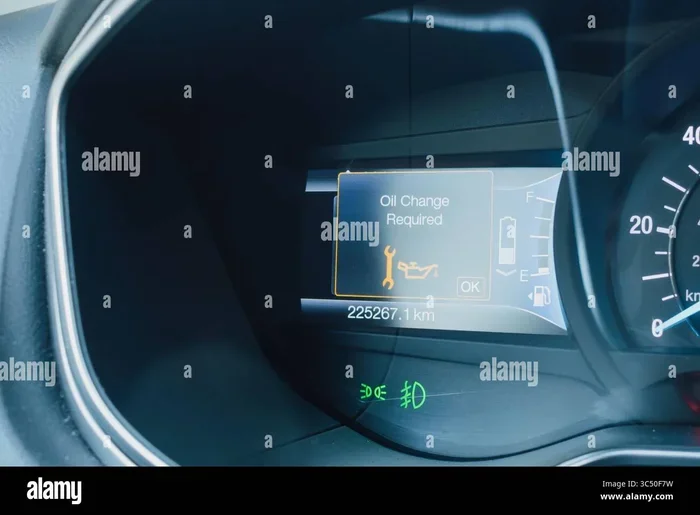
Many modern cars have an oil life monitoring system. After an oil change, this system needs to be reset manually. If it is not reset, the car may display a warning that looks similar to the check engine light. While not the same thing, drivers often confuse the two.
A Diagnostic Code Was Already Pending
Sometimes the check engine light was already on before the oil change. The mechanic may have cleared it during service, but the underlying issue was not fully fixed. The code returns after a few driving cycles, and the light comes back on.
Sensor Reset or Electrical Glitch
Disconnecting any part of the car during an oil change — even temporarily — can cause a sensor reset. The car’s computer may need a few minutes to recalibrate. During this time, the check engine light may stay on as a precaution.
Common Reasons the Check Engine Light Stays On After an Oil Change
If the light stays on for more than a day or two, something specific is going on. Here are the most common culprits.
- Loose or damaged gas cap: This is the easiest fix and the most common cause. A cap that does not seal properly lets vapors leak out.
- Wrong oil type: Using the wrong grade of oil can affect oil pressure readings and trigger the light.
- Low oil level: If the oil was not filled to the correct level, the oil pressure sensor may detect a problem.
- Faulty oil pressure sensor: Sometimes the sensor itself is defective and sends a false signal to the computer.
- Uncleared diagnostic codes: If the mechanic cleared the light but did not fix the root cause, the code will return.
- Oil filter not seated properly: A loose oil filter can cause minor leaks and pressure drops.
Understanding these common reasons helps you figure out whether the issue is a simple fix or something that needs professional attention.
How to Turn Off the Check Engine Light After an Oil Change
Now for the part you have been waiting for — how to actually turn off the light. There are several methods, ranging from super simple to slightly more involved. Let us go through each one.
Method 1: Tighten the Gas Cap
Before you do anything else, check your gas cap. Sounds too simple, right? But it works more often than you would think. Turn the cap clockwise until you hear three clicks. Then drive the car for a few minutes. In many cases, the light will turn off on its own after a couple of driving cycles.
Quick Tip: If the gas cap is cracked or the seal is worn, replace it. A new gas cap costs just a few dollars and is one of the easiest check engine light fixes you can do.
Method 2: Use an OBD-II Scanner
An OBD-II scanner is the most reliable way to clear the check engine light. You plug it into the diagnostic port under your dashboard, and it reads the codes stored in your car’s computer. Once you know the code, you can clear it with the scanner.
Here is how to do it step by step:
- Locate the OBD-II port under your dashboard, usually on the driver’s side.
- Plug the scanner into the port.
- Turn the ignition to the “on” position (do not start the engine).
- Wait for the scanner to connect to your car’s computer.
- Read the diagnostic codes and note them down.
- Select the option to clear or erase the codes.
- Turn off the ignition and restart the engine.
If the issue was minor — like a loose gas cap — the light should stay off after you clear the code. If it comes back, there is a deeper problem that needs addressing.
You can also manually clear your car codes if you do not have a scanner, though this method is less reliable and varies by vehicle model.
Method 3: Drive It Off
Sometimes the check engine light just needs to be driven off. After a minor glitch, the car’s computer may turn the light off automatically after a few successful driving cycles. A driving cycle means starting the car, driving it for a few miles, and then turning it off.
Try driving the car for 50 to 100 miles after tightening the gas cap or clearing the code. If the light does not come back, you are good to go.
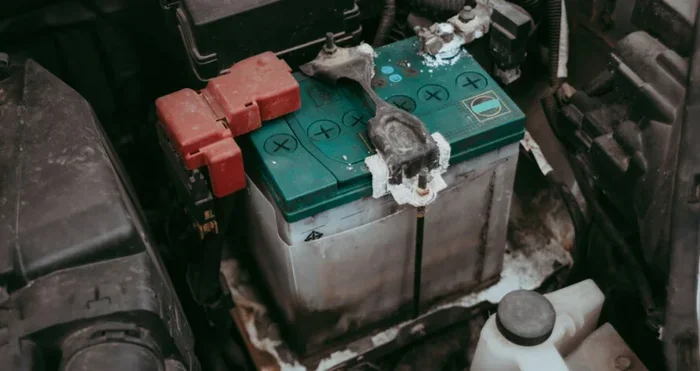
Method 4: Disconnect the Battery
Disconnecting the battery resets the car’s computer. This can clear temporary codes and turn off the check engine light. Here is how:
- Turn off the engine and all accessories.
- Open the hood and locate the battery.
- Using a wrench, disconnect the negative (black) cable first.
- Wait for 10 to 15 minutes.
- Reconnect the cable and tighten it securely.
- Start the engine and check if the light is off.
Be careful: Disconnecting the battery may also reset your radio presets, clock, and other settings. Some cars may also need to relearn idle trim, which can cause rough idling for a short time.
Method 5: Use the Ignition Cycle Trick
Some vehicles respond to a simple ignition cycle. Turn the key to the “on” position for one second, then turn it to the “off” position for one second. Repeat this three times. Then start the engine. This method works on some older models but is not reliable for all cars.
Can You Clear the Check Engine Light Yourself?
The short answer is yes. Most of the time, you can clear the check engine light yourself without visiting a mechanic. But there is a catch. Clearing the light does not fix the underlying problem. If there is a real issue, the light will just come back.
This is why many drivers prefer to clear the check engine light themselves using an OBD-II scanner. It gives you control and saves money. You can read the code first, understand what it means, and then decide whether to fix it yourself or take the car to a shop.
Here are a few things to keep in mind before you clear the light:
- Write down the codes first. Even after you clear them, you may want to look up what they mean.
- Do not clear the light if it is flashing. A flashing check engine light usually indicates a serious problem like engine misfire that can damage the catalytic converter.
- Check for other symptoms. If the car is running rough, making strange noises, or losing power, do not just clear the light. Get it checked.
It is also worth noting that some states require the car to pass an emissions test with no check engine light present. Clearing the light temporarily may help you pass the test, but the underlying issue will likely show up during inspection.
When to See a Mechanic About the Check Engine Light
Not every check engine light situation is a DIY fix. Here are some signs that you should take the car to a professional.
- The light is flashing instead of staying solid. A flashing light is an emergency.
- The car is shaking, stalling, or running poorly.
- You notice a strong smell of fuel or burning oil.
- The light comes back immediately after you clear it.
- You have checked the gas cap and tightened it, but the light stays on.
- The oil pressure warning light is also on along with the check engine light.
A mechanic can run a full diagnostic using professional-grade tools. They can also check things like oil pressure, sensor readings, and engine performance that are not visible to the naked eye. Sometimes the issue is as simple as a faulty sensor, and other times it is something that needs immediate repair.
If you are unsure whether the light is serious, it is always better to be safe than sorry. A quick diagnostic check can give you peace of mind and save you from a much bigger repair bill down the road.
Preventing the Check Engine Light From Coming On After an Oil Change
Prevention is always better than cure. Here are some simple steps you can take to avoid seeing the check engine light after your next oil change.
Make Sure the Gas Cap Is Tight
After the oil change, double-check the gas cap. Make sure it clicks at least three times when you tighten it. This small step can save you a lot of hassle.
Ask the Mechanic to Check for Codes
Before you leave the shop, ask the mechanic to run a quick diagnostic. If there are any pending codes, they can address them before the light comes on at home.
Use the Right Oil
Always use the oil grade recommended by your car manufacturer. Check your owner’s manual if you are unsure. Using the wrong oil can affect everything from engine performance to sensor readings.
Reset the Oil Life System
After the oil change, make sure to reset the oil life system if your car has one. This is different from the check engine light, but it keeps your maintenance tracking accurate.
Drive Smoothly After the Oil Change
Avoid aggressive driving for the first few miles after an oil change. Give the engine time to adjust to the fresh oil. Smooth driving helps the sensors recalibrate properly.
By following these simple tips, you can reduce the chances of seeing the check engine light after your next oil change. And if the light does come on, you will know exactly what to do.
How Long Does It Take for the Check Engine Light to Go Off?
The answer depends on why the light came on in the first place. If the cause was minor — like a loose gas cap — the light may turn off within one to three driving cycles. A driving cycle usually takes about 50 to 100 miles of normal driving.
If you use an OBD-II scanner to clear the code, the light should turn off immediately. However, if the underlying issue is not resolved, the light may come back within a few days or after a certain number of miles.
In some cases, the check engine light may go off by itself after a few days if the car’s computer determines that the issue has resolved. This is more common with intermittent problems or temporary sensor glitches.
Understanding Diagnostic Trouble Codes
When you plug in an OBD-II scanner, it reads diagnostic trouble codes (DTCs) from your car’s computer. These codes tell you exactly what the car detected. Each code starts with a letter followed by four numbers.
Here is a quick breakdown:
- P-codes: Powertrain codes related to the engine, transmission, and emissions system.
- B-codes: Body codes related to the interior systems like air conditioning and airbags.
- C-codes: Chassis codes related to the braking and suspension systems.
- U-codes: Network codes related to communication between different car modules.
The most common codes you might see after an oil change include P0456 (small EVAP leak, often caused by a loose gas cap) and P0521 (oil pressure sensor range/performance). These codes are usually easy to fix and do not indicate serious engine damage.
You can also run diagnostics without a check engine light in some cases, but this is more advanced and usually not necessary for post-oil change issues.
Check Engine Light After Oil Change: Is It Normal?
To answer the most common question — yes, it is relatively normal for the check engine light to come on after an oil change. It does not mean the mechanic did a bad job. It does not mean your engine is failing. In most cases, it is a minor sensor glitch or a loose gas cap that can be fixed in minutes.
That said, you should never ignore the light. Even if it seems like a false alarm, it is worth checking. A quick scan with an OBD-II tool can tell you exactly what is going on and give you the confidence to either fix it yourself or visit a shop.
Also keep in mind that a check engine light can go off by itself if the issue was temporary. The car’s computer monitors conditions over multiple driving cycles and will turn the light off if everything looks normal.
Conclusion
Dealing with the check engine light after an oil change can be stressful, but it is almost always manageable. The most important thing is to stay calm and follow the right steps. Start with the simplest fix — check the gas cap. If that does not work, grab an OBD-II scanner and clear the code. If the light keeps coming back, it is time to see a professional.
Turning off the check engine light after an oil change is something most car owners can do themselves with the right tools and a little knowledge. You do not need to be a mechanic to handle it. Just remember to address the root cause, not just the light itself. A light that keeps coming back is your car telling you something needs attention.
Take care of your car, stay on top of your maintenance, and do not let a glowing dashboard light ruin your day. With the information in this guide, you are now equipped to handle the check engine light like a pro.
Frequently Asked Questions
Why did my check engine light come on right after an oil change?
The most common reason is a loose gas cap. During the oil change, the gas cap may have been bumped or not tightened properly. Other causes include leftover diagnostic codes, an oil life system that needs resetting, or a temporary sensor glitch. In most cases, the fix is simple and takes just a few minutes.
Can I drive my car with the check engine light on after an oil change?
If the light is solid and the car is running normally, you can usually drive it safely for a short distance. However, if the light is flashing, the car is shaking, or you notice a loss of power, pull over and get it checked immediately. A flashing light often indicates a serious problem that can damage the catalytic converter if ignored.
How do I know if the check engine light is serious?
A solid check engine light after an oil change is usually not serious. A flashing light is more urgent and requires immediate attention. You can plug in an OBD-II scanner to read the code, which will tell you exactly what triggered the light. Codes related to oil pressure or engine misfire are more serious than EVAP codes caused by a loose gas cap.
Will the check engine light go off by itself after an oil change?
Yes, in many cases the light will turn off on its own after a few driving cycles if the cause was minor. Tightening the gas cap and driving normally for 50 to 100 miles often does the trick. If the light does not go off within a few days, you should use a scanner or visit a mechanic to investigate further.
Do I need a special tool to turn off the check engine light?
An OBD-II scanner is the most effective tool for clearing the check engine light. You can buy a basic scanner for under $30 at most auto parts stores or online. Some car parts stores, like AutoZone or O’Reilly, will read and clear codes for free if you bring the car in. You can also try the ignition cycle method or battery disconnect as alternatives, though these are less reliable.
What is the difference between resetting the oil life system and clearing the check engine light?
Resetting the oil life system tells your car that you have completed an oil change. Clearing the check engine light erases the diagnostic trouble codes stored in the car’s computer. These are two separate processes. Resetting the oil life system does not turn off the check engine light, and clearing the check engine light does not reset the oil life system. You may need to do both after an oil change depending on your vehicle.