How to Check Primary Oil on Harley-Davidson – Step by Step
Checking the primary oil on your Harley-Davidson is a simple but essential maintenance task that keeps your bike running strong. This guide walks you through every step, from gathering the right tools to draining, filling, and checking the oil level. You will learn the correct oil type, how often to change it, and common mistakes to avoid during the process.
Owning a Harley-Davidson comes with a great sense of freedom and the responsibility of keeping your bike in top shape. One of the most overlooked maintenance tasks is checking the primary oil on your Harley. Many riders focus on engine oil and forget about the primary chain case, but this fluid plays a huge role in how smoothly your motorcycle runs.
If you are new to Harley ownership or just have not checked your primary oil in a while, this guide is for you. We will walk you through the entire process step by step. You will learn what tools you need, how to drain the old fluid, how to fill it properly, and how to check the level. By the end, you will feel confident doing this job in your own garage.
Keeping your Harley-Davidson maintenance on track does not have to be complicated. With a little knowledge and the right approach, you can save money on shop visits and keep your bike running strong for years. Let us dive into everything you need to know about checking and changing your primary oil.
Key Takeaways
- Regular primary oil checks extend your Harley’s engine life: Fresh oil keeps the primary chain and gears lubricated and cool.
- You only need basic tools: A socket wrench, drain pan, funnel, and the correct Harley-Davidson primary fluid are all you need.
- Check the oil level with the bike level and engine warm: This gives you the most accurate reading every time.
- Use the right oil type: Harley-Davidson recommends specific primary fluid to avoid clutch slipping and gear wear.
- Change your primary oil at regular intervals: Most Harley models need a primary oil change every 5,000 to 10,000 miles.
- Avoid overfilling: Too much oil can cause leaks and pressure buildup in the primary case.
📑 Table of Contents
- What Is Primary Oil and Why Does It Matter?
- Tools and Materials You Will Need
- Step-by-Step Guide to Check Primary Oil on Harley-Davidson
- How Often Should You Change Primary Oil?
- Common Mistakes to Avoid When Checking Primary Oil
- Can You Do This Yourself or Should You Visit a Mechanic?
- Expert Tips for Maintaining Your Harley Primary Oil System
- Conclusion
What Is Primary Oil and Why Does It Matter?
The primary oil in your Harley-Davidson lubricates the gears and chain inside the primary chain case. This is the section between the engine and the transmission. Without proper lubrication, these components can wear out quickly, leading to expensive repairs.
Think of it like this: your engine oil keeps the motor happy, and the primary oil keeps the gears and chain happy. Both are essential. Many riders know to check their engine oil regularly but skip the primary side entirely. This is a mistake that can cost you over time.
Dirty or low primary oil can cause several problems:
- Grinding noises from the primary gears
- Clutch slipping or grabbing unevenly
- Increased wear on the primary chain
- Poor power transfer from engine to transmission
- Overheating of the primary case components
Regularly checking your primary oil level helps you catch these issues early. It is one of the simplest things you can do to protect your investment.
Tools and Materials You Will Need
Before you start, gather everything you need. Having all your tools ready makes the job faster and less frustrating. Here is a simple list of what you will need:
- Socket wrench set — to remove the drain plug
- Primary oil drain pan — to catch the old fluid
- Funnel — for clean filling without spills
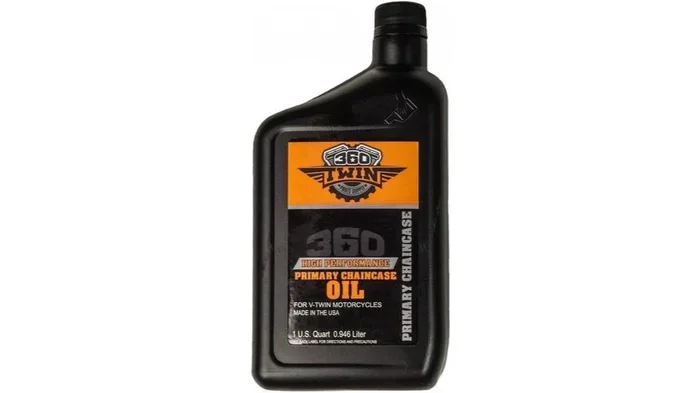
- Harley-Davidson primary fluid — the correct type for your model
- Clean rags or shop towels — for wiping spills and cleaning the fill area
- Jack or lift — to keep the bike level and stable
- Gloves and safety glasses — to protect your hands and eyes
Make sure you have the right Harley Davidson oil type for your specific model. Check your owner’s manual or the Harley service manual for the exact fluid specification. Using the wrong oil can lead to clutch issues and poor performance.
Pro tip: warm up your engine for about five minutes before draining the oil. This makes the fluid thinner and helps it drain more completely from the primary case.
Step-by-Step Guide to Check Primary Oil on Harley-Davidson
Step 1: Position Your Motorcycle on a Level Surface
Start by placing your Harley on a level surface. A garage floor works great, or you can use a motorcycle lift or jack stand. It is very important that the bike is level because an uneven surface will give you an inaccurate oil reading.
Make sure the engine is warm but not hot. If you just rode the bike, wait about five minutes for the oil to settle. A warm engine lets the fluid flow more easily and gives you a better picture of the current oil level.
Step 2: Locate the Primary Oil Fill and Drain Plugs
Now you need to find the relevant plugs on your Harley. The primary oil fill plug is typically located on the left side of the engine, near the primary cover. The drain plug is usually at the bottom of the primary case.
Different Harley models may have slightly different layouts, so refer to your specific model’s Harley service manual if you are unsure. Familiarizing yourself with the layout before you start will save you time and frustration.
Step 3: Drain the Old Primary Oil
Place your drain pan underneath the drain plug. Using your socket wrench, carefully remove the drain plug. Let the old oil flow out completely into the pan. This may take a few minutes, so be patient.
While the oil is draining, take a moment to inspect it. Healthy primary oil should be amber or light brown. If it looks very dark, black, or has a burnt smell, it is definitely time for a change. Dark oil means the fluid has broken down and is no longer protecting your gears effectively.
Once the oil has stopped dripping, clean the drain plug with a rag and reinstall it. Tighten it snugly but do not over-torque, as this can strip the threads.
Step 4: Remove the Fill Plug and Check the Oil Level
Now locate the fill plug on the primary cover. Remove it with your socket wrench. The oil level should be right at the bottom of the fill hole. If you do not see oil at the fill hole opening, the level is low.
If you are unsure whether your oil level is correct, you can also tell if your vehicle is low on oil by using the dipstick method on models that support it. However, most Harleys use the fill-hole method described here.
This is also a good time to inspect the fill hole and surrounding area for any leaks or residue. Clean everything thoroughly before proceeding to the next step.
Step 5: Add Fresh Primary Oil
Take your funnel and place it into the fill hole. Slowly pour in the new Harley-Davidson primary fluid. Add it gradually and check the level frequently. You want the oil to reach the bottom of the fill hole but not overflow.
The typical oil capacity for most Harley primary cases is around one quart, but this can vary by model. Always check your owner’s manual for the exact oil capacity Harley specification. Overfilling can cause pressure buildup and leaks.
Once you have added the right amount, reinsert and tighten the fill plug securely. Wipe away any spilled oil with a clean rag.
Step 6: Run the Engine and Recheck
Start your Harley and let it idle for a few minutes. This allows the new oil to circulate through the primary chain case. After a few minutes, turn off the engine and wait a couple of minutes for the oil to settle.
Remove the fill plug again and check the oil level one more time. It should be at the bottom of the fill hole. If it is low, add a small amount more. If it is overflowing, you have added too much and will need to drain some out.
While the engine is running, listen for any unusual noises from the primary case. Smooth operation means everything is working correctly. Grinding or whining sounds could indicate low oil or worn components.
How Often Should You Change Primary Oil?
Most Harley-Davidson models recommend changing the primary oil every 5,000 to 10,000 miles. However, this interval can vary depending on your riding style, conditions, and model. If you ride in dusty or wet conditions, you may need to change it more frequently.
Here is a quick reference guide:
- Normal riding conditions: Change every 5,000 to 7,500 miles
- Heavy or aggressive riding: Change every 3,000 to 5,000 miles
- Riding in dusty or wet conditions: Change every 2,500 to 4,000 miles
- Low-mileage riders: Change at least once per year
Think of the primary oil change interval like brushing your teeth. It is a simple habit that prevents bigger problems down the road. Skipping this maintenance can lead to gear wear, clutch issues, and ultimately costly repairs.
If you are unsure about the recommended interval for your specific model, check the Harley service manual or consult with your local dealer. They can give you the exact guidelines for your bike.
Common Mistakes to Avoid When Checking Primary Oil
Even experienced riders can make mistakes when checking or changing primary oil. Here are some common errors to watch out for:
- Using the wrong oil type: Not all oils work the same in a Harley primary case. Always use the fluid recommended by Harley-Davidson. Using standard engine oil can cause clutch slipping.
- Overfilling the primary case: Too much oil creates pressure inside the case, which can lead to leaks and even damage to seals.
- Checking oil on an unlevel surface: This gives you a false reading and can lead to underfilling or overfilling.
- Skipping the warm-up: Cold oil does not flow as well and may not drain completely. Always warm up the engine first.
- Ignoring the condition of the old oil: If the old oil looks dark or smells burnt, that is a sign something is wrong. Do not just refill without investigating.
Many riders also ask whether they should add oil when it is low between changes. The answer is yes, but always use the correct fluid type and do not overfill. Topping off between scheduled changes is fine as long as you are using the right product.
Can You Do This Yourself or Should You Visit a Mechanic?
The good news is that checking and changing primary oil on a Harley-Davidson is a straightforward DIY job. Most riders with basic mechanical skills can handle it in about 30 to 45 minutes. You do not need any special expertise or expensive equipment.
That said, there are times when visiting a professional makes sense. If you are uncomfortable working on your bike, or if you notice unusual wear or metal particles in the old oil, it is worth getting a second opinion. A qualified mechanic can run a full Harley Davidson service inspection and catch issues you might miss.
Some riders also wonder if they can change their oil themselves as a way to save money and learn more about their vehicle. The same mindset applies to Harley primary oil. Doing it yourself builds confidence and helps you understand your bike better.
Just like you would check transmission fluid during an oil change, checking your primary oil should be part of your regular maintenance routine. It is all about keeping every system in your motorcycle working at its best.
Expert Tips for Maintaining Your Harley Primary Oil System
Want to get the most out of your Harley’s primary oil system? Here are some expert tips from experienced riders and mechanics:
- Keep a maintenance log: Write down every oil change date and mileage. This helps you stay on track and makes it easy to spot trends or potential issues.
- Inspect the primary chain: While you are working on the primary case, take a moment to look at the chain. Check for stretch, rust, or damaged links.
- Replace the drain plug washer: A worn washer can cause leaks. Replace it every time you drain the oil to maintain a proper seal.
- Use a quality funnel: A narrow funnel designed for motorcycle oil fills makes the process cleaner and prevents spills.
- Monitor for leaks: After filling, check the area around the drain and fill plugs for any signs of leaking. Catching a small leak early can prevent bigger problems.
- Store your bike properly: If you store your Harley for long periods, make sure the primary oil is fresh before storage. Old oil can break down over time and lose its protective properties.
These small habits add up over time and can significantly extend the life of your Harley’s drivetrain. Consistent motorcycle maintenance tips like these separate riders who enjoy trouble-free miles from those who face frequent breakdowns.
Conclusion
Checking the primary oil on Harley-Davidson is one of the simplest and most rewarding maintenance tasks you can do. It takes less than an hour, requires only basic tools, and can save you hundreds of dollars in repairs. By following the steps in this guide, you will keep your primary chain case properly lubricated and your bike running smoothly.
Remember to check your oil level regularly, use the correct fluid type, and stick to the recommended change intervals. Your Harley deserves the best care, and these simple habits will keep it running strong for many miles to come. Get your hands dirty, enjoy the process, and take pride in maintaining your ride the right way.
Whether you are a seasoned rider or just getting started with your first Harley, making primary oil checks part of your routine is one of the best decisions you can make. Your bike will thank you with smooth, reliable performance every time you hit the road.
Frequently Asked Questions
What type of primary oil does a Harley-Davidson use?
Harley-Davidson recommends using their factory-spec primary fluid or a high-quality motorcycle-specific primary oil. Always check your owner’s manual for the exact specification. Using the wrong type of oil can cause clutch slipping and gear wear.
How do I know if my Harley’s primary oil is low?
Remove the fill plug on the primary cover. If you do not see oil at the bottom of the fill hole, the level is low. You should also listen for unusual grinding noises from the primary case, which can indicate insufficient lubrication.
Can I use regular engine oil in my Harley’s primary case?
No, you should not use regular engine oil in the primary case. Harley primary cases require specific fluid formulations that are different from engine oil. Using the wrong oil can cause clutch problems and inadequate gear protection.
How long does it take to check and change primary oil on a Harley?
For most riders, the entire process takes about 30 to 45 minutes. This includes draining the old oil, inspecting the condition, refilling with fresh fluid, and rechecking the level. With practice, you can do it even faster.
What happens if I overfill the primary case?
Overfilling creates excess pressure inside the primary case, which can lead to oil leaks, seal damage, and gear churning. Always fill to the correct level, which is right at the bottom of the fill hole. If you accidentally overfill, drain the excess carefully.
Is checking primary oil the same as checking engine oil?
No, they are different systems. Engine oil lubricates the internal engine components, while primary oil lubricates the gears and chain in the primary chain case between the engine and transmission. Both are important and require separate checks and changes.