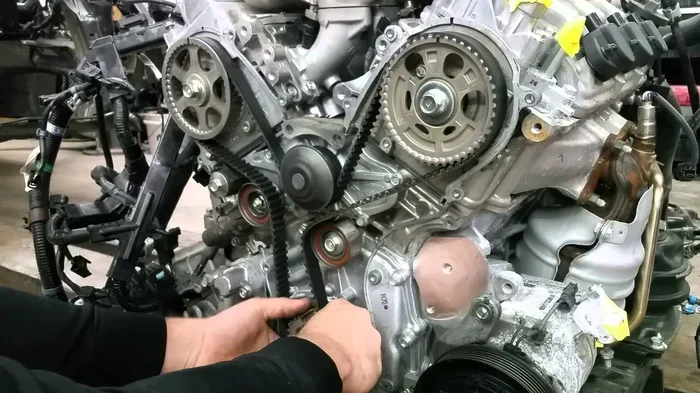
Is Changing a Timing Belt a DIY Job Really Worth It
Is Changing a Timing Belt a DIY Job Really Worth It? This guide breaks down the complexity, cost, and risks of replacing your timing belt yourself. You’ll learn the tools needed, common mistakes, and when to call a pro.
Is Changing a Timing Belt a DIY Job Really Worth It? This is a question many car owners ask when they see the repair bill. Is Changing a Timing Belt a DIY Job something you can handle in your garage? The answer depends on your mechanical skills, tools, and the type of engine you have. A timing belt keeps your engine’s valves and pistons in perfect sync, and replacing it incorrectly can cause catastrophic damage. In this guide, I’ll walk you through everything you need to know, from the basic steps to the hidden costs, so you can decide if a DIY approach makes sense for your situation.
A timing belt is one of the most critical components in your vehicle’s engine. It synchronizes the rotation of the crankshaft and camshaft, ensuring that your engine’s valves open and close at the right times. If the belt breaks, the engine can suffer severe internal damage, especially in interference engines. That’s why staying on top of the timing belt replacement interval is so important. Many owners wonder if they can save money by doing the job themselves. This article explores whether Is Changing a Timing Belt a DIY Job is a smart move or a risky gamble.
Key Takeaways
- Timing belt replacement is a high-stakes job: A mistake can cause engine damage, so assess your skills honestly.
- DIY can save hundreds in labor: But you’ll need specialty tools and several hours of focused work.
- Interference engines are especially risky: If the belt breaks during installation, the consequences are severe.
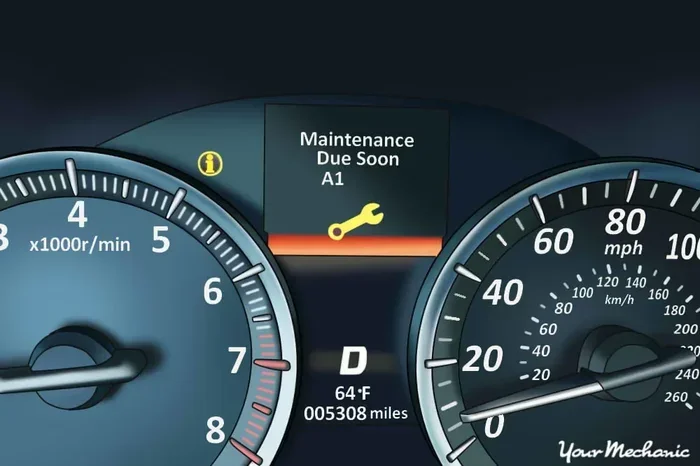
- Always reset the service interval after the job: You’ll need to reset the mileage on a car to clear the maintenance light.
- Check your owner’s manual for the exact interval: Following the recommended timing belt replacement interval prevents unexpected failure.
- Consider your experience level before starting: If you’re new to engine work, review whether a beginner can handle this task.
📑 Table of Contents
- What Does a Timing Belt Do and When Should You Replace It?
- Is Changing a Timing Belt a DIY Job Really Worth It?
- Step-by-Step: What Does a DIY Timing Belt Replacement Involve?
- Timing Belt Replacement Cost: DIY vs Professional
- Common Mistakes to Avoid When Replacing a Timing Belt
- Expert Insights: When to Call a Professional Instead
- Quick Tips for a Successful Timing Belt Replacement
What Does a Timing Belt Do and When Should You Replace It?
The timing belt is a toothed rubber belt that connects the crankshaft to the camshaft. It ensures the engine’s valves open and close at the exact right moment during each cylinder’s intake and exhaust stroke. Without a properly functioning belt, the engine would run out of sync and fail to operate. Most manufacturers recommend replacing the belt every 60,000 to 100,000 miles, but always check your owner’s manual. The timing belt replacement interval varies by vehicle and engine type.
How a Timing Belt Works
When the engine runs, the crankshaft spins and turns the timing belt. The belt then rotates the camshaft, which pushes the valves open. This precise timing allows fuel and air to enter the cylinder and exhaust gases to exit. The whole process happens hundreds of times per minute. If the belt slips even a few teeth, the engine timing is off. You might notice rough idling, misfires, or a loss of power. In a worst-case scenario, a broken belt causes the pistons to collide with the valves.
Warning Signs Your Timing Belt Is Failing
Watch for these symptoms that suggest your belt needs attention:
- A ticking or clicking noise coming from the engine bay.
- Difficulty starting the engine or a rough idle.
- Visible cracks or fraying on the belt (if accessible).
- The check engine light or maintenance required light illuminating.
- Oil leaks near the front of the engine, which can contaminate the belt.
If you notice any of these signs, address the issue quickly. Ignoring them can lead to a complete belt failure and expensive engine repairs.
The Recommended Replacement Interval
Most automakers suggest replacing the timing belt every 60,000 to 100,000 miles. Some newer vehicles have intervals of 100,000 miles or more. The timing belt replacement interval depends on the engine design, driving conditions, and the manufacturer’s specifications. If you frequently drive in stop-and-go traffic or extreme temperatures, you might need to replace it sooner. Always follow the service schedule in your owner’s manual. Keeping a log of your mileage makes it easy to track when the next replacement is due.
Is Changing a Timing Belt a DIY Job Really Worth It?
The short answer is: it depends. Replacing a timing belt is not a simple oil change. It involves removing several engine components, setting the correct timing, and ensuring the new belt tension is perfect. For a confident DIYer with the right tools, it can be a rewarding project. For a beginner, the risk of error is high. Let’s break down what makes this job challenging.
The Complexity of the Job
A timing belt job often requires removing the serpentine belt, the water pump, the alternator, and sometimes the radiator. In many engines, the belt is located deep in the engine bay, surrounded by tight spaces. You must rotate the engine to the top dead center (TDC) position and align the timing marks on the crankshaft and camshaft sprockets. If these marks are off by even one tooth, the engine will run poorly or suffer internal damage. The entire process can take a weekend or more for a first-timer.
Tools and Skills You’ll Need
Before you start, make sure you have the right tools:
- A timing belt kit that includes the belt, tensioner, and idler pulleys.
- A torque wrench for precise bolt tightening.
- A breaker bar and socket set to remove engine components.
- A timing light or alignment tool to verify the marks.
- Basic hand tools like wrenches, pliers, and screwdrivers.
You also need mechanical knowledge. You should understand how to read engine diagrams, how to safely support the vehicle, and how to avoid damaging sensors or wiring harnesses during disassembly.
Can a Beginner Handle It?
If you’ve never done major engine work, you might wonder can a beginner change a timing belt. The honest answer is that it’s possible, but it requires patience, attention to detail, and a willingness to follow the factory service manual step by step. Many beginners start with simpler jobs like an oil change or air filter replacement before tackling the timing belt. If you feel unsure, there’s no shame in watching detailed video tutorials or having a helper guide you through the process.
Step-by-Step: What Does a DIY Timing Belt Replacement Involve?
Here’s a high-level overview of the process. Always refer to your vehicle-specific service manual for exact procedures.
Preparing the Vehicle and Removing Components
- Disconnect the negative battery cable to prevent electrical shorts.
- Remove the serpentine belt that drives accessories like the alternator and power steering pump.
- Take off the radiator fan assembly and any shields or covers blocking access to the timing belt cover.
- Drain the coolant if the water pump is driven by the timing belt (many modern engines do this).
- Remove the timing belt cover bolts and carefully take off the cover.
Taking Off the Old Belt and Installing the New One
- Rotate the engine to the TDC position on the compression stroke for cylinder one.
- Release the tension on the old belt by loosening the tensioner bolt.
- Remove the old belt and inspect the crankshaft and camshaft sprockets for wear.
- Install the new idler pulley, tensioner, and any other components included in the kit.
- Loop the new belt around all the sprockets, following the routing diagram in the manual.
- Tighten the tensioner to the specified torque and verify that the timing marks align perfectly.
Resetting the Maintenance Reminder
Once the new belt is installed and the engine runs smoothly, you’ll want to reset the mileage on a car to clear the service interval. This step tells the onboard computer that the maintenance has been completed. If you own a Toyota and the maintenance required light stays on after you’ve completed the replacement, don’t panic. It often just needs a reset. Follow the specific procedure for your vehicle to clear the light and update the service reminder.
Timing Belt Replacement Cost: DIY vs Professional
One of the main reasons people consider a DIY timing belt job is cost. The parts themselves are relatively affordable, but labor at a shop can be steep. Let’s compare the two options.
Cost Breakdown Table
| Aspect | DIY | Professional |
|---|---|---|
| Parts Cost (belt, tensioner, idlers, water pump if needed) | $150 – $400 | $150 – $400 |
| Labor Cost | $0 (your time) | $500 – $1,200 |
| Total Estimated Cost | $150 – $400 | $650 – $1,600 |
| Time Required | 4 – 8 hours | 2 – 4 hours |
| Skill Level Needed | Intermediate to Advanced | Professional |
| Risk of Error | Higher if inexperienced | Low |
| Warranty Coverage | None (parts only) | Shop warranty on labor and parts |
Hidden Costs to Consider
When you do it yourself, you might need to buy or rent specialty tools like a torque wrench or a timing alignment tool. If you make a mistake and damage the belt tensioner or break a bolt, those replacement costs add up. Also, if the job takes longer than expected, you might need to rent a garage or borrow tools. On the other hand, a professional shop often provides a warranty that covers both parts and labor for a set period. That peace of mind has real value.
Common Mistakes to Avoid When Replacing a Timing Belt
Even experienced DIYers can make errors. Here are the most common mistakes and how to avoid them.
Forgetting to Check the Tensioner
The tensioner keeps the belt at the correct tension. If you reuse an old tensioner or fail to set the new one properly, the belt can slip or make noise. Always replace the tensioner and idler pulleys with the new kit. A worn tensioner is a leading cause of premature belt failure.
Misaligning the Timing Marks
This is the most critical step. If the crankshaft and camshaft marks are not perfectly aligned, the engine will run poorly or suffer valve damage. Take your time. Use a timing light or the marks on the sprockets to verify alignment before tightening the belt. Double-check by rotating the engine by hand two full turns and confirming the marks return to TDC.
Skipping the Water Pump
On many engines, the water pump is driven by the timing belt. If the water pump is leaking or showing signs of wear, replace it during the same job. Doing so saves hundreds of dollars in future labor, since the timing belt components are already off.
Not Following the Factory Service Manual
Every engine has a specific belt routing and tightening sequence. Guessing or relying on a generic tutorial can lead to errors. Always download or purchase the factory service manual for your exact vehicle model and year. It provides the correct torque specs, diagrams, and safety precautions.
Expert Insights: When to Call a Professional Instead
Knowing when to stop the DIY attempt is just as important as knowing how to start. Here are expert tips to help you decide.
Signs You Should Stop the DIY Attempt
- You cannot find the top dead center position after several attempts.
- The timing marks do not align even after rotating the engine.
- You hear unusual noises or feel resistance that doesn’t match the manual.
- You are missing a critical tool or part and cannot finish the job safely.
If any of these happen, stop and seek professional help. Forcing the engine or the belt can cause irreversible damage.
The Risk of Engine Damage
In an interference engine, a timing belt failure or a mistake during installation can cause the pistons to hit the open valves. This results in bent valves, damaged pistons, and a very expensive repair. The cost of a new engine far exceeds the savings of a DIY job. If you are not 100% confident in your ability to set the timing correctly, it is worth paying a professional to do the work.
Quick Tips for a Successful Timing Belt Replacement
- Take photos at every step: Before removing any component, snap clear photos. You’ll thank yourself during reassembly.
- Label all bolts and parts: Use small containers or a magnetic tray to keep hardware organized. Mixing up bolt lengths can strip threads.
- Replace the belt tensioner and idler pulleys: Always use a new kit. Reusing old components shortens the life of the new belt.
- Check the belt tension after installation: Give the belt a gentle push with your thumb. It should have a slight give but not feel loose.
- Run the engine and listen: After reassembly, start the engine and let it idle. Listen for any ticking or rattling sounds that indicate a timing issue.
- Reset the service reminder: Clear the maintenance light and update the service interval to keep your records accurate.
Changing your timing belt is a serious job, but with the right preparation and a careful approach, it can be a satisfying DIY project. Weigh the cost savings against the risks, and always prioritize the long-term health of your engine. If you follow the steps outlined here and know your limits, you’ll be well-equipped to make the best decision for your vehicle and your budget.
Frequently Asked Questions
What happens if the timing belt breaks while driving?
In an interference engine, a broken timing belt causes the pistons to collide with the open valves. This results in severe internal damage like bent valves and damaged pistons, often requiring a full engine rebuild or replacement. In a non-interference engine, the belt simply breaks and the engine stops, but no internal damage occurs. Either way, you will be stranded and need a tow.
How long does it take to replace a timing belt?
A professional mechanic usually completes the job in 2 to 4 hours. A DIYer with experience might take 4 to 8 hours, depending on the engine’s accessibility and any unexpected complications. First-time DIYers should set aside a full weekend and have a helper on standby.
Can I drive my car after replacing the timing belt?
Yes, but only after you have verified that the timing marks are perfectly aligned and the engine starts and idles smoothly. Take a short test drive at low speeds and listen for any unusual noises. If the engine runs rough or the check engine light comes on, stop and recheck the timing before driving further.
Is it worth replacing the water pump at the same time?
Absolutely. If the water pump is driven by the timing belt, replacing it during the same job saves you the labor cost of doing it later. The water pump is a wear item, and taking it off now means you won’t have to repeat the entire teardown process in a few years.
Do I need to replace the serpentine belt too?
Not necessarily. The serpentine belt is a separate component that drives accessories like the alternator and air conditioner. However, if it shows cracks or glazing, it is a good idea to replace it while you have the engine bay open. It’s a low-cost part that prevents future breakdowns.
What is the difference between a timing belt and a timing chain?
A timing belt is a rubber belt with teeth that runs outside the engine and needs regular replacement. A timing chain is a metal chain that is typically housed inside the engine and lasts much longer, often the life of the vehicle. Not all engines have a belt; some use a chain. Check your owner’s manual to see which your vehicle uses.