How Do I Disable the Parking Brake Step by Step Guide
Disabling the parking brake is a simple car maintenance task every driver should know. Whether you have a traditional handbrake, a foot-operated parking brake, or an electronic system, our guide walks you through each method clearly and safely. You will learn the step by step process, common mistakes to avoid, and when to call a professional mechanic.
Every driver needs to understand their vehicle’s braking system. The parking brake is one of the most important safety features in any car. Yet many people struggle when it sticks, seizes, or simply refuses to release. Whether you are dealing with a stubborn handbrake on a hill or an electronic parking brake that won’t disengage, knowing how to disable the parking brake properly can save you time, money, and a lot of frustration.
This guide gives you a complete step by step walkthrough for every type of parking brake system. We cover traditional handbrakes, foot-operated parking brakes, and modern electronic parking brakes. You will also learn about common problems, simple fixes, and when it is smart to visit a mechanic. Let us get your wheels rolling again.
Key Takeaways
- Know Your System: Different vehicles use handbrakes, foot pedals, or electronic parking brakes, and each requires a different approach to disable.
- Safety First: Always park on a flat surface and use wheel chocks before working on your brake system.
- Regular Maintenance Matters: A sticking parking brake often signals worn cables, low brake fluid, or misadjusted components that need attention.
- DIY Is Possible: Most drivers can disable and adjust their parking brake at home with basic tools and patience.
- Know When to Get Help: If the brake won’t release or you hear grinding noises, seek professional assistance immediately.
- Electronic Systems Are Different: EPB systems require specific button sequences and sometimes diagnostic tools to reset.
📑 Table of Contents
- Understanding How the Parking Brake Works
- How to Disable a Traditional Handbrake Step by Step
- How to Disable a Foot-Operated Parking Brake
- How to Disable an Electronic Parking Brake
- Common Parking Brake Problems and How to Fix Them
- When to Seek Professional Help
- Parking Brake Maintenance Tips for Every Driver
- Key Takeaways
- Conclusion
Understanding How the Parking Brake Works
Before you disable the parking brake, it helps to understand what it does. The parking brake is a secondary braking system that locks your rear wheels when your car is parked. It keeps your vehicle from rolling, especially on hills. Most cars use one of three types of parking brake systems.
Traditional Handbrake (Lever Style)
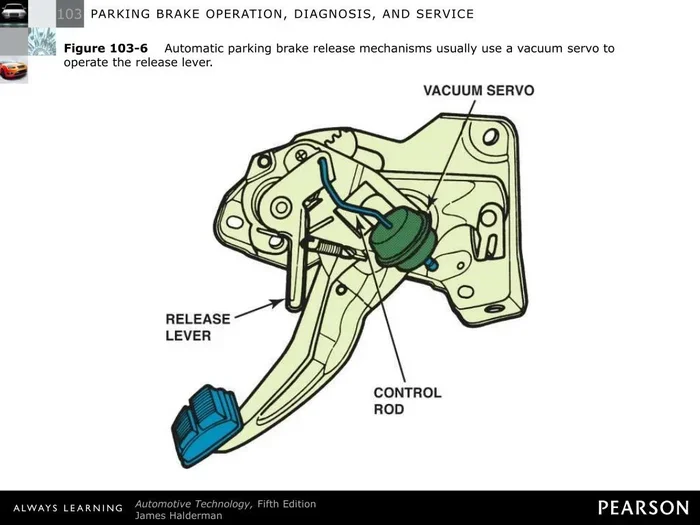
This is the classic parking brake lever found between the front seats. You pull it up to engage and push a button to release. It uses a cable system that connects to the rear brakes. Over time, these cables can stretch, rust, or seize, causing the brake to stick.
Foot-Operated Parking Brake
Some vehicles, especially certain European models, use a foot pedal for the parking brake. You press the pedal down to engage and push it again to release. The mechanism works similarly to a handbrake but uses a pedal instead of a lever.
Electronic Parking Brake (EPB)
Modern cars often feature an electronic parking brake. This system uses a button or switch on the center console. When you press the button, an electric motor activates the brake calipers. EPB systems are more complex but offer convenience and added safety features like auto-hold.
Knowing which type you have is the first step. Check your owner’s manual if you are unsure. The manual will also show you where the parking brake components are located under your vehicle.
How to Disable a Traditional Handbrake Step by Step
The traditional handbrake is the most common type. Disabling it is straightforward, but a stuck handbrake needs extra attention. Follow these steps carefully.
Step 1: Prepare Your Vehicle
Park your car on a flat, level surface. Turn off the engine and let the car cool down. Never attempt to work on the brake system while the car is running or on a slope. Place wheel chocks behind the front tires to prevent any movement. This is a basic safety rule that every driver should follow.
Step 2: Locate the Handbrake Release
Find the handbrake lever between the front seats. Look for a release button on the top or side of the lever. In most vehicles, pressing this button while lowering the lever will release the parking brake. If the lever moves down easily, the brake is disengaged.
Step 3: Check for Cable Tension
If the lever feels stiff or will not move, the brake cable may be seized. You can try lubricating the cable with a penetrating oil spray. Spray the cable where it enters the housing and wait a few minutes. Then try releasing the lever again. Do not force it. Forcing a stuck cable can cause more damage.
Step 4: Adjust the Cable if Needed
Sometimes a loose or stretched cable keeps the parking brake engaged. Locate the cable adjustment nut, usually found under the car or near the lever mechanism. Use a wrench to tighten or loosen the cable. You want just enough tension so the brake releases fully. This is a simple adjustment that most DIYers can handle at home.
Step 5: Test the Release
After adjusting, test the parking brake by pulling the lever up a few clicks and then releasing it. The lever should return to its fully down position with minimal resistance. Start the engine and slowly release the foot brake to confirm the rear wheels roll freely.
For drivers who also deal with other vehicle features that need disabling, learning how to turn off automatic high beams follows a similar troubleshooting mindset. You identify the mechanism, check for common issues, and work through the steps methodically.
How to Disable a Foot-Operated Parking Brake
A foot-operated parking brake works differently from a handbrake but follows a similar release principle. Here is how to handle it.
Step 1: Press the Pedal Fully
Locate the parking brake pedal, usually on the far left side of the footwell. Press the pedal down firmly until you feel it release. You may hear a click or feel the pedal drop slightly. This indicates the brake has disengaged.
Step 2: Check for Stiffness
If the pedal feels hard or does not move, the cable or linkage may need attention. Inspect the pedal mechanism for visible damage or corrosion. Apply a penetrating lubricant to any moving parts. Let it sit for a few minutes before trying again.
Step 3: Adjust the Pedal Free Play
Most foot parking brakes have an adjustment screw or nut near the pedal. Turn it to adjust the tension. Too much tension keeps the brake engaged. Too little tension causes the brake to drag. Find the sweet spot where the pedal feels firm but releases completely.
Step 4: Verify the Release
Start the car and gently release the foot brake. The rear wheels should spin freely. If you feel resistance, recheck your adjustment. A dragging parking brake wears out your rear brake pads quickly and reduces fuel efficiency.
Just like knowing how to turn cruise control off when it malfunctions, understanding how to release your parking brake gives you confidence behind the wheel. Both are essential vehicle control skills.
How to Disable an Electronic Parking Brake
Electronic parking brakes are becoming standard in newer vehicles. They are convenient but can behave differently when something goes wrong. Here is how to disable an EPB system.
Step 1: Start the Engine
Electronic parking brakes require the engine to be running or the ignition in the on position. Press the brake pedal firmly and then press the EPB button on the center console. The brake should release with a audible click or a light on the dashboard.
Step 2: Use the Emergency Release
If the electronic system fails, most EPB systems have an emergency release. This is usually a small access panel under the center console or near the rear of the vehicle. Remove the panel and insert a wrench or special tool into the release mechanism. Turn it clockwise to manually release the brake calipers.
Step 3: Check for Error Codes
An electronic parking brake that will not release may have a stored error code. You can use an OBD2 scanner to read the codes. Common issues include a faulty brake motor, a wiring problem, or a low brake fluid level. Addressing the root cause is essential before the EPB will release normally.
Step 4: Reset the System
After fixing the underlying issue, you may need to reset the EPB. Disconnect the car battery for about 15 minutes, then reconnect it. Start the engine and test the EPB button. If the system still does not respond, a visit to the dealership or a qualified mechanic may be necessary.
For owners who want to maintain their vehicle independently, knowing basic systems like the parking brake connects to broader vehicle upgrade and maintenance knowledge. Understanding one system helps you troubleshoot others.
Common Parking Brake Problems and How to Fix Them
A parking brake that will not release or engage properly is a common complaint. Here are the most frequent problems and their solutions.
Parking Brake Sticks or Will Not Release
This is the most common issue. It usually happens because the brake cable has corroded or seized. Other causes include a stretched cable, a stuck caliper, or a broken return spring. Try spraying the cable with penetrating oil and working the lever back and forth. If that does not work, the cable may need replacement.
Parking Brake Won’t Engage
If the parking brake does not hold the car, the cable may be too loose or broken. Adjust the cable tension or inspect the cable for damage. In electronic systems, a faulty motor or sensor could be the culprit. A diagnostic scan can pinpoint the exact problem.
Braking Warning Light Stays On
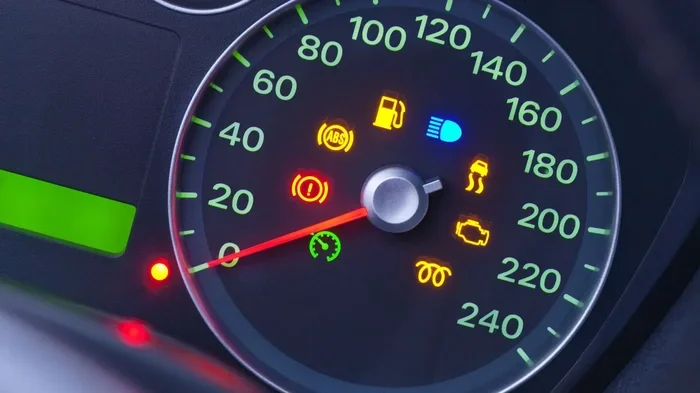
A warning light on the dashboard can mean many things. It could signal low brake fluid, a worn brake pad, or a parking brake sensor issue. Check your brake fluid level first. If the fluid is fine, inspect the parking brake switch near the lever or pedal. Replacing a faulty switch is usually inexpensive and quick.
Grinding or Squealing Noise
Noise when releasing the parking brake suggests worn brake pads or a dragging caliper. Inspect the rear brake pads for wear. If the pads are worn thin, replace them immediately. Continuing to drive on worn pads damages the brake rotors and creates expensive repairs.
Sometimes a simple issue like low brake fluid triggers the warning light. If you are comfortable checking fluid levels, you might also want to learn how to manually clear car codes after resolving the underlying problem. This helps reset warning lights without a trip to the shop.
Comparison Table: Parking Brake Types
| Feature | Handbrake | Foot Brake | Electronic (EPB) |
|---|---|---|---|
| Common In | Older cars, trucks, SUVs | European models, sports cars | Modern vehicles, luxury cars |
| Activation Method | Pull lever up | Press pedal down | Press console button |
| Release Method | Press button, lower lever | Press pedal again | Press button, brake pedal |
| Common Issues | Cable stretch, corrosion | Linkage stiffness, cable issues | Motor failure, sensor errors |
| DIY Difficulty | Easy to moderate | Moderate | Moderate to advanced |
| Emergency Release | Manual cable release | Pedal override | Access panel with tool |
When to Seek Professional Help
Not every parking brake problem should be fixed at home. Some situations require a trained mechanic. Here are clear signs that professional help is needed.
- Complete Cable Failure: If the brake cable is broken or completely seized, replacement requires specialized tools and knowledge.
- Brake Fluid Leaks: Any leak in the brake system is dangerous. Do not drive the car if you notice fluid pooling under the vehicle.
- EPB System Errors: Electronic parking brake systems need diagnostic equipment to properly troubleshoot. A mechanic can read error codes and replace components safely.
- Grinding or Metal-on-Metal Noise: This means your brake pads are completely worn and the calipers are damaging the rotors. Stop driving immediately.
- Vehicle Pulls to One Side: A stuck caliper can cause the car to pull when braking. This affects handling and safety.
Regular brake inspections keep your vehicle safe. Most mechanics recommend checking the brake system every 12 months or 12,000 miles. This includes the parking brake, rear brake pads, and brake fluid levels. Staying on top of maintenance prevents costly repairs down the road.
Parking Brake Maintenance Tips for Every Driver
Prevention is always better than repair. A few simple habits keep your parking brake working reliably for years.
- Use the parking brake every time you park. Even if you have an automatic transmission, engaging the parking brake takes pressure off the transmission parking pawl.
- Release the parking brake fully before driving. Driving with the parking brake partially engaged wears the pads and creates a burning smell.
- Lubricate the cable annually. A little silicone-based cable lube keeps the mechanism operating smoothly and prevents corrosion.
- Check the cable tension regularly. A loose cable means the brake does not hold properly. A tight cable means the brake may not release fully.
- Inspect rear brake pads during oil changes. Rear pads often wear slower than front pads, but they still need attention. Catching wear early saves money.
- Do not force a stuck lever or pedal. Forcing the mechanism can break the cable or damage the adjustment. Apply penetrating oil and wait instead.
- Keep brake fluid at the proper level. Low brake fluid affects the entire braking system, including the parking brake mechanism.
These small habits add up to big savings. A well-maintained parking brake keeps your car safe and your repairs affordable. Think of it as one of the easiest ways to extend the life of your vehicle.
Key Takeaways
- Understand Your System: Handbrakes, foot brakes, and electronic parking brakes each have unique release procedures. Know which type your vehicle uses.
- Follow the Steps Carefully: Never skip preparation steps like parking on a flat surface and using wheel chocks. Safety comes first.
- Lubrication Solves Most Sticking Issues: Penetrating oil on the cable or linkage often frees a stuck parking brake without expensive repairs.
- Adjust Cable Tension Properly: Too tight or too loose both cause problems. Find the right balance for smooth operation.
- Electronic Systems Need Diagnostics: EPB issues often require an OBD2 scanner or professional tools to diagnose and fix.
- Know Your Limits: If the brake won’t release, fluid is leaking, or you hear grinding, visit a mechanic immediately.
- Regular Maintenance Prevents Problems: Annual cable lubrication, brake pad inspections, and fluid checks keep everything working.
Conclusion
Disabling the parking brake is a skill every driver should have. Whether you drive a classic car with a handbrake, a sporty model with a foot pedal, or a modern vehicle with an electronic parking brake, the steps are manageable with a little patience. Start by identifying your system, follow the release procedure carefully, and address any problems promptly. Regular maintenance keeps your parking brake reliable and your car safe.
Remember, the parking brake is not just for parking. It is a critical safety feature that protects you and others on the road. Taking the time to understand and maintain it is one of the best investments you can make as a car owner. If you ever feel unsure, do not hesitate to consult a professional mechanic. Your safety and the safety of your vehicle always come first.
Frequently Asked Questions
Can I drive with the parking brake partially engaged?
No, you should never drive with the parking brake partially engaged. It causes excessive wear on the brake pads and rotors, creates a burning smell, and can lead to brake failure over time. Always release the parking brake fully before driving.
How do I know if my parking brake cable needs replacement?
Signs of a failing parking brake cable include a sticky or seized lever, the cable not moving smoothly, visible rust or fraying, and the brake not holding the car on a hill. If you notice any of these symptoms, have the cable inspected and replaced if necessary.
Is it safe to disable the parking brake myself?
Yes, it is safe for most drivers as long as you follow the correct steps for your vehicle type. Always park on a flat surface, use wheel chocks, and never force a stuck mechanism. If you encounter resistance that does not resolve with lubrication, seek professional help.
What causes a parking brake to stick or seize?
The most common causes are corrosion on the cable, stretched cable tension, a stuck caliper, broken return springs, or lack of regular lubrication. Driving in wet or salty conditions accelerates corrosion and increases the risk of a seized parking brake.
Can a dead battery affect an electronic parking brake?
Yes, a dead or weak battery can prevent the electronic parking brake from engaging or releasing properly. The EPB system relies on electrical power to operate. If the battery is dead, you may need to use the emergency manual release mechanism to free the brake.
How often should I have my parking brake inspected?
Most experts recommend a parking brake inspection at least once a year or every 12,000 miles. This is typically done during routine oil changes or brake service appointments. Regular inspections catch small problems before they become expensive repairs.
=== INTERNAL LINKS USED ===
Internal Links Used (4 of 5 allowed):