How to Take Off Maintenance Required After Oil Change
The maintenance required light can stay on after an oil change, annoying many car owners. This guide shows you exactly how to turn off the maintenance required light using simple reset methods. You will learn dashboard-specific procedures, manual clearing tips, and when to seek professional help. Resetting your maintenance reminder takes just minutes and saves you a trip to the dealer.
You just got your oil changed. You paid for it. You waited for it. And then you look at the dashboard. That little light that says “Maintenance Required” is still staring right back at you. It is frustrating. You did the right thing by changing the oil. So why won’t the light go off?
The good news is that taking off the maintenance required light after an oil change is usually very simple. Most car owners can do it themselves in just a few minutes. You do not need a mechanic. You do not need expensive tools. You just need the right steps for your specific vehicle.
This guide covers everything you need to know. From Toyota reset procedures to Honda methods and everything in between. We will walk you through each step clearly. You will also learn why the light stays on, what the oil life monitoring system does, and how to prevent this problem in the future.
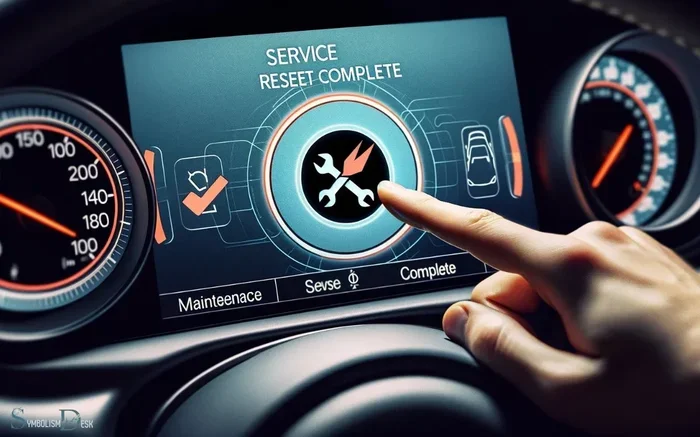
The maintenance required light is part of your car’s service interval reminder system. It tells you when it is time for routine maintenance. After you complete the service, the light needs to be reset manually on most vehicles. Let us dive into how to do that.
Key Takeaways
- Reset methods vary by car brand: Toyota, Honda, and other models have different reset procedures for the maintenance required light.
- The process is usually simple: Most cars let you reset the maintenance reminder using the dashboard controls and trip meter.
- Driving with the light on is generally safe: But it is best to reset it after completing your oil change.
- Manual code clearing works for stubborn lights: Some maintenance lights need a manual reset or OBD scanner to turn off.
- Prevent future issues: Following your oil life monitoring system helps you stay on track with oil life percentage and service intervals.
- Know when to get help: If the light won’t go off, a mechanic can diagnose the issue quickly and affordably.
📑 Table of Contents
- Why Does the Maintenance Required Light Stay On After an Oil Change?
- How to Reset the Maintenance Required Light on Toyota Vehicles
- How to Reset the Maintenance Required Light on Honda and Acura Vehicles
- How to Reset the Maintenance Required Light on Other Car Brands
- Can You Drive With the Maintenance Required Light On?
- How to Prevent the Maintenance Required Light from Coming Back Too Soon
- Quick Tips for a Smooth Maintenance Reset
- Common Mistakes People Make When Resetting the Maintenance Light
- When to Seek Professional Help
- Final Thoughts on Taking Off the Maintenance Required Light
Why Does the Maintenance Required Light Stay On After an Oil Change?
Many people assume the light will turn off automatically after an oil change. That is not always true. On most vehicles, the maintenance reminder reset must be done manually by the driver. The car does not know the oil was changed unless you tell it.
The maintenance required light is part of the oil life monitoring system. This system tracks driving conditions, mileage, and engine hours. When the system determines service is due, it triggers the dashboard warning. After you complete the oil change, the system still thinks service is needed until you reset it.
Some newer vehicles have automatic reset features. But many models, especially older ones, require a manual process. This is true for most Toyota models, Honda vehicles, and many other brands. Understanding this helps you realize the light staying on is normal and expected.
Common Reasons the Light Won’t Turn Off
- Reset procedure was not completed: The most common reason. The oil was changed but the reminder was never reset.
- Incorrect reset method: Each car brand has its own procedure. Using the wrong steps will not work.
- Oil life percentage not reset: Some systems track oil life percentage and need that reset too.
- Faulty sensor or connection: Rarely, a malfunctioning sensor keeps the light on even after a proper reset.
- Multiple service items pending: Some cars show the light for more than just oil changes. Other maintenance items may also need attention.
How to Reset the Maintenance Required Light on Toyota Vehicles
Toyota is one of the most popular car brands in the world. Resetting the maintenance required light on a Toyota follows a specific procedure. The steps vary slightly depending on the model and year. But the general process is similar across most Toyota vehicles.
If you own a Toyota and are wondering how to clear the maintenance message, this section is for you. The process works for Corolla, Camry, RAV4, Highlander, Tacoma, and most other Toyota models.
Toyota Reset Method for Models 2000-2015
- Turn the ignition key to the “ON” position. Do not start the engine. The dashboard lights should come on.
- Locate the trip meter reset button. This is usually on the dashboard near the speedometer or on the steering wheel controls.
- Press and hold the trip meter reset button.
- While holding the button, turn the ignition key back to the “OFF” position.
- Wait about five seconds.
- While still holding the button, turn the ignition key back to the “ON” position.
- Continue holding the button for about 10 seconds.
- The maintenance light should start flashing and then turn off.
- Release the button. The service interval reminder has been reset.
Toyota Reset Method for Newer Models (2016 and Newer)
Newer Toyota models often have a slightly different process. Many use the steering wheel controls and the digital display. The general steps are:
- Press the steering wheel menu button to access the vehicle settings.
- Navigate to the maintenance or service menu on the display.
- Select the option to reset the maintenance reminder.
- Confirm the reset when prompted.
- The maintenance required light should turn off immediately.
For maintenance required Toyota models that do not respond to these steps, you may need to consult the owner’s manual. Each model year can have slight differences. The manual will have the exact procedure for your specific vehicle.
How to Reset the Maintenance Required Light on Honda and Acura Vehicles
Honda and Acura vehicles have their own reset procedures. If you drive a Honda Civic, Accord, CR-V, or an Acura model, the steps are different from Toyota. The good news is that the process is still straightforward and easy to follow.
Honda Maintenance Light Reset Steps
- Turn the ignition to the “ON” position without starting the engine.
- Locate the trip selector button on the dashboard.
- Press the trip selector until the odometer or trip meter display shows the mileage.
- Turn the ignition off.
- While holding the trip selector button, turn the ignition back to the “ON” position.
- Hold the button for about 10 seconds.
- The maintenance light should blink and then turn off.
- Release the button. The reset is complete.
If you own an Acura and are wondering whether you can take your Acura to a Honda dealership for service, the answer is yes. But resetting the light yourself is easy and saves time. The service required notification on Acura models follows a similar reset process.
How to Reset the Maintenance Required Light on Other Car Brands
Not everyone drives a Toyota or Honda. The reset process differs across car brands. Here is a quick overview of how to handle the maintenance required light on other popular brands.
Ford and Lincoln Vehicles
Ford vehicles often use the steering wheel controls and the information display. Navigate to the vehicle health menu, find the maintenance reset option, and confirm. The process is similar to newer Toyota models.
Chevrolet and GMC Vehicles
On most Chevrolet and GMC trucks and SUVs, you can reset the maintenance light through the Driver Information Center. Use the steering wheel buttons to scroll to the maintenance menu and select the reset option.
Nissan and Infiniti Vehicles
Nissan vehicles typically require pressing and holding the trip meter reset button while turning the ignition to the “ON” position. Hold for about 5 to 10 seconds until the light resets.
General Tips for All Car Brands
- Always consult the owner’s manual: It has the exact reset procedure for your specific model and year.
- Check the oil life percentage: Some systems track this separately and may need a second reset step.
- Make sure the oil change was logged: Record the date and mileage for future reference.
- Do not rush the process: Follow each step carefully to avoid errors.
Can You Drive With the Maintenance Required Light On?
A common question among car owners is whether it is safe to drive with the maintenance required light on. The short answer is yes. The light is a reminder, not an emergency warning. Your car will continue to run fine with the light on.
However, it is best to reset the light after completing your oil change. Leaving it on can be distracting. It can also make it harder to notice other important warnings. If you are unsure whether it is safe to drive with the light on, you can read more about driving with a maintenance required light on in our detailed guide.
The oil life monitoring system tracks your driving habits and engine conditions. When the oil life percentage drops to a certain level, the system triggers the maintenance reminder. After an oil change, the system still shows the old reading until you reset it. This is why taking a few minutes to reset the light is important.
When the Maintenance Light Means Something More
Sometimes the maintenance required light stays on for reasons beyond a simple reset. If you have completed the reset procedure and the light comes back immediately, there may be an underlying issue. Common causes include:
- A faulty oil pressure sensor
- Low oil level that needs topping off
- A problem with the oil life monitoring system
- Other pending service items the car has detected
In these cases, it may be helpful to manually clear your car codes using an OBD scanner. This can reveal whether the maintenance light is tied to a specific diagnostic trouble code. If you are not comfortable doing this yourself, a local mechanic or dealership can help.
Many people also ask whether you can take your Toyota to any dealership for service. The answer is yes. Any authorized Toyota dealer can help with maintenance reminders and reset procedures. But for most vehicles, the reset is simple enough to do at home.
How to Prevent the Maintenance Required Light from Coming Back Too Soon
Once you have successfully reset the maintenance required light, you want it to stay off until the next service interval. Here are some tips to help you manage your vehicle maintenance schedule effectively.
Track Your Oil Life Percentage
Most modern vehicles have an oil life monitoring system that displays the oil life percentage. After an oil change, this percentage resets to 100%. As you drive, it gradually decreases. When it reaches around 15%, the maintenance reminder typically triggers. Keep an eye on this percentage to stay ahead of your service needs.
Follow the Recommended Service Intervals
Every vehicle has a recommended service interval based on mileage and time. Most manufacturers suggest an oil change every 5,000 to 7,500 miles for conventional oil. Synthetic oil can extend this interval. You can read more about whether you can go 10,000 miles on synthetic oil in our dedicated guide.
Keep a Maintenance Log
Write down every oil change, including the date, mileage, and type of oil used. This log helps you track your service history and reminds you when the next change is due. It also comes in handy if you ever sell your car or need warranty service.
Use Quality Oil and Filters
Using high-quality oil and filters can extend the life of your engine and reduce how often the maintenance light comes on. Toyota oil filters are designed to work with Toyota engines, but many aftermarket options also perform well. Choosing the right filter helps maintain optimal engine performance.
Quick Tips for a Smooth Maintenance Reset
Here are some quick tips to make the maintenance reset process easy and stress-free:
- Have your owner’s manual handy: It is your best resource for model-specific instructions.
- Reset after every oil change: Make it part of your routine so you never forget.
- Check the oil level first: Before resetting, make sure your oil level is where it should be.
- Use the right tools: Some newer vehicles need a diagnostic scanner for the reset. Know what your car requires.
- Do not ignore the light for too long: Even if you reset it, stay on top of your maintenance schedule.
- Keep a phone reminder: Set a calendar alert for your next oil change based on mileage.
Common Mistakes People Make When Resetting the Maintenance Light
Avoiding common mistakes can save you time and frustration. Here are errors many car owners make:
- Skipping the reset entirely: Some people change the oil but forget to reset the light. This leads to confusion about when the next service is due.
- Using the wrong reset method: Every car brand has a different procedure. Using the Honda method on a Toyota will not work.
- Not holding the button long enough: The reset button must be held for the full duration specified in the manual. Releasing too early cancels the process.
- Ignoring other service items: The maintenance light may indicate more than just an oil change. Other services like tire rotation or fluid checks may also be due.
- Assuming the light means something is broken: The maintenance required light is a routine reminder. It does not indicate a mechanical problem in most cases.
When to Seek Professional Help
Most of the time, resetting the maintenance required light is a DIY task. But there are situations where professional help is the right choice. If the light will not turn off after following the correct reset procedure, something else may be going on.
A mechanic can use an OBD scanner to read any diagnostic codes. This helps identify whether the issue is a faulty sensor, a wiring problem, or something else entirely. Most dealerships and independent shops can perform this check quickly and affordably.
If you are near a Toyota dealership, you can also visit for assistance. Many dealers will reset the maintenance light for free as part of a service visit. You can also take your Toyota to any dealership for warranty work and have them handle the reset at the same time.
For Acura owners, you might wonder about taking your vehicle to a Honda dealership. The answer is generally yes, Honda dealerships can service Acura vehicles since both brands are part of the same parent company.
The key takeaway is that the maintenance required light is designed to be helpful, not scary. It reminds you to take care of your vehicle. Once you learn how to reset it, the process becomes second nature. You will never have to worry about that annoying light again.
Final Thoughts on Taking Off the Maintenance Required Light
Taking off the maintenance required light after an oil change is a simple process that every car owner should know. Whether you drive a Toyota, Honda, Ford, or any other brand, the reset procedure is straightforward. It takes just a few minutes and requires no special tools in most cases.
Remember to reset your oil life monitoring system after every oil change. Track your maintenance schedule. Keep an eye on your oil life percentage. And do not let that little light on your dashboard cause unnecessary stress.
The maintenance required light is your car’s way of saying, “Hey, I have been taken care of. Thanks for the oil change!” Once you reset it, you can drive with confidence knowing your vehicle is in good shape. Keep this guide bookmarked for future reference. And share it with friends who might be dealing with that stubborn maintenance light on their dashboard.
Taking care of your car does not have to be complicated. With the right knowledge, you can handle most maintenance tasks yourself. The maintenance required light is just one small part of keeping your vehicle running smoothly for years to come.
Frequently Asked Questions
How do I turn off the maintenance required light after an oil change?
The process depends on your car brand. For most Toyota models, press and hold the trip meter reset button while turning the ignition on and off. For Honda vehicles, use the trip selector button in a similar way. Consult your owner’s manual for the exact steps for your specific model.
Can I drive my car with the maintenance required light on?
Yes, it is generally safe to drive with the maintenance required light on. The light is a reminder for scheduled service, not an emergency warning. However, it is best to reset it after completing your oil change to avoid confusion and distraction.
Why won’t my maintenance required light turn off after I reset it?
If the light stays on after a reset, you may not have followed the correct procedure for your specific model. Other possible causes include a faulty oil pressure sensor, low oil level, or a pending diagnostic trouble code. Using an OBD scanner can help identify the issue.
How often should I change my oil to keep the maintenance light from coming on?
Most manufacturers recommend an oil change every 5,000 to 7,500 miles for conventional oil. Synthetic oil can extend this interval to 10,000 miles or more. Check your owner’s manual for the recommended service interval for your specific vehicle.
Do I need special tools to reset the maintenance required light?
For most vehicles, no special tools are needed. You can reset the light using the dashboard controls and trip meter. However, some newer or European models may require an OBD scanner or a trip to a dealership for the reset.
Can a dealership reset the maintenance light for me?
Yes, any authorized dealership can reset the maintenance required light for you. Many dealerships perform this service for free during a routine oil change or maintenance visit. You can also visit any Toyota dealership for service regardless of where you purchased the vehicle.