How to Change Oil on Honda Civic Step by Step Guide
Changing your Honda Civic oil at home is easier than most people think. This guide walks you through every step, from picking the right oil and tools to draining the old oil and resetting the maintenance light. You will save money, learn valuable car skills, and keep your Civic running strong for years to come.
Changing the oil in your Honda Civic is one of the simplest and most rewarding maintenance jobs you can do at home. It takes about 30 minutes, costs a fraction of what a shop charges, and gives you a real sense of accomplishment. Whether you own a sleek new Civic or a trusty older model, this guide will walk you through every single step.
You do not need to be a mechanic to pull this off. You just need the right oil, a few basic tools, and a little patience. We will cover everything from choosing the correct engine oil to properly disposing of the old stuff. By the end, you will feel confident tackling this job on your own.
Let us dive into the world of DIY oil changes and help you keep your Honda running like new.
Key Takeaways
- Right Oil Matters: Always use the correct viscosity and oil type for your Honda Civic engine.
- Basic Tools Are All You Need: A socket wrench, oil filter wrench, drain pan, and jack stands are the essentials.
- Reset the Maintenance Light: After every oil change, reset the Honda maintenance indicator to stay on track.
- Check for Leaks: Inspect the drain plug and oil filter after refilling to prevent costly damage.
- DIY Saves Money: Doing it yourself can save $30 to $75 per oil change compared to a shop visit.
- Stick to the Schedule: Follow Honda’s recommended oil change interval for best engine health.
📑 Table of Contents
Why Changing Your Honda Civic Oil Matters
Oil is the lifeblood of your engine. It lubricates moving parts, reduces friction, and keeps things cool under the hood. Over time, oil breaks down and collects dirt, metal particles, and combustion byproducts. Fresh oil keeps everything running smoothly.
Skipping oil changes leads to sludge buildup, increased wear, and eventually engine failure. Honda recommends changing the oil every 7,500 to 10,000 miles for newer models. Older Civics with conventional oil may need changes every 3,000 to 5,000 miles. Always check your owner’s manual for the exact oil change interval for your specific year and trim.
Regular oil changes are the cheapest insurance you can buy for your engine. A few dollars spent on oil now can prevent thousands in repairs later.
How to Know When It Is Time for an Oil Change
Your Honda Civic has a maintenance minder system that flashes on the dashboard. This is your primary reminder. However, you should also check if your car is low on oil between changes using the dipstick. If the oil looks dark and gritty, it is time for a swap regardless of the mileage.
Other signs that your oil needs changing include:
- Engine noise that sounds louder than usual
- Dark or black oil on the dipstick
- A burning smell coming from the engine bay
- Reduced fuel efficiency
- The maintenance light is illuminated
Gathering Your Tools and Materials
Before you get under the car, make sure you have everything ready. There is nothing worse than halfway through the job and realizing you are missing a key tool.
Oil and Filter
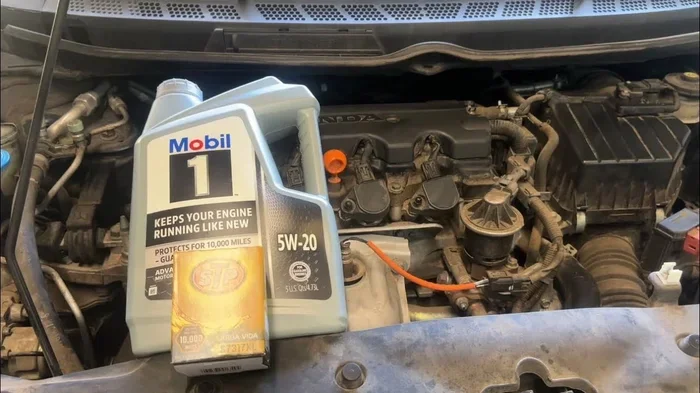
Most Honda Civics use a 1.8L engine that requires about 3.7 to 4.1 quarts of oil. You can find the exact how many quarts does a 1.8L take capacity in your owner’s manual. Use Honda-recommended oil with the correct viscosity rating, which is typically 0W-20 for newer models.
Do not forget a new oil filter. Honda OEM filters are ideal, but quality aftermarket options work great too. Make sure the filter matches your specific Civic model year.
Tools You Will Need
- Socket wrench set (14mm for most Civics)
- Oil filter wrench
- Torque wrench
- Jack and jack stands or ramps
- Oil drain pan
- Funnel
- Rag or paper towels
- Gloves and safety glasses
Pro tip: Warm up the engine for about 5 minutes before starting. This helps the old oil flow out more smoothly and completely. Just make sure the car is cool enough to touch safely.
Step-by-Step Oil Change Process
Now for the fun part. Follow these steps carefully and you will have a clean, professional-quality oil change in no time.
Step 1: Lift and Secure the Vehicle
Park your Civic on a level surface and turn off the engine. Engage the parking brake. Use a jack to lift the front of the car and place jack stands securely under the frame. Never rely on a jack alone to hold the weight of the vehicle. Safety always comes first.
Step 2: Locate the Drain Plug and Oil Filter
Slide under the car and find the oil pan on the bottom of the engine. The drain plug is a 14mm bolt on the front of the oil pan. The oil filter is located near the front of the engine, usually on the right side when viewed from below.
Place your drain pan directly beneath the drain plug before you start loosening it.
Step 3: Drain the Old Oil
Using your socket wrench, slowly loosen the drain plug by turning it counterclockwise. Be ready for the oil to start flowing quickly. Once the plug is loose, carefully remove it by hand and let the old oil drain completely into the pan.
While the oil is draining, take a moment to inspect the drain plug for any signs of damage or wear. The washer on the plug should be in good condition. Replace it if it looks worn or flattened.
Step 4: Replace the Oil Filter
Position your drain pan under the oil filter. Use your oil filter wrench to loosen the old filter by turning it counterclockwise. Be careful, as it may still contain oil. Once removed, lightly coat the rubber gasket of the new filter with a little fresh oil. This ensures a proper seal and makes future removal easier.
Hand-tighten the new filter until the gasket contacts the engine, then tighten it about three-quarters of a turn. Do not overtighten. This is a common mistake that can make future oil changes much harder.
Step 5: Reinstall the Drain Plug
Once all the oil has drained, reinstall the drain plug and tighten it to the proper torque specification. For most Honda Civics, this is around 25 to 30 foot-pounds. A torque wrench is the best tool for this job because it prevents over-tightening, which can strip the threads or crack the oil pan.
Step 6: Add Fresh Oil
Locate the oil fill cap on top of the engine. Remove it and place a funnel in the opening. Pour in the fresh oil slowly, checking the level with the dipstick periodically. Most 1.8L Civics need around 3.7 to 4.1 quarts, but always double-check your manual.
Do not overfill. Too much oil can cause foaming, increased pressure, and potential engine damage. If you accidentally add too much, use a suction pump to remove the excess through the fill hole.
Step 7: Check for Leaks and Reset the Maintenance Light
Start the engine and let it run for about 30 seconds. Check underneath for any leaks around the drain plug and oil filter. Turn off the engine and wait a few minutes for the oil to settle, then check the dipstick again to confirm the level is correct.
Now it is time to reset the maintenance light. The process varies slightly by model year, but generally you hold the trip reset button on the instrument cluster while turning the ignition to the ON position. Hold the button until the light blinks and resets. If you are unsure, search for a reset the oil change reminder guide specific to your Civic year.
Dispose of the old oil and filter properly at a recycling center or auto parts store. Never pour used oil down a drain or into the trash.
Common Mistakes to Avoid
Even simple jobs can go wrong if you are not careful. Here are the most common mistakes people make when changing their Honda Civic oil:
- Using the wrong oil: Always match the viscosity rating specified in your owner’s manual. Using the wrong grade can reduce engine protection and fuel efficiency.
- Forgetting the oil filter gasket: If the old gasket sticks to the engine when you remove the filter, the new filter will not seal properly. This causes leaks.
- Over-tightening the drain plug: Stripped threads are an expensive repair. Hand-tighten first, then use the wrench for just a quarter turn past snug.
- Not checking the oil level: Always verify the oil level after a change. Running the engine with too little oil can cause catastrophic damage.
- Skipping the reset: If you do not reset the maintenance light, you will never know when the next oil change is due.
How Much Does a Honda Civic Oil Change Cost?
Doing it yourself is the cheapest option. A quart of quality synthetic oil costs around $15 to $20, and a new oil filter runs about $5 to $10. For a full DIY oil change, you are looking at roughly $25 to $40 total.
Taking your Civic to a shop costs significantly more. Quick lube places typically charge $40 to $70 for a standard oil change. Dealerships can charge $80 to $120 or more, especially if they use synthetic blend or full synthetic oil.
If you are wondering whether you can save even more by doing it yourself but still want professional-quality results, the answer is absolutely yes. With the right oil, a quality filter, and a clean workspace, your DIY job will be just as good as anything a shop can do.
Some people also ask whether can you negotiate the price of an oil change at a shop. The answer is yes, especially at independent garages. Always call around and compare prices before committing.
Expert Tips for the Best Results
Here are some insider tips that will make your Honda Civic oil change even better:
- Keep a maintenance log: Write down the date, mileage, and oil type every time you change your oil. This helps you track your oil change interval and maintain resale value.
- Use synthetic oil: Full synthetic oil provides superior protection and lasts longer than conventional oil. It is worth the extra cost, especially if you drive in extreme temperatures or stop-and-go traffic.
- Change the oil filter every time: Never reuse an old filter. A clean filter ensures proper oil flow and protects your engine from contaminants.
- Check for recalls and service bulletins: Honda occasionally issues updates for oil change procedures. A quick check online can save you from missing an important update.
- Take your Civic for a short drive after the change: This circulates the fresh oil throughout the engine and helps you spot any leaks while the engine is warm.
One last thing to keep in mind: how far can you drive an overheating car is a completely different issue, but if you notice your engine running hotter than normal after an oil change, check your oil level first. Low oil is one of the most common causes of overheating.
Key Takeaways
- Right Oil Matters: Always use the correct viscosity and oil type for your Honda Civic engine.
- Basic Tools Are All You Need: A socket wrench, oil filter wrench, drain pan, and jack stands are the essentials.
- Reset the Maintenance Light: After every oil change, reset the Honda maintenance indicator to stay on track.
- Check for Leaks: Inspect the drain plug and oil filter after refilling to prevent costly damage.
- DIY Saves Money: Doing it yourself can save $30 to $75 per oil change compared to a shop visit.
- Stick to the Schedule: Follow Honda’s recommended oil change interval for best engine health.
Frequently Asked Questions
What kind of oil does a Honda Civic need?
Most Honda Civics require 0W-20 synthetic oil, but always check your owner’s manual for the exact specification. Using the correct viscosity ensures proper engine protection and fuel efficiency.
How often should I change the oil in my Honda Civic?
Honda recommends oil changes every 7,500 to 10,000 miles for newer models. If you use conventional oil or drive in severe conditions, you may need to change it more frequently, around every 5,000 miles.
Can I change my Honda Civic oil myself?
Absolutely. Changing the oil on a Honda Civic is one of the easiest DIY maintenance jobs. You need basic tools, about 30 minutes, and a clean workspace. It is a great way to learn more about your car and save money.
Do I need to reset the maintenance light after an oil change?
Yes, resetting the maintenance light is important so you can track your next oil change. The process is simple and varies slightly by model year. You can also refer to a guide on how to reset the oil change reminder for your specific Civic.
How much does a Honda Civic oil change cost at a dealership?
Dealership oil changes typically cost between $80 and $120, depending on the model year and type of oil used. Independent shops usually charge $40 to $70, while a DIY oil change costs around $25 to $40 in materials.
What happens if I overfill my Honda Civic with oil?
Overfilling can cause oil foaming, increased crankcase pressure, and potential engine damage. If you accidentally add too much oil, use a suction pump or small drain pan to remove the excess through the oil fill hole.
Conclusion
Changing the oil on your Honda Civic is a straightforward job that anyone can do at home. It saves you money, teaches you valuable car maintenance skills, and keeps your engine running strong for the long haul. With the right oil, the right tools, and the steps laid out in this guide, you have everything you need to succeed.
Remember to use the correct engine oil for your specific model year, check your oil level after every change, and reset the maintenance light when you are done. These small habits add up to big savings and a healthier car over time.
So grab your tools, pop the hood, and give it a try. Your Honda Civic will thank you, and your wallet will too. Happy wrenching!