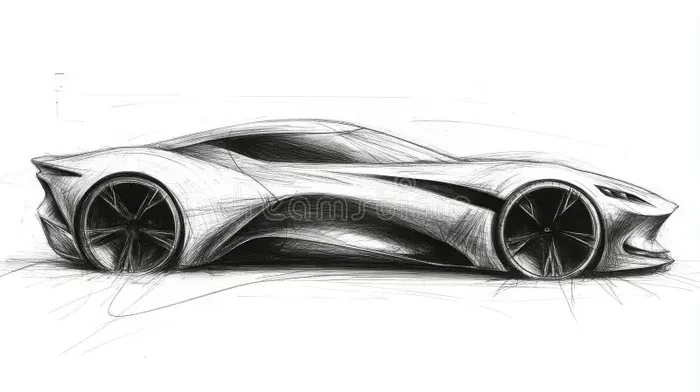
Black and White Car Drawing Techniques for Beginners
Black and white car drawing is one of the best ways to build core sketching skills and develop a strong foundation in automotive art. This guide covers pencil drawing techniques, shading methods, and practical tips that help beginners create realistic car illustrations from scratch. You will learn how to master light and shadow, improve your car sketching proportions, and apply graphite pencil drawing methods like a pro.
Have you ever looked at a black and white car drawing and thought, “I wish I could make something like that”? You absolutely can. The truth is, drawing cars for beginners does not require talent or years of practice. It requires the right approach, a few basic tools, and a willingness to learn step by step.
Black and white car drawing is a fantastic starting point for anyone interested in automotive art. Without the distraction of color, you focus on what really matters: form, proportion, light, and shadow. These are the building blocks of every great illustration, whether you are drawing a sleek sports car or a rugged truck.
This guide walks you through everything you need to know about black and white car drawing. From choosing your pencils to mastering shading techniques, you will find clear, practical advice you can use right away. Let us get started.
Key Takeaways
- Start with basic shapes: Breaking down a car into simple forms makes drawing cars for beginners far easier and more approachable.
- Master shading early: Understanding light and shadow transforms flat line art car sketches into realistic automotive art.
- Use the right tools: A quality set of graphite pencils and smooth paper dramatically improves your car illustration results.
- Practice perspective: Learning one-point and two-point perspective drawing helps you draw vehicles that look three-dimensional and accurate.
- Follow step-by-step methods: Structured drawing tutorials build confidence and skill faster than random practice alone.
- Avoid common mistakes: Skipping proportions and pressing too hard are the top errors beginners make in monochrome art.
📑 Table of Contents
- Why Black and White Car Drawing Is the Perfect Starting Point
- Essential Tools for Black and White Car Drawing
- Step-by-Step Guide to Drawing a Car in Black and White
- Shading Techniques That Make Car Drawings Realistic
- Common Mistakes Beginners Make in Car Drawing
- Expert Tips to Improve Your Black and White Car Drawing Fast
- How to Build a Regular Practice Routine
- Why Black and White Car Drawing Matters for Your Artistic Growth
Why Black and White Car Drawing Is the Perfect Starting Point
Focus on Fundamentals, Not Color
When you start car sketching in color, your brain splits attention between hue, saturation, and value. That is a lot to handle at once. Black and white car drawing removes color from the equation entirely. You concentrate on shape, outline, and value scale instead.
This focused approach helps you build muscle memory. Your hand learns how to create smooth lines, consistent curves, and controlled shading. These skills transfer directly to color work later. Think of monochrome art as the training wheels for your drawing journey.
Build Confidence Through Simplicity
One of the biggest reasons beginners quit drawing is frustration. Color mistakes feel huge and obvious. But in pencil drawing techniques, mistakes are easy to fix. You can erase, lighten, or redraw a line without ruining the whole piece.
This low-pressure environment builds confidence fast. Every small improvement feels rewarding. You start to see progress in just a few practice sessions. And that progress keeps you motivated to keep going.
Essential Tools for Black and White Car Drawing
Pencils You Need
You do not need a fancy art supply store to start. A basic set of graphite pencils covers everything you need for black and white car drawing. Here is what I recommend:
- HB pencil: Great for light outlines and initial sketches.
- 2B pencil: Perfect for medium shading and depth.
- 4B pencil: Ideal for dark shadows and rich contrast.
- 6B pencil: Use sparingly for the darkest darks in your car illustration.
A kneaded eraser is also essential. It lifts graphite gently without tearing the paper. And a blending stump helps you smooth out shading for a polished look.
Paper Matters More Than You Think
Smooth paper works best for graphite pencil drawing. Rough paper can catch the pencil lead and create uneven lines. Look for paper labeled “smooth” or “hot-pressed.” A sketchbook with 90gsm or heavier weight paper holds up well to erasing and blending.
Pro tip: Start with a sketchbook instead of loose sheets. It keeps all your practice work organized. You can flip back and compare early drawings with newer ones to see how fast you improve.
Step-by-Step Guide to Drawing a Car in Black and White
Step 1: Break the Car Into Basic Shapes
Every car outline starts with simple geometry. Look at any car and you will see rectangles, ovals, and triangles hiding inside the body. Start by sketching these basic shapes lightly with your HB pencil.
For example, a sedan is basically a long rectangle with a curved roofline and smaller rectangles for the windows. A sports car might start as a wedge shape with a low, angled front. Do not worry about details yet. Just get the big forms down on paper.
Step 2: Refine the Contour Lines
Once you have the basic shapes, start refining the contour drawing. This means tracing over your light sketch with smoother, more confident lines. Erase any unnecessary construction lines as you go.
Pay close attention to the car’s silhouette. The outline is what people notice first. A clean, confident contour makes even a simple line art car look professional. Take your time with this step. Rushing here leads to wobbly lines that are hard to fix later.
Step 3: Add Proportional Details
Now it is time to place the details. Wheels, headlights, grille, door handles, and mirrors all go in at this stage. Use light lines first. Check your drawing proportions carefully before pressing harder.
A common mistake is making the wheels too small or the hood too long. Step back from your paper and squint at it. This simple trick helps you see if the proportions look right. Compare your drawing to a reference photo to double-check.
Step 4: Establish the Value Scale
The value scale is the range from white to black on your drawing. Before you start shading the whole car, create a small value scale in the corner of your page. Draw a row of squares and fill them from light gray to pure black.
This exercise trains your eye to see subtle differences in tone. When you shade the car later, you will know exactly which value to use for each area. It is one of the most valuable pencil drawing techniques for beginners.
Step 5: Apply Shading and Texture
Now comes the fun part. Start shading the car using hatching techniques and cross-hatching. Hatching means drawing parallel lines in one direction. Cross-hatching adds a second layer of lines at an angle to create darker tones.
Work from light to dark. Build up layers gradually rather than trying to get dark tones right away. This approach gives you more control and avoids muddy, overworked areas. Use a blending stump to smooth transitions between light and shadow.
Step 6: Add Final Highlights and Contrast
The last step is adding highlights. Use your eraser to lift graphite from the brightest areas, like the top of the hood or the curve of the fender. This creates a natural glow that makes your car illustration pop.
Step back and look at your drawing as a whole. Does it have enough contrast? Are the darks dark enough? Make final adjustments and sign your work. You just completed a black and white car drawing from scratch.
Shading Techniques That Make Car Drawings Realistic
Understanding Light Direction
Every black and white car drawing needs a clear light source. Before you shade, decide where the light is coming from. Is it hitting the car from the left? The top right? This decision affects every shadow and highlight you place.
As a rule, the side facing the light source stays lighter. The opposite side falls into shadow. The cast shadow on the ground adds depth and grounding. Getting the light direction right is what separates a flat drawing from a realistic car illustration.
Hatching vs. Cross-Hatching
Hatching techniques use parallel lines to build tone. They work well for smooth surfaces like car doors and hoods. Keep your lines consistent in direction and spacing for a clean look.
Cross-hatching adds a second set of lines crossing the first. This creates darker values and adds texture. Use cross-hatching for areas like tire treads, textured grilles, and deep shadows. Both techniques are essential for automotive sketching.
Blending for Smooth Surfaces
Cars have smooth, reflective surfaces that need smooth shading. Use a blending stump or a soft tissue to gently blend your graphite. This creates the seamless gradients that make metal and paint look realistic in monochrome art.
Avoid using your fingers to blend. The oils from your skin can smudge the drawing and create uneven tone. A blending tool gives you much more control over the final result.
Common Mistakes Beginners Make in Car Drawing
Skipping Proportions
The biggest mistake in drawing cars for beginners is jumping straight to details without checking proportions. A car with oversized wheels or a too-long hood immediately looks wrong. Always map out the basic shapes first and verify proportions before adding details.
Pressing Too Hard on the Pencil
Pressing too hard creates dark, unforgiving lines that are hard to erase. It also tires out your hand quickly. Use a light touch for your initial sketch. You can always go over lines with more pressure later. Black and white car drawing rewards gentle, controlled strokes.
Ignoring the Background
Many beginners focus only on the car and forget the ground beneath it. A simple shadow on the ground anchors the vehicle and makes the drawing feel complete. Without it, the car can look like it is floating on the page.
Overworking the Shading
There is such a thing as too much shading. Overworking an area makes it look muddy and lifeless. Build your values in thin layers and stop when the tone looks right. Less is often more in automotive art.
Expert Tips to Improve Your Black and White Car Drawing Fast
Draw from Reference Photos
Never draw from memory alone when you are learning car sketching. Use reference photos to understand how light hits different car shapes. Choose clear, high-contrast images for your first few practice sessions. As you improve, you can draw from imagination while still checking against references.
Practice the Same Car Multiple Times
Pick one car model and draw it over and over. Each time, focus on a different skill. One drawing might focus on proportions. The next might focus entirely on shading. This repetition builds mastery faster than drawing ten different cars once each.
Set a Timer
Give yourself 15 to 30 minutes per drawing. A time limit forces you to make decisions quickly and avoid overthinking. It also simulates the kind of quick sketching used in automotive design studios. This practice sharpens your observation and hand speed.
Study Real Cars in Person
If possible, visit a parking lot or car show and sketch real vehicles. Seeing a car in three dimensions teaches you about curves, reflections, and form that photos cannot fully capture. Even a quick 10-minute automotive sketching session from life is worth hours of drawing from pictures.
How to Build a Regular Practice Routine
Consistency beats intensity in drawing practice. Set aside 20 minutes every day rather than three hours once a week. Daily practice builds neural pathways faster and keeps your skills sharp between sessions.
Start each session with a warm-up. Draw simple shapes, lines, and curves for five minutes. This loosens up your hand and gets you in the right mindset. Then move into your main drawing task with fresh focus and energy.
Track your progress by dating every drawing. After a month, flip back through your sketchbook. You will be amazed at how much your car illustration skills have improved. That visual proof of growth is incredibly motivating.
Why Black and White Car Drawing Matters for Your Artistic Growth
Black and white car drawing is not just a beginner exercise. It is a fundamental skill that every artist benefits from throughout their career. The ability to see and render values accurately is what separates good illustrators from great ones.
Many professional automotive artists and designers still work in black and white for concept sketches. Car companies use monochrome drawings to communicate shape and form before color is even considered. Mastering black and white car drawing gives you a skill that is genuinely valuable in the real world of automotive design.
Beyond the professional side, drawing cars in black and white is simply deeply satisfying. There is a quiet beauty in a well-rendered monochrome art piece. The interplay of light and shadow, the precision of a clean contour, and the realism of a shaded vehicle all come together to create something truly compelling.
So pick up your pencil. Choose a car you love. And start drawing. The skills you build through black and white car drawing will serve you for a lifetime, whether you pursue automotive art as a hobby or a career. Every line you draw brings you closer to creating something you are proud of.
Frequently Asked Questions
What pencils are best for black and white car drawing?
A basic set of graphite pencils from HB to 6B covers everything you need. The HB pencil is perfect for light outlines, while the 4B and 6B pencils handle dark shadows and deep contrast in your car illustration. A kneaded eraser and blending stump complete the essential toolkit.
How long does it take to learn black and white car drawing?
Most beginners see noticeable improvement within a few weeks of consistent practice. Drawing for 20 minutes a day builds skills faster than longer, infrequent sessions. The key is regular practice and patience with your progress.
Do I need to be good at drawing to start black and white car drawing?
Not at all. Black and white car drawing is one of the best ways to build drawing skills from the ground up. You start with simple shapes and gradually add complexity. Every artist starts somewhere, and cars are a fun, motivating subject to practice with.
Can I use a pen instead of a pencil for car sketching?
Yes, pens work well for line art car sketches and contour drawing. However, pencils are more forgiving for beginners because you can erase and adjust your lines. Start with a pencil and transition to pen once you feel more confident with your automotive art skills.
What is the best way to learn shading for car drawings?
Start by practicing hatching techniques and cross-hatching on simple shapes. Create a value scale to train your eye to see tonal differences. Then apply those shading skills to your car drawing, working from light to dark in thin, layered strokes.
Is black and white car drawing useful for automotive design careers?
Absolutely. Many professional automotive designers use black and white car drawing for concept sketches and presentations. Car manufacturers value the ability to communicate shape, form, and proportion clearly in monochrome art before moving to color rendering.
=== SEO TITLE ===
Black and White Car Drawing Techniques for Beginners
=== META TITLE ===
Black and White Car Drawing Techniques for Beginners
=== URL SLUG ===
/black-and-white-car-drawing-techniques-for-beginners