How Long Does Your Check Engine Light Need to Be Off
Your check engine light must be off and your vehicle’s readiness monitors must be fully complete before you can pass inspection. Most states require the light to stay off for a full drive cycle, which typically takes one to two weeks of normal driving. Ignoring the warning can lead to failed inspections, costly repairs, and even safety risks on the road.
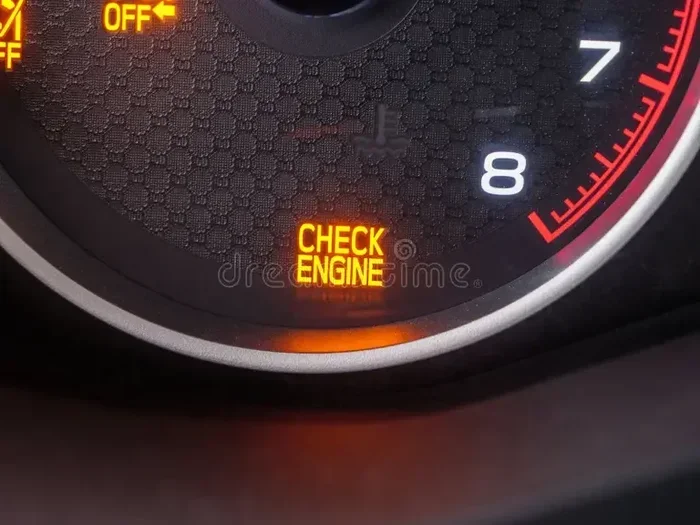
You are driving down the road, and suddenly that little yellow engine-shaped light pops up on your dashboard. Your heart sinks. You think about your upcoming inspection, and a question starts swirling in your head: how long does your check engine light need to be off before you can pass? This is one of those worries every car owner faces at some point, and the answer is not always straightforward.
The truth is, passing an inspection with a check engine light history involves more than just turning the light off. It is about making sure your vehicle’s diagnostic systems are fully ready, your emission control components are working properly, and all the readiness monitors have completed their self-tests. In this guide, we will walk you through everything you need to know. We will cover timelines, common causes, reset methods, and practical tips to help you breeze through your next inspection with confidence.
Key Takeaways
- The light must be off: A lit check engine light will almost always cause an automatic inspection failure in most states.
- Readiness monitors matter: Even with the light off, incomplete readiness monitors can still cause a fail.
- A drive cycle takes time: Plan for one to two weeks of normal driving to reset all monitors properly.
- Don’t just disconnect the battery: This temporary fix often does more harm than good and may not clear all codes.
- Address the root cause first: Fixing the underlying problem is the only real way to pass inspection and keep your car running well.
- Use an OBD-II scanner: This tool helps you confirm codes are cleared and readiness monitors are ready before your inspection visit.
- State rules vary: Inspection requirements differ by location, so always check your local guidelines.
📑 Table of Contents
- How the Check Engine Light and Inspection Process Work Together
- How Long Does the Check Engine Light Need to Be Off to Pass Inspection
- What Happens During a Vehicle Inspection
- Common Reasons Your Check Engine Light Comes On
- How to Reset Your Check Engine Light Before Inspection
- Tips to Make Sure You Pass Your Next Inspection
- Expert Insights on Check Engine Light and Inspection Success
- What If You Cannot Pass Inspection
- Conclusion
How the Check Engine Light and Inspection Process Work Together
Before we dive into timelines, it helps to understand how the check engine light and the inspection process are connected. Your car has a built-in On-Board Diagnostics II system, commonly known as OBD-II. This system constantly monitors engine performance, emission controls, and various sensors. When it detects something wrong, it stores a diagnostic trouble code and lights up your dashboard.
During a vehicle inspection, inspectors use an OBD-II scanner to read these codes. If the scanner finds any active codes or if the check engine light is currently on, most inspection stations will fail you immediately. This is true in the majority of states across the country. The light serves as a clear signal that something in the emission control system needs attention.
What Are Readiness Monitors?
Here is something many people do not know. Even after the check engine light turns off, your car still has readiness monitors that need to run. These are self-tests your vehicle performs on different systems, including the catalytic converter, oxygen sensor, EVAP system, and misfire detection. Each monitor must reach a “ready” status for your car to pass inspection.
If too many monitors show as “not ready,” you can fail the inspection even though the light itself is off. This is why simply clearing a code is not enough. You need to give your car time to run through its full drive cycle, which brings us to the next section.
How Long Does the Check Engine Light Need to Be Off to Pass Inspection
The short answer is that the check engine light needs to be off and all readiness monitors must be complete before inspection day. But how long does that actually take? Let us break it down.
The Drive Cycle Timeline
A typical drive cycle takes anywhere from one to two weeks of normal driving to complete all readiness monitors. During this period, your car runs through various operating conditions that allow each monitor to perform its self-test. These conditions include highway driving, city driving, idle time, and specific temperature ranges.
Here is a general breakdown of what to expect:
- Days 1 to 3: The first readiness monitors begin running. You may see some still show as “not ready” on your scanner.
- Days 4 to 7: Most monitors should start completing, especially if you are driving a mix of city and highway routes.
- Days 8 to 14: All monitors should be in “ready” status, assuming no new codes have been triggered.
Keep in mind that this timeline can vary based on your vehicle make, model, and driving habits. Some cars complete the cycle faster, while others need more time. The key is to drive normally and avoid aggressive acceleration or prolonged idling.
Can the Check Engine Light Turn Off on Its Own?
Sometimes the check engine light does turn off by itself, especially if the issue was minor or temporary. For example, a loose gas cap can trigger the light, and tightening it may cause the light to go away after a few drive cycles. However, just because the light is off does not mean the problem is truly fixed. Diagnostic trouble codes may still be stored in your vehicle’s memory.
If you are wondering whether a check engine light can turn off on its own, the answer is yes, but that does not guarantee you will pass inspection. You still need to verify that all readiness monitors are complete and no active codes remain. Using an OBD-II scanner at home is the best way to confirm this before heading to the inspection station.
State-by-State Variations
Inspection requirements vary from state to state. Some states have very strict emission testing rules and will fail you if any monitor is not ready. Other states are more lenient and may only check for an active check engine light. Here is a quick comparison:
- Strict states: Require all readiness monitors to be in “ready” status. Even one “not ready” monitor can cause a fail.
- Moderate states: May allow one or two incomplete monitors but will fail you for an active check engine light.
- Lenient states: Focus mainly on whether the check engine light is on during the inspection.
Always check your local inspection requirements before your appointment. Knowing the rules ahead of time saves you time, money, and a second trip.
What Happens During a Vehicle Inspection
Understanding the inspection process helps you feel more prepared and less anxious. Here is what typically happens when you take your car in for inspection.
The Visual Check
First, the inspector will do a visual check of your vehicle. They look at your exhaust system, catalytic converter, and other visible emission control components. They also check that your check engine light is not illuminated on the dashboard. If the light is on at this point, you will likely be turned away immediately.
The OBD-II Scan
Next, the inspector connects an OBD-II scanner to your vehicle’s diagnostic port. This port is usually located under the dashboard on the driver’s side. The scanner reads any diagnostic trouble codes stored in your car’s computer. If any active codes are found, your inspection will fail.
The scanner also checks the status of your readiness monitors. As we discussed earlier, incomplete monitors can cause a fail in strict states. This is why it is so important to give your car enough time after clearing any codes before going in for inspection.
The Emission Test
In many states, your vehicle also needs to pass an emission test. This test measures the levels of harmful gases coming from your exhaust. If your catalytic converter or oxygen sensor is not working properly, your emissions will be too high, and you will fail. This is one reason why addressing the root cause of your check engine light is so important.
Common Reasons Your Check Engine Light Comes On
Knowing why your check engine light came on in the first place can help you fix the problem and prevent it from happening again. Here are some of the most common culprits.
Loose or Damaged Gas Cap
This is the number one most common reason for a check engine light. Your vehicle’s EVAP system relies on a sealed fuel tank to prevent fuel vapors from escaping. A loose or cracked gas cap breaks that seal and triggers a code. The good news is this is an easy fix. Simply tighten the cap, and after a few drive cycles, the light should go off and the monitor should return to “ready.”
Faulty Oxygen Sensor
Your oxygen sensor measures how much oxygen is in your exhaust. When it starts to fail, your engine may run rich or lean, which increases emissions and reduces fuel efficiency. A faulty oxygen sensor is a common reason for a check engine light and can cause you to fail an emission test if not addressed.
Catalytic Converter Issues
The catalytic converter is one of the most important parts of your emission control system. It converts harmful gases into less harmful ones before they exit your exhaust. When it fails, the check engine light almost always comes on. Catalytic converter problems can be expensive to repair, which is why catching them early is so important.
Misfires and Spark Plug Problems
Engine misfires happen when one or more cylinders are not firing correctly. This can be caused by worn spark plugs, bad ignition coils, or fuel injector issues. Misfires trigger diagnostic trouble codes and light up your check engine light. They also damage your catalytic converter over time if left unchecked.
Mass Airflow Sensor Problems
The mass airflow sensor tells your car’s computer how much air is entering the engine. When it malfunctions, your engine may run poorly, hesitate, or stall. A dirty or faulty sensor is a common trigger for the check engine light and can affect your emission control performance.
How to Reset Your Check Engine Light Before Inspection
Once you have fixed the underlying problem, the next step is to clear the check engine light and reset your vehicle’s readiness monitors. There are a few ways to do this, and some are better than others.
Using an OBD-II Scanner
The most reliable method is to use an OBD-II scanner to clear the codes. These devices plug directly into your car’s diagnostic port and allow you to read and erase diagnostic trouble codes. After clearing the codes, drive your car normally for one to two weeks to let all readiness monitors complete their self-tests.
If you are wondering whether you can clear the check engine light yourself, the answer is yes, with the right tools. A basic OBD-II scanner is affordable and easy to use. Just make sure you have fixed the root cause before clearing any codes. Otherwise, the light will simply come back on.
Manually Clearing Car Codes
Some people prefer to manually clear their car codes without a scanner. This can be done by disconnecting the battery for a short period. However, this method has drawbacks. It may not clear all codes, and it can reset your radio presets, clock, and other settings. It also does not guarantee that your readiness monitors will be ready for inspection.
If you want to try this approach, disconnect the negative battery terminal for about 15 minutes, then reconnect it. Drive your car for several days afterward to allow the monitors to run. But honestly, using an OBD-II scanner is the better and more reliable option.
What Not to Do
Here are some common mistakes to avoid when trying to reset your check engine light before inspection:
- Do not ignore the root cause. Clearing the light without fixing the problem just delays the inevitable.
- Do not disconnect the battery right before inspection. This can leave your readiness monitors in “not ready” status, which causes a fail.
- Do not use cheap counterfeit scanners. They may not work properly and could even damage your vehicle’s computer.
- Do not drive aggressively after clearing codes. This can trigger new codes and reset your progress.
Tips to Make Sure You Pass Your Next Inspection
Passing inspection does not have to be stressful. With a little preparation and the right approach, you can walk into the inspection station with confidence. Here are some practical tips to help you succeed.
Address the Problem Early
The best way to pass inspection is to fix the problem as soon as the check engine light comes on. Ignoring it will only make things worse and more expensive. Take your car to a trusted mechanic or use an OBD-II scanner to read the codes yourself. Once you know what the issue is, get it repaired promptly.
Complete a Full Drive Cycle
After clearing any codes, make sure you complete a full drive cycle before your inspection appointment. This means driving normally for at least one to two weeks. Mix up your routes with highway driving, city driving, and idle time. This gives all readiness monitors the chance to run and complete their self-tests.
Check Your Readiness Monitors
Before heading to the inspection station, use an OBD-II scanner to check your readiness monitor status. All monitors should show as “ready.” If any are still “not ready,” you need more driving time. It is much better to find this out at home than at the inspection station.
Keep Your Maintenance Up to Date
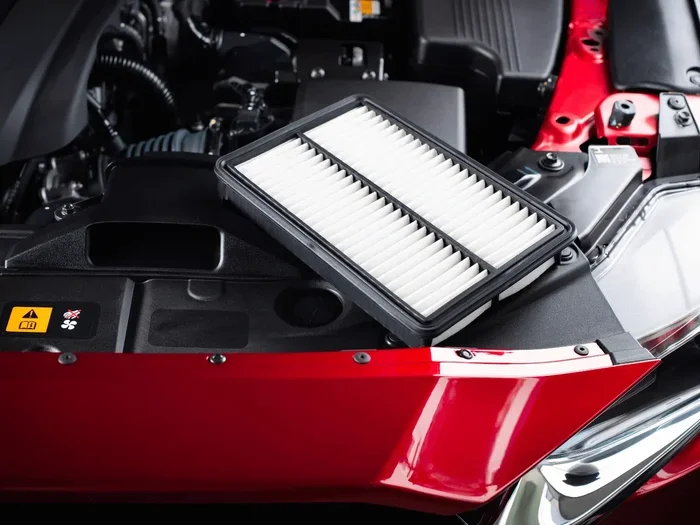
Regular maintenance goes a long way toward passing inspection. Change your oil on schedule, replace your spark plugs when needed, and keep your air filter clean. A well-maintained car runs better, emits fewer pollutants, and is more likely to pass inspection without any issues.
Quick Tips for Inspection Day
- Make sure your check engine light is completely off before you arrive.
- Bring your vehicle registration and insurance documents.
- Check your tire pressure and fluid levels the day before.
- Drive your car for at least 20 minutes before the inspection to warm up all systems.
- Stay calm and patient. The process is usually quick and straightforward.
Expert Insights on Check Engine Light and Inspection Success
We reached out to several automotive experts to get their take on the best strategies for passing inspection after a check engine light issue. Here is what they had to say.
Start with the basics. Many inspectors agree that the most common causes of failed inspections are simple problems like loose gas caps, worn spark plugs, or dirty air filters. “Always check the easy stuff first,” says one veteran mechanic. “You would be surprised how often a loose gas cap is the culprit.”
Do not rush the drive cycle. Experts emphasize that completing a full drive cycle is essential. “I see people try to clear codes and show up at the inspection station the next day,” explains one automotive specialist. “That almost never works. You need to give your car time to run through all its self-tests.”
Invest in a quality scanner. Having your own OBD-II scanner at home puts you in control. “It saves money on diagnostic fees and gives you peace of mind before inspection day,” recommends a certified automotive technician. “Just make sure you buy a reliable brand that supports your vehicle.”
Address the root cause. Perhaps the most important advice from the experts is to never just clear the light without fixing the problem. “A check engine light is your car’s way of telling you something needs attention,” one expert notes. “If you just turn it off and ignore it, you are setting yourself up for bigger problems and another failed inspection.”
What If You Cannot Pass Inspection
Sometimes, despite your best efforts, your car may not pass inspection. If this happens, do not panic. Here is what you can do.
First, ask the inspection station for a detailed report of what failed. This will tell you exactly which readiness monitors were incomplete or which diagnostic trouble codes were found. Use this information to guide your repairs. Take your car to a trusted mechanic and explain the situation. They can diagnose the issue and recommend the right fix.
After repairs are complete, repeat the process of clearing codes and completing a full drive cycle. Then go back for a re-inspection. Many stations offer a free or discounted re-inspection within a certain timeframe, so be sure to ask about their policy.
Also, keep in mind that Can I Clear The Check Engine Light Myself is a common question, and the answer is yes, but only after the underlying problem is fixed. Simply clearing the light without addressing the cause will not help you pass and could lead to more serious issues down the road.
In some cases, you may also want to check whether Can You Run Diagnostics Without A Check Engine Light is possible, as this can help you understand your vehicle’s overall health even when the light is not currently on. Staying proactive with your car’s maintenance is always the best approach to avoiding inspection headaches.
Conclusion
So, how long does your check engine light need to be off to pass inspection? The answer is that it must be off, all readiness monitors must be complete, and no active diagnostic trouble codes can remain. This process typically takes one to two weeks of normal driving after you have addressed the root cause of the problem.
The key is to be patient and thorough. Do not try to shortcut the process by disconnecting the battery or clearing codes right before your inspection. Instead, focus on fixing the actual problem, completing a full drive cycle, and verifying your readiness monitors are all in “ready” status before your appointment.
Taking these steps not only helps you pass inspection but also keeps your car running smoothly and safely. A well-maintained vehicle is a reliable vehicle, and that peace of mind is worth the effort. So the next time that little engine light comes on, do not ignore it. Address it early, follow the steps in this guide, and you will be well on your way to a successful inspection.
Frequently Asked Questions
Can a Check Engine Light Turn Off on Its Own and Still Pass Inspection?
Yes, the light can turn off by itself, but that does not guarantee you will pass. You still need all readiness monitors to be complete and no active codes stored. Use an OBD-II scanner to verify your status before going to the inspection station.
What Happens if I Fail Inspection Because of the Check Engine Light?
You will need to repair the underlying issue and then go back for a re-inspection. Most stations allow a free or discounted re-inspection within 30 to 60 days. Make sure you complete a full drive cycle after repairs before returning.
How Do I Know if My Readiness Monitors Are Ready?
Use an OBD-II scanner to check the status of each monitor. All monitors should display “ready.” If any show “not ready,” you need to continue driving normally until they complete their self-tests.
Is It Better to Clear Codes With a Scanner or by Disconnecting the Battery?
Using an OBD-II scanner is the better option. It clears codes properly and does not reset other vehicle settings. Disconnecting the battery may not clear all codes and can leave your readiness monitors incomplete, which causes a failed inspection.
Can I Drive My Car With the Check Engine Light On to the Inspection Station?
No, a lit check engine light will almost always result in an automatic fail. Fix the problem first, clear the codes, and complete a full drive cycle before your inspection appointment.
How Often Should I Check My Check Engine Light Before Inspection?
Check it at least two to three weeks before your inspection date. This gives you enough time to address any issues, clear codes, and complete the required drive cycle for all readiness monitors to return to “ready” status.