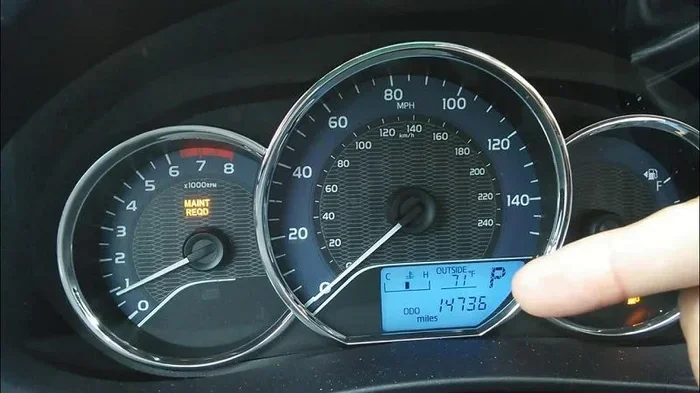
How Do You Reset the Check Light on a Toyota Corolla
Resetting the check light on a Toyota Corolla is a straightforward process you can do at home. The check engine light may come on for many reasons, from a loose gas cap to a faulty sensor. This guide walks you through three easy reset methods using an OBD-II scanner, the ignition cycle, or a battery disconnect. You will also learn what causes the light, whether it is safe to drive, and how to prevent it from returning.
The check engine light on your Toyota Corolla can feel scary. One moment everything is fine, and the next, a yellow (or sometimes red) warning glows on your dashboard. You wonder, “Is my car about to break down?” The truth is, the check light on a Toyota Corolla comes on for dozens of reasons. Some are minor. Others need attention right away. Either way, knowing how to reset the check light on a Toyota Corolla gives you control and peace of mind.
This guide covers everything you need. We explain why the light turns on, the tools you need, and the exact steps to reset it. We also share tips on when to drive and when to stop. By the end, you will feel confident handling this common car issue. Let us get started.
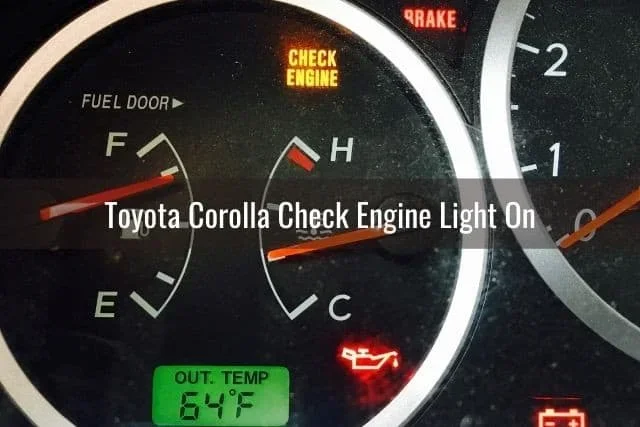
The check engine light is part of your Toyota Corolla’s onboard diagnostics system. This system monitors many sensors and components in real time. When something falls outside the normal range, the computer triggers the warning light. Think of it as your car’s way of saying, “Hey, something needs attention.”
The light usually shows up as an engine-shaped icon on your dashboard. Sometimes it stays solid. Other times it flashes. A solid light often means a less urgent issue. A flashing light usually signals a serious problem that needs quick action. Understanding this difference matters a lot.
Key Takeaways
- Three reset methods work: OBD-II scanner, ignition cycle, and battery disconnect.
- A loose gas cap is the most common reason the check light comes on.
- Driving with the check light on is sometimes safe but depends on the cause.
- An OBD-II scanner helps you read the diagnostic trouble code before resetting.
- Prevention is key — regular maintenance keeps warning lights away.
- Persistent lights may signal a deeper problem that needs a mechanic.
- Resetting does not fix the problem — it only clears the warning on the dashboard.
📑 Table of Contents
Why the Check Light Comes On in a Toyota Corolla
Many things can trigger the check engine light on a Toyota Corolla. The causes range from very simple to more complex. Here are the most common reasons your warning light might activate.
Common Reasons the Check Light Activates
- A loose or faulty gas cap. This is the number one cause. A loose cap lets fuel vapors escape, which trips the sensor.
- A failing oxygen sensor. This sensor measures unburned oxygen in the exhaust. When it goes bad, fuel economy drops.
- Worn spark plugs or plug wires. Old spark plugs cause misfires, which the system detects quickly.
- A clogged catalytic converter. This part reduces harmful emissions. When blocked, the light comes on.
- Mass airflow sensor issues. This sensor tells the computer how much air enters the engine. Dirt or damage causes errors.
- Low battery voltage. A weak battery or bad alternator can trigger the light unexpectedly.
- Evaporative emissions system leaks. Small leaks in the fuel system set off this warning.
Each of these issues stores a diagnostic trouble code in your car’s computer. An OBD-II scanner reads these codes so you know exactly what to fix. More on that below.
Understanding the Difference Between the Check Light and Maintenance Light
Toyota Corollas have two different warning lights that people often confuse. The check engine light (also called the malfunction indicator lamp) signals a problem detected by the emissions system. The maintenance required light simply reminds you that it is time for an oil change or scheduled service. These two lights are not the same, and you reset them differently. If you are unsure which light you are seeing, check your owner’s manual. It will show you the exact icon for each warning.
Some owners wonder if the maintenance light behaves the same way as the check engine light. It does not. The maintenance light is a simple timer-based reminder. It does not indicate a problem with your engine or emissions system. For more details on how the maintenance light works and whether it stays on, you can check our guide on does the maintenance light stay on.
Tools You Need to Reset the Check Light on a Toyota Corolla
Resetting the check engine light does not require expensive tools or a trip to the dealer. You need just a few items, depending on which method you choose.
Using an OBD-II Scanner
An OBD-II scanner is the most reliable tool for this job. It plugs directly into your Toyota’s diagnostic port. The scanner reads the error codes stored in the computer. You can then clear those codes and reset the light. OBD-II scanners range from basic models under $30 to advanced ones with Bluetooth connectivity. For most owners, a basic scanner works perfectly fine.
You can find OBD-II scanners at auto parts stores, online retailers, and even some gas stations. Some auto parts stores will read the codes for free if you buy the scanner from them. This is a great way to get help without spending extra money.
The Manual Reset Method
The manual reset method uses your car’s ignition key and dashboard controls. No extra tools are needed. This method works on most Toyota Corolla models from 1996 onward. However, it does not work on all years. Check your owner’s manual to confirm your model supports this approach.
Battery Disconnect Method
Disconnecting the battery resets all the electronic systems in your car, including the warning lights. You need a basic wrench to loosen the battery terminal clamp. This method is effective but has a downside — it also resets your radio presets, clock, and other settings. Use this method only if the other two do not work.
Step-by-Step Guide to Reset the Check Light on a Toyota Corolla
Now let us walk through each reset method in detail. Follow these steps carefully for the best results.
Reset Method One: Using the OBD-II Scanner
This is the most precise and recommended method. Here is how to do it:
- Locate the OBD-II port. In most Toyota Corollas, it sits under the dashboard on the driver’s side. Look near the steering column.
- Plug in the scanner. Connect the OBD-II scanner firmly into the port.
- Turn the ignition to ON. Do not start the engine. Just turn the key to the “ON” position.
- Read the codes. The scanner will display any stored diagnostic trouble codes. Write them down.
- Research the codes. Look up what each code means. This tells you the actual problem.
- Fix the issue. Before resetting, address whatever caused the light. Replace the gas cap, fix a sensor, or repair the wiring.
- Clear the codes. Use the scanner’s menu to erase the codes and reset the light.
- Turn off and restart. Turn the ignition off, wait ten seconds, then restart. Check if the light stays off.
If the light returns after a few days, the underlying problem was not fully fixed. Go back and recheck your repair work.
Reset Method Two: The Ignition Cycle Method
The ignition cycle method works without any special tools. Try this if you do not own an OBD-II scanner:
- Turn the ignition to OFF. Make sure the engine is completely off.
- Press and hold the odometer trip button. This button is usually on the dashboard cluster.
- While holding the button, turn the ignition to ON. Do not start the engine.
- Wait for the odometer to display “TEST.” This may take a few seconds.
- Release the trip button. The diagnostic test mode will start.
- Press and hold the trip button again. The odometer should show “RESET” or begin clearing the codes.
- Turn the ignition OFF and then back ON. Check if the check light is gone.
This method works well for simple issues like a loose gas cap. If the light comes back, the problem is still present and needs a real fix.
Reset Method Three: Disconnecting the Battery
This is the most aggressive reset method. Use it only when the other two fail:
- Turn off the engine and all accessories. Remove the key from the ignition.
- Open the hood. Locate the battery.
- Use a wrench to loosen the negative terminal clamp. The negative terminal usually has a black cable and a minus (-) symbol.
- Disconnect the cable and move it away from the battery. Make sure it cannot touch the terminal again.
- Wait at least 15 minutes. This allows the computer to fully reset.
- Reconnect the negative terminal. Tighten the clamp securely.
- Start the engine. Check if the check light is off.
- Reset your clock and radio presets. These will have been cleared during the disconnect.
Be careful when working near the battery. Wear gloves and avoid touching both terminals at the same time. If you are not comfortable with this method, skip it and visit a mechanic instead.
Can You Drive with the Check Light On?
This is one of the most common questions car owners ask. The answer depends on what triggered the light in the first place.
When It Is Safe to Keep Driving
If the check light is solid and your car drives normally, you can usually keep driving. A loose gas cap is a perfect example. Tighten the cap, and the light often goes away on its own within a few days of driving. You do not need to pull over or call for help. Just keep an eye on the light.
Similarly, if the light came on due to a minor sensor glitch, short trips to a repair shop are usually fine. Just avoid aggressive driving and heavy loads until the issue is resolved.
When You Should Pull Over Immediately
A flashing check engine light is a different story entirely. A flash usually means a severe engine misfire is occurring. Unburned fuel is entering the exhaust system, which can damage the catalytic converter quickly. If you see a flashing light, pull over safely and turn off the engine. Call for roadside assistance if needed.
Also, if you notice any of these symptoms along with the light, stop driving: strange noises, loss of power, overheating, or a strong fuel smell. These signs point to a serious problem that could become dangerous.
Some owners ask whether it is okay to drive long distances with the check light on. The honest answer is, it depends. For more insight on this topic and how it applies to specific Toyota models, you can read our article on can I drive my Toyota Camry with the check engine light on. The principles are very similar across Toyota models.
Preventing the Check Light from Coming Back
Resetting the light is only half the battle. The real goal is keeping it off for good. Here is how to prevent the check engine light from returning.
Regular Maintenance Tips
- Check your gas cap after every fill-up. Make sure it clicks at least three times when you tighten it.
- Stick to the maintenance schedule. Toyota provides a detailed service plan in the owner’s manual. Follow it closely.
- Use the right fuel. Always use the octane rating recommended for your Corolla model.
- Check fluid levels regularly. Keep an eye on engine oil, coolant, and brake fluid. For more on checking your car’s fluids and other maintenance tips, you can refer to our guide on do you reset after an oil change.
- Replace spark plugs on schedule. Old spark plugs are a leading cause of check light triggers.
Addressing the Root Cause
The biggest mistake people make is simply resetting the light without fixing the underlying problem. The light will almost always return. If the OBD-II scanner shows a code, take the time to understand what it means. Address the root cause first, then reset the light. This approach saves money and keeps your Toyota Corolla running smoothly for years.
Also, pay attention to early warning signs. A slight drop in fuel economy, a rough idle, or a weird smell from the exhaust can all point to problems before the check light even comes on. Catching these signs early helps you avoid bigger repairs down the road.
When to See a Professional Mechanic
Not every check light situation is a DIY project. There are times when calling a professional is the smartest move.
If the check light stays on after you try all three reset methods, something is still wrong. The diagnostic codes may point to a complex issue like a failing catalytic converter, a bad mass airflow sensor, or an emissions system leak. These repairs require special tools and expertise.
Also, if you are not comfortable working under the hood or reading diagnostic codes, there is no shame in visiting a mechanic. A qualified technician can diagnose and fix the problem quickly. On average, mechanics charge between $75 and $150 per hour for diagnostic work. Many shops will waive the diagnostic fee if you have them perform the repair.
For simple issues like a loose gas cap or a faulty sensor, the fix is usually inexpensive. But ignoring the light can lead to much bigger problems and much bigger bills. Always take the warning seriously, even if your car seems to run fine.
Remember that the check engine light is your car’s built-in safety system. It exists to protect your engine, your wallet, and the environment. Treating it with respect keeps your Toyota Corolla in top shape for years to come.
In summary, resetting the check light on a Toyota Corolla is something you can absolutely do yourself with the right approach. Whether you use an OBD-II scanner, the ignition cycle method, or a battery disconnect, the process is manageable for most car owners. Just remember to fix the root cause first, reset the light second. And when in doubt, a professional mechanic is always a good call.
Frequently Asked Questions
How do I know if my check engine light is serious?
A solid check engine light usually means a less urgent issue, like a loose gas cap. A flashing light signals a serious problem, such as an engine misfire, and you should stop driving immediately. When in doubt, get the car scanned for diagnostic trouble codes at an auto parts store or mechanic.
Can I reset the check engine light without a scanner?
Yes, you can. The ignition cycle method uses your car’s dashboard buttons and ignition key. The battery disconnect method also works without a scanner. Both methods are free and easy to try at home. However, an OBD-II scanner gives you the most control and lets you read the codes first.
Will the check light come back after I reset it?
It might, if the underlying problem is not fixed. Resetting the light only clears the warning — it does not repair the issue. If the cause was a loose gas cap, the light should stay off. If a sensor or component is failing, the light will likely return until the part is replaced.
How much does it cost to fix the check engine light?
The cost depends entirely on the cause. A loose gas cap costs nothing to fix. A faulty oxygen sensor might run $100 to $300 to replace. A catalytic converter repair can cost $500 or more. Always get a proper diagnosis before committing to expensive repairs.
Is it safe to drive my Toyota Corolla with the check light on?
For a solid check light with no other symptoms, short drives are usually safe. However, if the light is flashing, or you notice shaking, loss of power, or strange noises, pull over and seek help. Driving with a serious issue can cause further damage to your vehicle.
How long does it take to reset the check engine light?
Using an OBD-II scanner takes about five minutes. The ignition cycle method takes around ten to fifteen minutes. The battery disconnect method requires waiting at least fifteen minutes after disconnecting. Total time depends on the method you choose and whether the underlying issue needs repair first.
=== CONCLUSION ===
Resetting the check light on a Toyota Corolla is a skill every car owner should have. It saves time, money, and the hassle of a trip to the mechanic for simple issues. We covered three reliable methods, explored the common causes of the warning light, and shared tips on prevention. The key takeaway is this: always identify and fix the root cause before resetting the light. A simple fix today prevents a costly repair tomorrow. Keep your Toyota running strong by staying proactive with maintenance and warning lights.