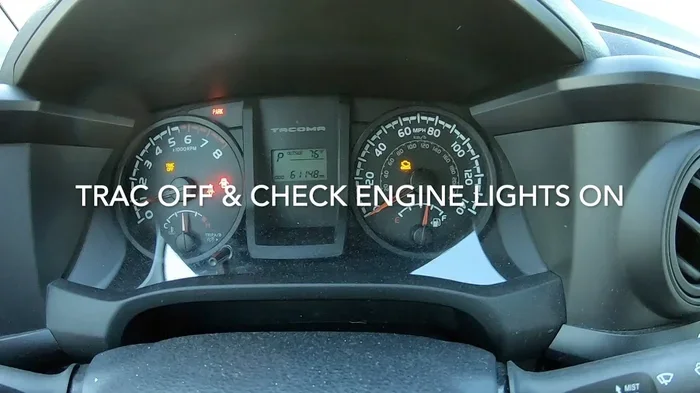
How Do You Reset the Check Engine Light on a Toyota
Resetting the check engine light on a Toyota is a straightforward process you can do at home with the right tools. Whether the light came on due to a loose gas cap or a sensor issue, this guide walks you through every method. We also cover when a DIY reset is safe and when you should head to a mechanic instead.
Key Takeaways
- Use an OBD-II scanner for the most reliable and accurate way to reset the check engine light on your Toyota.
- Check the fuel cap first because a loose or damaged cap is the most common cause of the check engine light.
- Never ignore a flashing check engine light as it signals a serious problem that needs immediate attention.
- Fix the underlying issue before resetting the light, or it will likely return within a few drives.
- Disconnecting the battery clears all codes but also resets other settings like your radio and clock.
- Regular Toyota maintenance helps prevent the check engine light from coming on in the first place.
- Visit a mechanic if the light keeps returning or if you are unsure about the cause.
📑 Table of Contents
How Do You Reset the Check Engine Light on a Toyota
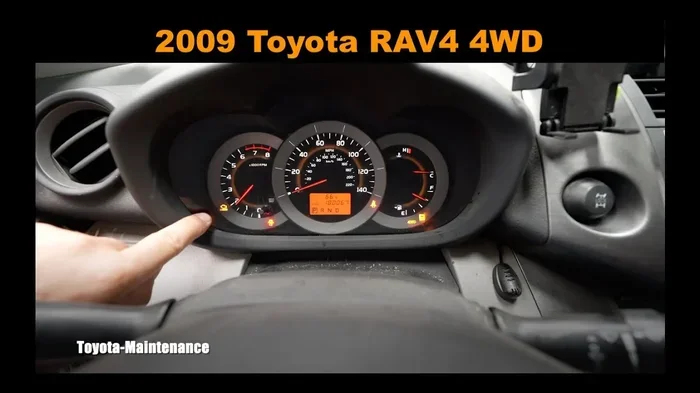
The check engine light on your Toyota dashboard can feel alarming the moment it pops on. You might wonder if your car is about to break down or if it is safe to keep driving. The truth is, the engine warning light serves as your vehicle’s early warning system. It alerts you to potential issues before they become major problems.
Your Toyota uses a network of sensors to monitor engine performance and emissions. When something goes wrong, the car’s computer stores a diagnostic trouble code, or DTC. This code triggers the check engine light on the Toyota dashboard. Understanding what this light means is the first step toward fixing the problem.
Not all check engine lights are created equal. A steady light usually indicates a minor issue. A flashing light, on the other hand, often signals a more serious problem. If you notice the light blinking rapidly, it is best to pull over and seek help right away. Knowing the difference can save you from costly damage.
Many Toyota owners ask themselves, how do you reset the check engine light on a Toyota? The answer depends on what triggered the light in the first place. In this guide, we walk you through every method, from simple DIY fixes to professional solutions. We also explain when it is safe to reset the light yourself and when you need a mechanic.
Common Reasons the Check Engine Light Turns On
Before you try to reset anything, it helps to understand why the light came on in the first place. The Toyota dashboard warning lights are designed to alert you to specific problems. Here are the most common culprits behind a glowing check engine light.
Loose or Faulty Fuel Cap
A loose or faulty fuel cap is one of the most common reasons the check engine light comes on. The fuel cap seals the fuel system and maintains proper pressure. When it is loose, damaged, or missing, the car detects a leak in the evaporative emissions system. This simple fix often takes just a few seconds and costs nothing. Next time you fill up, make sure the cap clicks tightly into place.
Oxygen Sensor Issues
The oxygen sensor measures unburned oxygen in your exhaust. Over time, these sensors can get contaminated or fail entirely. A faulty oxygen sensor can reduce fuel efficiency and increase emissions. Replacing it is a common Toyota maintenance task that a mechanic can handle quickly. Ignoring a bad oxygen sensor can lead to higher fuel costs over time.
Catalytic Converter Problems
The catalytic converter converts harmful gases into less harmful emissions. When it fails, the check engine light turns on. Catalytic converter problems are serious and should not be ignored. Driving with a damaged converter can lead to expensive Toyota repair bills down the road. If you notice a rotten egg smell or reduced performance, get it checked immediately.
Spark Plug and Ignition Troubles
Spark plugs and ignition coils play a vital role in firing the engine. When they wear out, you may experience an engine misfire. A misfire sends unburned fuel into the exhaust system. This not only triggers the warning light but can also damage the catalytic converter over time. Regular spark plug replacement is an easy way to prevent this issue.
Mass Airflow Sensor Failures
The mass airflow sensor measures the amount of air entering the engine. Dirt, oil, or debris can foul this sensor. When it fails, the engine may run rough or stall. Replacing a mass airflow sensor is a relatively affordable fix that restores proper engine performance. Keeping your air filter clean helps extend the life of this sensor.
How to Reset the Check Engine Light on a Toyota
Resetting the check engine light on a Toyota is possible in several ways. Each method has its pros and cons. The best approach depends on the reason the light came on and the tools you have available. Below, we walk you through the most effective methods.
Method 1: Using an OBD-II Scanner
An OBD-II scanner is the most reliable tool for resetting the check engine light. This device plugs directly into your Toyota’s diagnostic port. The port is usually located under the dashboard on the driver’s side. Once connected, the scanner reads the stored Toyota error codes and diagnostic trouble codes.
You can purchase a basic OBD-II scanner for under $50. More advanced models offer live data streaming and code definitions. To use one, follow these steps:
- Turn off your Toyota’s ignition.
- Locate the OBD-II port and plug in the scanner.
- Turn the ignition to the “On” position without starting the engine.
- Wait for the scanner to connect and display the codes.
- Write down the codes for reference.
- Press the “Clear” or “Erase” button on the scanner.
- The check engine light should turn off after clearing the codes.
Using an OBD-II scanner gives you insight into what triggered the light. You can address the root cause before the problem returns. Many auto parts stores also offer free diagnostic readings if you do not want to buy a scanner.
Method 2: The Disconnect Battery Method
Disconnecting the car battery is a popular DIY method for resetting the check engine light. This approach clears all stored codes from the Toyota’s computer system. However, it also resets other settings like your radio presets and clock. Use this method with caution.
Here is how to do it safely:
- Turn off your Toyota and remove the keys from the ignition.
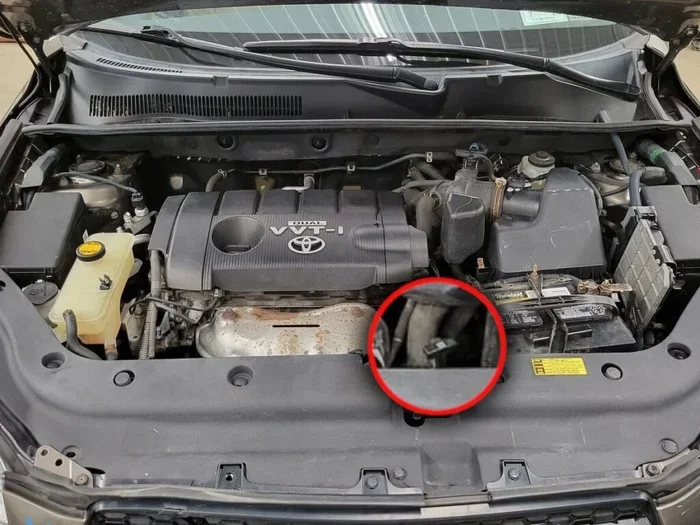
- Open the hood and locate the battery.
- Disconnect the negative battery cable first.
- Wait at least 15 minutes to allow the computer to fully reset.
- Reconnect the negative cable and tighten the clamp.
- Start your Toyota and check if the light is off.
This method works well for temporary fixes. However, if the underlying issue persists, the light will likely come back. Keep in mind that disconnecting the battery can also affect your Toyota maintenance reminder systems. You may need to reset the service interval after reconnecting. If you are unsure about this method, consult your Toyota owner’s manual.
Method 3: Turning the Ignition On and Off
This simple method involves cycling the ignition key several times. It works on older Toyota models that do not require a scanner. Here is what to do:
- Insert the key into the ignition.
- Turn the key to the “On” position without starting the engine.
- Wait for about three seconds.
- Turn the key back to the “Off” position.
- Repeat this cycle three to four times.
- Turn the key to the “On” position one final time.
- Check the dashboard to see if the check engine light has turned off.
This method is quick and requires no special tools. However, it may not work on newer Toyota models with advanced computer systems. If the light stays on after trying this method, move on to the OBD-II scanner approach.
Step-by-Step Guide to Resetting the Light
Before you attempt any reset, it is important to address the root cause. Simply clearing the codes without fixing the problem will not solve anything. Here is a step-by-step approach to ensure a lasting fix.
Step 1: Check for Obvious Issues
Start by looking for visible problems. Open the fuel door and make sure the cap is tight. Inspect the area around the engine for any loose wires or hoses. Sometimes a visual inspection reveals the answer right away. A quick look under the hood can save you a trip to the mechanic.
Step 2: Read the Diagnostic Codes
Use an OBD-II scanner to read the stored codes. Write down each code and look up what it means. Many scanners come with a built-in code library. You can also search the codes online or refer to your Toyota’s service manual. Understanding the check engine light symptoms helps you choose the right fix.
Step 3: Fix the Underlying Problem
Once you know what triggered the light, take action. Replace a loose fuel cap, swap out a worn spark plug, or clean a dirty sensor. Addressing the root cause is the only way to prevent the light from returning. If you are not comfortable making repairs yourself, a trusted mechanic can help.
Step 4: Clear the Codes
After fixing the problem, use your OBD-II scanner to clear the codes. Alternatively, try the battery disconnect method or the ignition cycling method. The check engine light should turn off after clearing the codes. If it does not, there may be another issue the scanner did not catch.
Step 5: Test Drive Your Toyota
Take your Toyota for a short test drive. Monitor the dashboard to see if the light stays off. If the light returns, the problem may not be fully resolved. You may need to revisit the repair or consult a professional. A successful reset means the light stays off for several drive cycles.
When to See a Mechanic Instead of DIY Reset
Not every check engine light situation is suitable for a DIY reset. Some issues require professional diagnosis and Toyota repair. Knowing when to seek help can save you time and money.
You should see a mechanic if the check engine light is flashing. A flashing light usually indicates a severe engine misfire. Driving with a misfire can damage the catalytic converter and other expensive components. This is not a situation where a quick reset will help.
If you have tried resetting the light multiple times and it keeps coming back, there is an underlying problem you have not fixed. Repeated resets without addressing the root cause can lead to more serious damage. Your Toyota’s computer stores codes for a reason, and ignoring them is risky.
Also, if you do not have an OBD-II scanner or feel uncomfortable working on your car, a mechanic is the best choice. Many auto parts stores offer free diagnostic readings. This can help you understand the problem before paying for repairs. Can I Drive My Toyota Camry With the Check Engine Light On? This is a common question, and the answer depends on the severity of the issue triggering the light.
Additionally, if the check engine light is accompanied by other warning signs like strange noises, smoke, or loss of power, do not attempt a DIY reset. Get your vehicle to a professional as soon as possible. Safety should always come first.
Preventing the Check Engine Light from Returning
The best way to deal with the check engine light is to prevent it from coming on in the first place. Regular Toyota maintenance goes a long way in keeping your car running smoothly and avoiding unexpected check engine light symptoms.
Keep up with scheduled oil changes and fluid replacements. Dirty oil and old fluids can cause engine stress over time. Do you reset after an oil change? Yes, many Toyota owners reset the maintenance light after an oil change, but the check engine light is different and should only be reset after fixing the actual problem.
Check your fuel cap regularly. A worn or damaged cap can trigger the light even when there is no real engine issue. Replace the cap if it shows signs of wear or does not seal properly. This is one of the easiest and cheapest maintenance tasks you can do.
Pay attention to early warning signs. If you notice rough idling, reduced fuel economy, or unusual sounds, get your car checked before the light comes on. Early detection can prevent minor issues from becoming major repairs. Staying proactive with your Toyota maintenance schedule makes a big difference.
Use quality fuel and replace your spark plugs on schedule. These simple habits keep your engine running efficiently and reduce the chance of triggering the warning light. Clean air filters and proper tire pressure also contribute to overall engine health.
If you are curious about other Toyota warning lights, you might want to check out this article on does the maintenance light stay on for more information about your Toyota’s dashboard indicators.
Another common question from Toyota owners is whether it is safe to drive with warning lights on. For those wondering about the maintenance required light specifically, this guide on Can I Drive With a Maintenance Required Light On in a Toyota provides helpful insights.
By staying on top of routine maintenance and addressing issues early, you can keep your Toyota running smoothly and avoid the frustration of a recurring check engine light. A little prevention goes a long way toward avoiding costly repairs down the road.
Resetting the check engine light on a Toyota is something most owners can do with basic tools and a little patience. Whether you use an OBD-II scanner, disconnect the battery, or cycle the ignition, the key is to fix the underlying problem first. A successful reset means the light stays off and your Toyota continues to run reliably for years to come.
Frequently Asked Questions
Can I drive my Toyota with the check engine light on?
It depends on the severity of the issue. If the light is steady and your car is running normally, you can usually drive a short distance to a mechanic. However, if the light is flashing or you notice performance problems, you should pull over and seek help immediately. Driving with a flashing check engine light can cause serious engine damage.
How much does it cost to reset the check engine light at a mechanic?
Many mechanics will read and clear the codes for free or for a small fee, typically between $50 and $100. The cost depends on the shop and your location. If you have an OBD-II scanner, you can reset the light yourself at no cost. Just remember that clearing the code does not fix the underlying problem.
Will the check engine light reset itself after the problem is fixed?
In many cases, yes. After you fix the problem, the Toyota’s computer needs to complete a few drive cycles before it clears the code and turns off the light. A drive cycle usually involves a combination of city and highway driving. If the light does not turn off after a few days, you may need to manually reset it with a scanner.
What is the difference between the check engine light and the maintenance required light?
The check engine light is a warning about an engine or emissions problem. The maintenance required light is a scheduled service reminder. They serve different purposes and require different responses. If you are unsure which light you are seeing, consult your Toyota owner’s manual or a trusted mechanic.
Can a loose gas cap cause the check engine light to come on?
Yes, a loose or faulty gas cap is one of the most common reasons the check engine light comes on. The cap maintains proper pressure in the fuel system. When it is not sealed correctly, the car’s computer detects a leak and triggers the warning light. Simply tightening or replacing the cap often resolves the issue.
How long does it take to reset the check engine light on a Toyota?
Using an OBD-II scanner, the reset process takes just a few minutes. The battery disconnect method requires about 15 minutes of waiting time. The ignition cycling method takes a couple of minutes. However, the total time depends on whether you also need to fix the underlying problem that triggered the light in the first place.