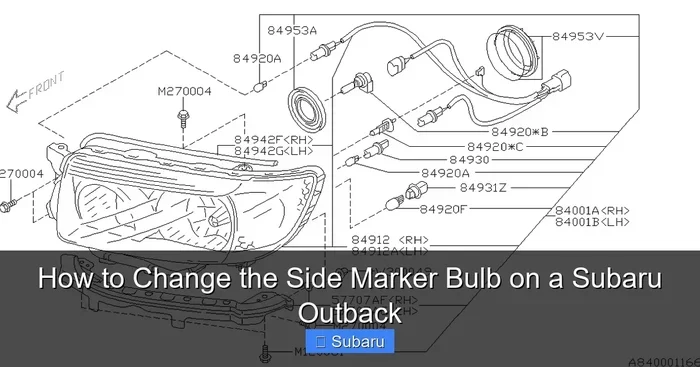
How to Change a Side Marker Bulb on a Subaru Outback
Changing a side marker bulb on a Subaru Outback is a simple DIY task you can finish in under 30 minutes. This guide walks you through every step, from picking the right bulb to reassembling the housing. You will learn which bulb type fits your model year, how to access the socket safely, and how to avoid common mistakes that cause repeat failures.
Your Subaru Outback’s side marker bulb might seem like a small detail, but it plays a big role in safety and legality. A burnt-out marker light can lead to a traffic ticket, and it makes your vehicle harder to see at night or in bad weather. The good news is that swapping it out yourself takes just a few simple steps. You do not need to be a mechanic or spend hours in the garage. This guide covers everything from choosing the correct bulb to finishing the job like a pro.
Whether you own a 2010 Outback or a brand-new 2024 model, the process is very similar. Subaru keeps the design fairly consistent across model years, which makes this repair beginner-friendly. In this article, we will walk you through each step with clear instructions and practical tips. By the end, you will feel confident tackling this job on your own. Let us get started.
Key Takeaways
- Right Bulb Matters: Most Subaru Outback models use a W5W or T10 bulb for the side marker. Always double-check your owner’s manual before buying.
- Basic Tools Are Enough: You only need a screwdriver, pliers, and the replacement bulb. No special equipment required.
- Safety First: Disconnect the battery or wait for the lights to cool before starting. Working on a hot bulb can cause burns.
- Avoid Common Mistakes: Over-tightening the socket, using the wrong bulb wattage, and skipping the seal check are the top errors people make.
- Know When to Seek Help: If the socket is corroded or the wiring looks damaged, a full car diagnostic at a shop may save you time and frustration.
- Prevent Future Issues: Regularly inspect your lights and check if leaving a car door open drain the battery or cause electrical drain that affects your lighting system.
📑 Table of Contents
- Why the Side Marker Bulb Matters on Your Subaru Outback
- What Bulb Do You Need for a Subaru Outback Side Marker
- Tools and Supplies You Will Need
- Step-by-Step Guide to Changing the Side Marker Bulb
- Common Mistakes to Avoid When Changing a Side Marker Bulb
- When to Seek Professional Help
- How to Prevent Side Marker Bulb Failures
- Final Thoughts
Why the Side Marker Bulb Matters on Your Subaru Outback
The side marker bulb sits on the front fender and sometimes the rear quarter panel of your Outback. Its job is to make your vehicle visible from the side, especially during low-light conditions. Many drivers overlook this small light until it burns out. That is a mistake. In most states, a working side marker is required by law. Driving without one can result in a failed inspection or even a fine during a traffic stop.
Beyond legality, the side marker helps other drivers gauge your position on the road. At dusk, dawn, or in fog, this little light adds an extra layer of visibility. It complements your headlights and tail lights. Think of it as a quiet safety guard that works around the clock. Replacing it promptly keeps you safe and keeps you on the right side of the law.
Side Marker vs. Turn Signal vs. Parking Light
It is easy to confuse the side marker with other lights on your Outback. The side marker is a small, steady-burning light that indicates the width of your vehicle. The turn signal flashes to show you are changing lanes or turning. The parking light illuminates when your headlights are on but you are parked. Each bulb serves a distinct purpose. Using the wrong type can cause flickering, poor visibility, or even electrical issues. Always verify which bulb you need before you start shopping.
What Bulb Do You Need for a Subaru Outback Side Marker
Picking the correct bulb is the first and most important step. Using the wrong bulb can damage the socket or create a poor connection. Most Subaru Outback models from the past two decades use a W5W bulb, also known as a T10 wedge-base bulb. However, some newer models or specific trims may use a slightly different variant. Always confirm with your owner’s manual or check the existing bulb before purchasing a replacement.
Common Bulb Types for the Outback
Here is a quick look at the bulbs commonly found in Subaru Outback side marker assemblies:
- W5W (T10): The most common side marker bulb. It is a small wedge-base bulb with 5 watts of power. Works in most older and mid-range Outback models.
- W2.1W: A slightly different wedge base. Found in some European-spec or newer model year Outbacks.
- LED W5W: A modern upgrade option. LED bulbs last longer and draw less power. They are a popular choice for owners who want a brighter, more efficient light.
Where to Buy Replacement Bulbs
You can find side marker bulbs at most auto parts stores, online retailers, or even some gas stations. Brands like Sylvania, Philips, and GE make reliable options. A standard W5W bulb costs between 3 and 10 dollars. LED versions run a bit more, usually 8 to 20 dollars. Buying a bulb with a warranty is a smart move. It gives you peace of mind if the bulb fails prematurely.
Tools and Supplies You Will Need
One of the best things about this repair is how little you need. You probably already have everything in your garage or junk drawer. Here is a simple list of what to gather before you begin.
- A replacement side marker bulb (W5W or T10, confirmed for your model year)
- A flathead or Phillips screwdriver, depending on your Outback’s trim
- A pair of needle-nose pliers for gripping the socket
- A clean microfiber cloth to handle the new bulb
- A small flashlight or phone light to see into the housing
- Dielectric grease (optional, but it helps prevent corrosion)
Having all your tools ready before you start saves time and frustration. There is nothing worse than getting halfway through the job and realizing you need a different screwdriver size. Take five minutes to set up your workspace. Clear a flat area near the front of your Outback. Make sure you have good lighting. A well-prepared setup makes the entire process smoother and faster.
Step-by-Step Guide to Changing the Side Marker Bulb
Now for the part you have been waiting for. Follow these steps carefully, and you will have a new side marker bulb shining in no time. Each step is designed to be simple and safe.
Step 1: Turn Off the Vehicle and Let the Lights Cool
Start by parking your Subaru Outback on a flat surface. Turn off the engine and remove the key from the ignition. Wait a few minutes for the bulb to cool down. Even though side marker bulbs do not get extremely hot, it is still smart to let them cool. Touching a warm bulb with bare hands can leave oils from your skin on the glass. Those oils create hot spots that shorten the bulb’s lifespan. If you accidentally touch the new bulb, wipe it clean with a microfiber cloth or rubbing alcohol before installing it.
Step 2: Locate the Side Marker Assembly
Walk to the side of your Outback where the bulb needs replacement. On the front, the side marker sits near the fender, just behind the front wheel well. On the rear, it is located near the quarter panel, close to the tail light assembly. Look for a small, rectangular or circular lens with a clear or amber cover. That is your side marker. You may need to look at an angle to see the mounting screws or clips that hold the housing in place.
Step 3: Remove the Housing or Access Panel
Most Subaru Outback side markers are held in place by one or two screws or plastic clips. Use your screwdriver to remove the screws. If your model uses clips, gently pry them out with a flat-head screwdriver or your fingers. Work slowly to avoid cracking the plastic. Once the screws or clips are removed, carefully pull the housing away from the body. Set the screws and clips somewhere safe. A small bowl or magnetic tray works great for keeping track of tiny parts.
Some Outback models have a removable access panel behind the front wheel liner. If your vehicle has this design, you may need to remove a plastic cover to reach the bulb from behind. Check your owner’s manual for guidance on your specific model year.
Step 4: Disconnect the Wiring Harness
With the housing exposed, you will see a wiring harness connected to the back of the bulb socket. This is a simple plug-and-play connector. Press the tab on the connector and gently pull it away from the socket. Do not yank on the wires themselves. Pulling on the wiring can damage the connections or cause a short circuit. If the connector feels stiff, wiggle it gently side to side while pulling. It should release with steady, gentle pressure.
Step 5: Remove the Old Bulb
The old bulb is held in the socket by a twist-and-lock or push-and-pull mechanism, depending on your model. For a twist-lock socket, grip the bulb gently and turn it counterclockwise about a quarter turn. It will release and you can pull it straight out. For a push-and-pull style, simply grip the bulb and pull it straight out. Use your needle-nose pliers if the bulb is hard to grip. Be careful not to press too hard on the glass.
Dispose of the old bulb properly. Check your local regulations for recycling halogen or LED bulbs. Many auto parts stores accept used bulbs for recycling. Do not toss them in your household trash without checking first.
Step 6: Install the New Bulb
Take your new bulb out of the packaging. Hold it by the plastic base or use a clean cloth. Avoid touching the glass part with your bare fingers. Oil from your skin is the number one enemy of a long-lasting bulb. If you do touch the glass, wipe it clean with rubbing alcohol before proceeding.
Insert the new bulb into the socket. For twist-lock sockets, push the bulb in and turn it clockwise until it clicks. For push-and-pull sockets, line up the tabs and push the bulb firmly into place until it seats. Give it a gentle tug to confirm it is secure. A loose bulb will flicker or fail to light up.
Step 7: Reconnect the Wiring Harness
Push the wiring harness connector back onto the bulb socket until you hear or feel it click into place. Make sure it is fully seated. A loose connection is one of the most common reasons a new bulb does not work. Give the connector a light tug to verify it is locked in.
Step 8: Reattach the Housing and Test the Light
Slide the housing back into position. Replace the screws or clips you removed earlier. Tighten the screws snugly, but do not overtighten. Over-tightening can crack the housing or strip the threads. Once the housing is secure, turn on your vehicle and activate the headlights or parking lights. Walk around to the side and confirm the new bulb is glowing brightly. If it does not light up, double-check the wiring connection and make sure the bulb is seated properly in the socket.
Common Mistakes to Avoid When Changing a Side Marker Bulb
Even simple repairs come with pitfalls. Knowing what to avoid saves you time, money, and headaches. Here are the most common mistakes people make when changing a side marker bulb on a Subaru Outback.
- Touching the new bulb with bare hands: Skin oils create hot spots on the halogen glass. This dramatically shortens the bulb’s life. Always handle bulbs by the base or with a cloth.
- Using the wrong bulb type: A bulb that is too large or too small will not fit the socket properly. It may cause poor contact, flickering, or even melt the housing. Always verify the bulb type before purchasing.
- Forgetting to check the socket for corrosion: Over time, moisture can cause corrosion on the socket pins. If the socket looks greenish or rough, clean it with electrical contact cleaner before installing the new bulb.
- Overtightening the housing screws: Plastic housings and clips crack easily. Tighten just enough to hold the housing securely. If the screw spins freely, you may have stripped the threads and need a repair.
- Skipping the seal check: The side marker housing has a rubber seal that keeps moisture out. If the seal is damaged or missing, water can enter and cause fogging or further bulb failure. Inspect the seal during every bulb replacement.
When to Seek Professional Help
Most side marker bulb changes are straightforward and do not require professional assistance. However, there are situations where it makes sense to visit a mechanic or dealership. If you notice that the socket is corroded beyond what contact cleaner can fix, a professional can replace the entire harness safely. If the wiring looks frayed or damaged, working on it yourself could lead to electrical problems. Additionally, if you have already replaced the bulb and the light still does not work, the issue may be deeper than a simple bulb swap.
In cases like these, getting a full car diagnostic can uncover hidden electrical issues. A technician can scan your Subaru’s system for error codes and pinpoint the exact cause. This saves you from replacing parts that are not actually the problem. Sometimes a burnt-out marker light is a symptom of a larger wiring or fuse issue that only a professional can diagnose properly.
Another reason to seek help is if your Outback is still under warranty. Some owners worry that DIY repairs void the warranty, though this is not always the case. If you are unsure, a quick visit to the dealership or a trusted mechanic can give you peace of mind. They can handle the repair quickly and document it properly for your warranty records.
How to Prevent Side Marker Bulb Failures
Once you have replaced your side marker bulb, you want it to last as long as possible. A few simple habits can extend the life of your bulbs and keep your Outback looking sharp.
- Inspect your bulbs regularly: Every few months, walk around your vehicle and check all lights. Catching a dimming bulb early prevents it from burning out completely at an inconvenient moment.
- Keep the housings clean: Dirt and debris buildup on the lens can reduce light output. A quick wipe with a damp cloth keeps the marker looking bright.
- Use dielectric grease: Applying a thin layer of dielectric grease to the socket pins prevents moisture and corrosion. This simple step can double or triple the life of your bulbs.
- Address moisture issues promptly: If you notice water inside the side marker housing, find and fix the source of the leak. Water damage is one of the leading causes of repeated bulb failures.
Taking care of your Subaru Outback’s lighting system is part of routine vehicle maintenance. It is one of those small tasks that makes a big difference in safety and appearance. A well-maintained vehicle not only looks better but also performs better on the road. Plus, staying on top of these small repairs prevents them from turning into expensive problems later on.
Final Thoughts
Changing a side marker bulb on your Subaru Outback is one of the easiest and most rewarding DIY repairs you can do. It requires no special skills, minimal tools, and less than 30 minutes of your time. You save money on labor costs, gain confidence in your ability to maintain your vehicle, and keep your Outback safe and road-legal. The key is preparation: have the right bulb, the right tools, and a little patience. Follow the steps outlined in this guide, avoid the common mistakes, and you will have a bright, working side marker in no time.
Remember, every small repair contributes to the overall health of your vehicle. A functioning side marker bulb may seem minor, but it keeps you visible and protected on the road. Take pride in doing it yourself. Your Subaru Outback will thank you with reliable performance and a clean, well-maintained appearance. Now grab that new bulb and get to work. Your Outback is ready for the road again.
Frequently Asked Questions
What type of bulb does a Subaru Outback side marker use?
Most Subaru Outback models use a W5W or T10 wedge-base bulb for the side marker. Some newer or European-spec models may use a W2.1W variant. Always check your owner’s manual or the existing bulb before purchasing a replacement to make sure you get the correct type.
How long does it take to change a side marker bulb on a Subaru Outback?
For most people, the entire process takes about 15 to 30 minutes. The time varies depending on how easily you can access the housing and how snug the clips or screws are. Having all your tools ready beforehand helps keep the job quick and painless.
Can I use an LED bulb for my Subaru Outback side marker?
Yes, you can use an LED W5W bulb as a replacement. LED bulbs are brighter, last longer, and draw less power than traditional halogen bulbs. Make sure the LED bulb has the correct wedge base (W5W or T10) to fit your Outback’s socket properly.
Is it safe to change a side marker bulb myself?
Absolutely. This is one of the simplest automotive repairs you can do at home. As long as you turn off the vehicle, let the bulb cool, and handle the new bulb carefully, there is very little risk involved. Just follow the steps in order and you will be fine.
Why does my side marker bulb keep burning out?
Repeated bulb failures are often caused by moisture entering the housing, a corroded socket, or using the wrong bulb type. Check the rubber seal for damage, clean the socket pins with electrical contact cleaner, and verify that the replacement bulb matches the original specifications.
Do I need to reset anything after changing the side marker bulb?
No, there is no reset required for a side marker bulb replacement. Once you reconnect the wiring harness and turn on the lights, the new bulb should illuminate immediately. If it does not, double-check the socket connection and make sure the bulb is fully seated in the base.