Is It OK to Just Replace Brake Pads and Save Money
Yes, you can replace just your brake pads in many cases and save real money. However, it depends on the condition of your brake rotors, brake calipers, and overall brake system health. This guide walks you through when solo pad replacement is safe, how much you can save, and the mistakes that could cost you more down the road.
This is a comprehensive guide about Is It OK to Just Replace Brake Pads?.
Key Takeaways
- Replacing only brake pads is often fine: If your rotors are still thick and smooth, you can skip them and save hundreds.
- Check rotor thickness first: Every vehicle has a minimum rotor thickness spec. Measure before deciding.
- Watch for warning signs: Squealing, grinding, or vibration means your brake pad wear has progressed further than expected.
- DIY brake pad swap saves even more: If you are handy, you can cut costs dramatically with basic tools.
- Never ignore the brake warning light: It exists for a reason, and skipping it can lead to expensive damage.
- Brake pad lifespan varies: Driving style, terrain, and vehicle weight all affect how long pads last.
- Quality matters: Cheap pads may save upfront but could wear faster and compromise safety.
[FEATURED_IMAGE_PLACEHOLDER]
Is It OK to Just Replace Brake Pads and Not the Rotors?
Here is the short answer: yes, it is often perfectly fine to replace just your brake pads. You do not always need to swap out your rotors at the same time. But there is a catch. It all comes down to what condition your rotors are in when you pull the wheels off.
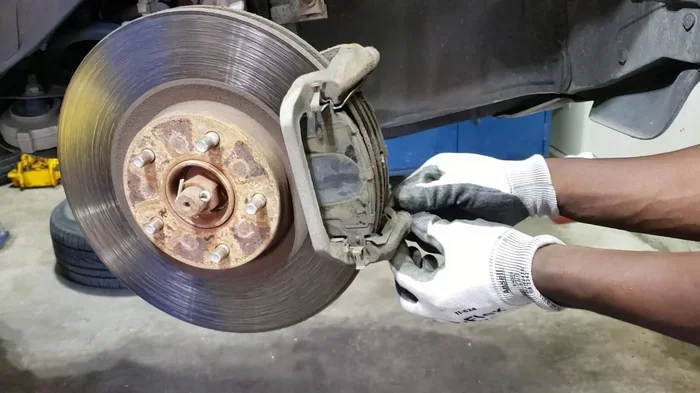
Think of it this way. Your brake pads are the sacrificial pieces that do the hard work every time you step on the pedal. They are designed to wear down over time. Your rotors, on the other hand, are the heavy metal discs that the pads clamp onto to slow your car. Rotors last much longer than pads, so replacing both every time is not always necessary.
Many car owners assume they need a full brake job every time pads wear out. That is simply not true. A full brake job can easily cost between 300 and 800 dollars per axle, depending on your vehicle. Replacing just the pads can cut that cost in half or more. The key is knowing when a partial replacement is safe and when it is not.
How Brake Pads and Rotors Work Together
Your brake system works through friction. When you press the brake pedal, the brake calipers squeeze the pads against the spinning rotors. This friction slows your wheels down and brings the car to a stop. Over thousands of miles, both the pads and rotors wear down from this constant friction.
Brake pads are made from composite materials like ceramic, semi-metallic, or organic compounds. Each type wears at a different rate. Ceramic pads tend to last longer and are gentler on rotors. Semi-metallic pads offer strong stopping power but can wear rotors faster. Organic pads are softer and quieter but do not last as long.
Rotors are typically made of cast iron or carbon-ceramic composites. They are much thicker and more durable than pads. A typical rotor can last two or three pad replacements if it stays in good shape. This is why replacing just the pads makes financial and mechanical sense in many cases.
When Is It Safe to Replace Only Brake Pads?
Not every situation allows for a pad-only replacement. There are clear conditions that must be met before you skip the rotors. Here is what you need to check.
Your Rotors Are Above Minimum Thickness
Every rotor has a minimum thickness stamped or etched onto it. This number is critical. If your rotor is still above that minimum, you can reuse it with new pads. A mechanic can measure this with a simple micrometer. It takes about two minutes per rotor.
If your rotors are worn but still above the minimum, resurfacing them is another option. Resurfacing machines shave a thin layer off the rotor face to make it smooth again. However, many modern vehicles use thin rotors that cannot be resurfaced safely. In those cases, you either replace just the pads or do a full rotor and pad replacement.
Your Rotors Have No Warping or Hot Spots
Warped rotors cause vibration in the brake pedal when you stop. You might feel a pulsing sensation through the pedal or the steering wheel. If your rotors are warped, new pads alone will not fix the problem. The warped surface will wear the new pads unevenly and reduce braking performance.
Hot spots are areas on the rotor that have hardened from extreme heat. They create uneven friction and can cause noise and poor braking. If your rotors have warping or hot spots, you need to replace them along with the pads.
Your Brake Pads Wore Evenly
If your old pads wore down evenly across the surface, that is a good sign. It means the calipers, slides, and hardware are working correctly. In this case, swapping in new pads without touching the rotors is usually fine.
If the pads wore unevenly, that signals a deeper problem. One side might be worn more than the other. You could see tapered wear or glazing on the pad surface. Uneven wear often points to stuck calipers, bad slide pins, or seized hardware. Fixing those issues is essential before installing new pads, or the new pads will wear out just as fast.
When You Need More Than Just New Brake Pads
Sometimes replacing only the pads is a bad idea. Here are the situations where you need to go further.
Your Rotors Are Below Minimum Thickness
This is the most common reason you cannot skip rotor replacement. If the rotor has worn down past the minimum safe thickness, it can crack or fail under heavy braking. Driving on thin rotors is a serious safety risk. In this case, you must replace the rotors along with the pads.
You Have Deep Grooves or Scoring on the Rotors
Deep grooves on the rotor surface mean the rotor is damaged. New pads pressed against a grooved rotor will not make full contact. This reduces stopping power and causes the new pads to wear unevenly. If you can see visible grooves or scoring, replace the rotors too.
Your Brake Calipers Are Sticking
A sticking caliper causes one pad to wear much faster than the other. If you notice that one pad is significantly more worn than the opposite one, the caliper is likely the problem. Replacing just the pads without fixing the caliper means you will burn through the new pads quickly.
Sticking calipers can also cause the car to pull to one side when braking. This is a clear sign that something is wrong beyond just the pads. Address the caliper issue first, then install fresh pads.
You Have Brake Fluid Leaks or Contamination
If your brake fluid is low or contaminated, it affects the entire system. Brake fluid absorbs moisture over time, which reduces its boiling point. Contaminated fluid can cause brake fade, especially during hard stops. If you notice a fluid leak or your pedal feels spongy, address the fluid system before just swapping pads.
How Much Money Can You Save by Replacing Only Brake Pads?
This is where replacing just the pads really shines. Let us look at real numbers so you can see the savings.
A typical brake pad set costs between 30 and 150 dollars for parts alone, depending on the vehicle and pad material. Professional installation adds 100 to 200 dollars per axle. So a pad-only replacement typically runs 130 to 350 dollars per axle.
Now compare that to a full brake job. Rotors add 100 to 300 dollars per rotor. A full axle with pads and rotors can cost 300 to 700 dollars or more. Multiply that by two axles, and a full brake job can reach 600 to 1,400 dollars.
By replacing only the pads when it is safe to do so, you could save anywhere from 300 to 800 dollars per service. Over the life of your vehicle, those savings add up significantly.
| Service | Parts Cost | Labor Cost | Total Per Axle |
|---|---|---|---|
| Pads Only | 30 – 150 | 100 – 200 | 130 – 350 |
| Pads + Rotors | 200 – 450 | 150 – 300 | 350 – 750 |
| Full Brake Job (Both Axles) | 400 – 900 | 300 – 600 | 700 – 1,500 |
Of course, these are average figures. Luxury vehicles and performance cars cost more. Economy cars tend to be cheaper. Always get a quote from a trusted shop before committing to any work.
Can You Do It Yourself? DIY Brake Pad Replacement Tips
If you enjoy working on your car, replacing brake pads yourself is one of the most satisfying DIY brake repair jobs you can do. It requires basic tools and about one to two hours per axle. You can save even more money by skipping the shop labor costs entirely.
Before you start, make sure you have the right tools. You will need a jack, jack stands, lug wrench, socket set, C-clamp or caliper tool, and a torque wrench. Safety should always come first. Never work under a car supported only by a jack. Use jack stands and secure the vehicle properly.
Also, if you have done your own windshield wiper replacement, you already have some of the confidence and skills needed for brake pad work. Both jobs involve removing bolts, handling clips, and working with friction-based components.
Step-by-Step: Replacing Brake Pads
- Loosen the lug nuts while the car is still on the ground. Do not remove them yet.
- Jack up the vehicle and secure it on jack stands.
- Remove the lug nuts and take the wheel off.
- Remove the caliper bolts and carefully lift the caliper off the rotor. Do not let it hang by the rubber hose.
- Slide the old pads out of the caliper bracket.
- Use the C-clamp to push the caliper piston back in if the new pads are thicker than the old ones.
- Install the new pads and reassemble the caliper.
- Put the wheel back on and torque the lug nuts to the manufacturer specification.
- Repeat on the other side of the same axle.
- Pump the brake pedal several times before starting the car to seat the pads properly.
After the job is done, take the car for a slow test drive in a safe area. Pump the brakes a few times before driving fast. New pads need a few stops to bed in properly. Avoid hard braking for the first 100 to 200 miles to allow the pads to seat correctly.
Pro Tips for a Clean Brake Pad Job
- Apply anti-seize lubricant to the pad contact points. This prevents squealing and makes future replacements easier.
- Clean the caliper slides with brake cleaner. Sticky slides cause uneven pad wear.
- Inspect the brake hardware and replace any worn clips or shims.
- Wear gloves and eye protection. Brake dust can be irritating and contains harmful particles.
- Check your pad thickness regularly. Most pads have a wear indicator tab that squeals when they are getting thin.
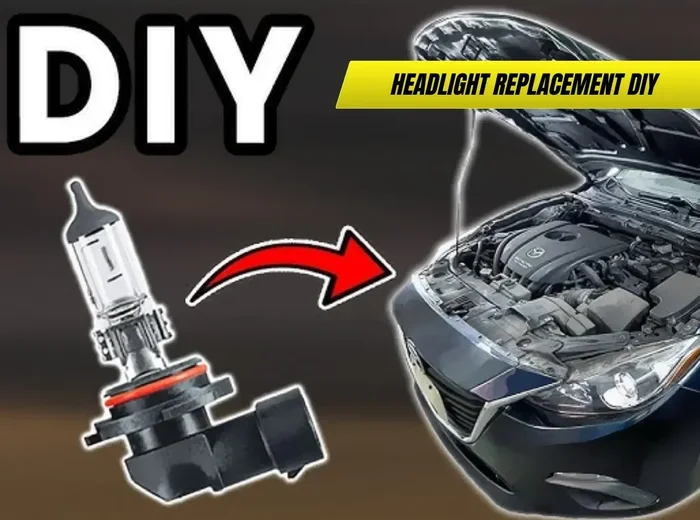
Just as you might replace a headlight bulb yourself to save on dealership costs, replacing brake pads at home is a smart way to keep maintenance costs low. Both are straightforward jobs that anyone can learn with a little patience.
How Long Do Brake Pads Last and When Should You Replace Them?
Brake pad lifespan varies widely depending on driving habits, vehicle weight, and pad material. Most pads last between 25,000 and 70,000 miles. Ceramic pads tend to last longer, while semi-metallic pads offer durability with strong stopping power.
Signs Your Brake Pads Need Replacement
- Squealing or squeaking noise when you apply the brakes. This is often the pad wear indicator making contact with the rotor.
- Grinding or growling sound. This means the pad material is completely worn and metal is grinding on metal. Stop driving immediately and get the pads replaced.
- Increased stopping distance. If your car takes longer to stop than it used to, your pads may be too thin.
- Brake pedal feels soft or spongy. This could indicate worn pads or a fluid issue in the brake system.
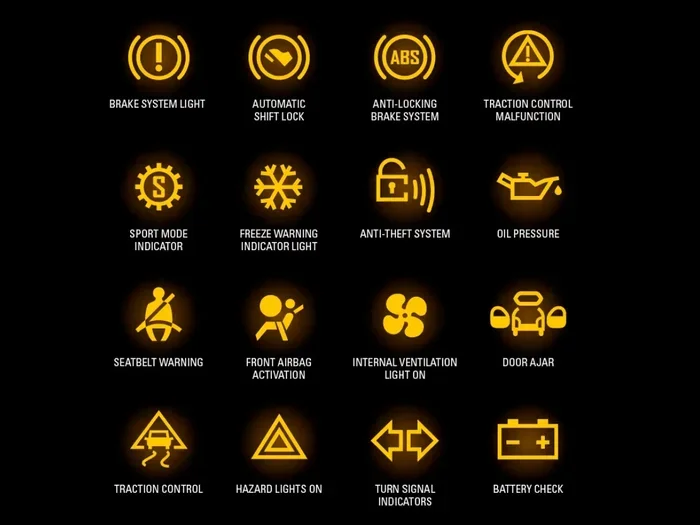
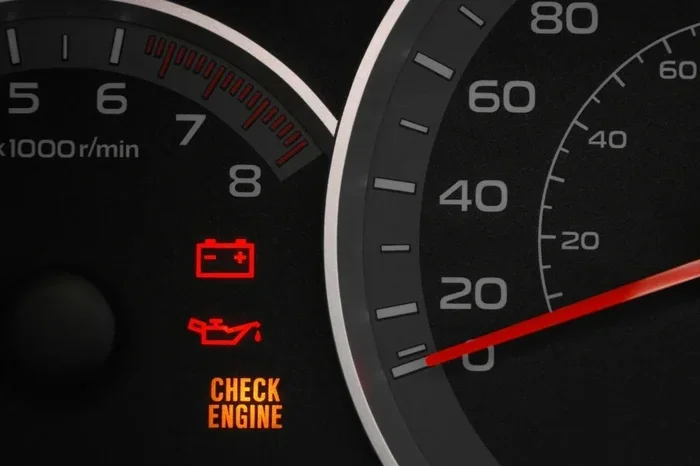
- Dashboard brake warning light. Many modern vehicles have pad wear sensors that trigger a warning light on the dash.
- Visible pad thickness. Look through the wheel spokes. If the pad material looks thin, less than a quarter inch, it is time for new pads.
The best practice is to have your brake inspection done every 12,000 to 15,000 miles. Most tire shops and quick-lube places will check your pad thickness for free. Catching wear early gives you more options and saves money.
Factors That Shorten Brake Pad Life
Not all driving is equal when it comes to pad wear. Here are the factors that cause pads to wear faster:
- Stop-and-go city driving. Constant braking generates more friction and heat.
- Heavy braking habits. Riding the brakes or slamming them wears pads quickly.
- Hilly or mountainous terrain. Descending steep grades requires frequent braking.
- Heavy loads. Towing or carrying extra weight increases the force on the pads.
- Performance driving. Aggressive driving and track use dramatically shorten pad life.
If you drive in any of these conditions, you may need to replace pads more often. Plan for it in your maintenance budget and check your pads at every oil change.
Common Mistakes People Make When Replacing Brake Pads
Even well-intentioned car owners make mistakes during brake pad replacement. Here are the most common ones and how to avoid them.
Forgetting to Replace the Hardware
Brake pad clips, shims, and abutment clips are cheap but essential. They ensure the pads slide smoothly and make even contact with the rotor. Reusing old, worn hardware causes noise, vibration, and uneven pad wear. Always install new hardware with every pad replacement.
Not Bedding In the New Pads Properly
Bedding in, also called break-in, is the process of transferring a thin layer of pad material onto the rotor surface. Skipping this step causes glazed pads, reduced stopping power, and noise. Follow the manufacturer bedding-in procedure, which usually involves several moderate stops from medium speed followed by a cool-down period.
Skipping the Brake Fluid Check
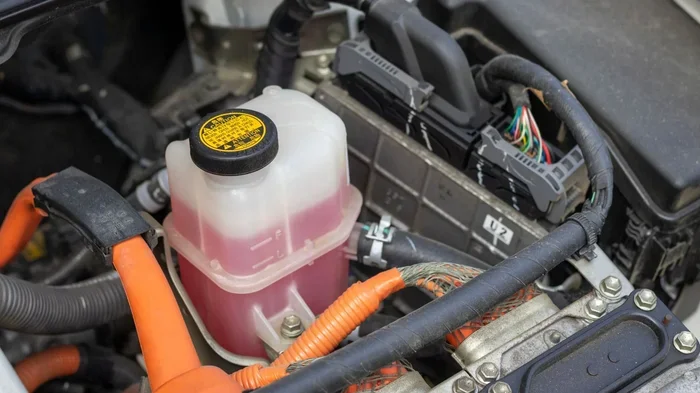
When you push the caliper piston back in to fit new pads, the fluid level in the reservoir rises. If the reservoir was already full, the excess fluid can overflow. Check the fluid level before starting and be ready to wipe up any spillage. Brake fluid is corrosive and can damage paint.
Not Torquing the Lug Nuts Properly
Loose lug nuts are dangerous. Over-tightening can warp the rotor. Always use a torque wrench and follow the manufacturer specification. The correct pattern is also important, usually a star or criss-cross pattern to ensure even pressure.
Ignoring Unusual Noises After Replacement
A little squeak for the first few hundred miles is normal. But persistent grinding, clicking, or grinding after the break-in period means something is wrong. It could be a missing shim, a loose clip, or a caliper issue. Do not ignore it. Get it checked before it becomes a bigger problem.
Expert Insight: What Mechanics Wish Every Driver Knew
Experienced mechanics consistently say that most drivers wait too long to address brake issues. A small pad problem becomes a rotor problem becomes a caliper problem. Each step up the chain costs more money and increases safety risk.
The best advice is simple: do not ignore the warning signs. If you hear a noise, feel a vibration, or notice reduced braking performance, get it checked right away. Early intervention is always cheaper and safer. A small pad replacement today can prevent a rotor and caliper replacement tomorrow.
Mechanics also recommend choosing quality pads over the cheapest option. Premium pads may cost a bit more upfront, but they typically last longer, perform better, and are gentler on rotors. Ceramic pads, in particular, offer excellent longevity and quiet operation for most daily drivers.
Finally, do not let anyone pressure you into replacing parts you do not need. A trustworthy shop will show you the worn pads and explain exactly what is necessary. If a shop recommends replacing rotors without showing you the measurements, ask them to explain why. You have every right to understand what work is being done on your car.
Conclusion
Is it OK to just replace brake pads? In most cases, the answer is yes. As long as your rotors are above minimum thickness, free of warping, and in good condition, a pad-only replacement is a safe and smart way to save money. You can cut brake maintenance costs significantly and keep your car stopping reliably.
The key is knowing when a partial replacement is appropriate and when a full brake job is needed. Check your rotor thickness, inspect for uneven wear, and listen to what your brakes are telling you. With regular inspections and timely pad replacements, you can keep your brake system in excellent shape for years to come.
Whether you do the work yourself or visit a shop, the principles remain the same. Use quality parts, follow proper procedures, and never compromise on safety. Your brakes are the most important safety system in your vehicle. Treat them well, and they will keep you stopping strong mile after mile.
Frequently Asked Questions
Can I replace just the front brake pads and not the rear?
Yes, you can replace just the front or just the rear pads if only one set is worn. Front pads typically wear faster because they handle most of the braking force. However, it is a good idea to have both axles inspected to make sure the other set is still safe.
How do I know if my rotors need replacing along with the pads?
A mechanic can measure rotor thickness with a micrometer. If the rotor is below the minimum spec, warped, or has deep grooves, it needs replacement. A visual inspection and test drive can also reveal rotor issues like vibration or pulsation in the brake pedal.
Is it safe to drive with worn brake pads?
No, driving with worn brake pads is unsafe. Thin pads reduce stopping power and can damage the rotors further. Once the pad material is worn down to the metal backing plate, you risk rotor damage and complete brake failure. Replace pads as soon as they show signs of wear.
How long does a brake pad replacement take?
A professional shop typically takes 30 to 60 minutes per axle. If you are doing it yourself, plan for one to two hours per axle, especially if you are new to the job. The time includes removing the wheel, sliding out the old pads, compressing the caliper piston, and installing the new pads.
What happens if I replace brake pads but not the rotors when I should have?
If the rotors are worn below spec or damaged, new pads will not seat properly. You may experience noise, vibration, reduced braking performance, and uneven pad wear. In worst cases, the rotor can crack or fail under hard braking, creating a serious safety hazard.
Can I replace brake pads myself if I have no car repair experience?
Brake pad replacement is one of the more accessible DIY car repairs. However, if you have never worked on brakes before, consider having a mechanic do the first replacement while you observe. This gives you hands-on knowledge and confidence for future jobs. Always follow the vehicle-specific service manual for torque specs and procedures.