How Do You Reset the Maintenance Light on a Toyota 4Runner
Resetting the maintenance light on a Toyota 4Runner is a simple process you can do at home in minutes. Whether you just completed an oil change or a major service, this guide walks you through the exact steps for your model year. You will learn the reset procedure, common mistakes to avoid, and when to seek professional help.
That little orange light on your dashboard has been staring at you for days. It says “Maintenance Required,” and it is getting on your nerves. You have already changed your oil and taken care of your scheduled service, so why is it still there? The good news is that resetting the maintenance light on a Toyota 4Runner is something you can handle yourself without visiting a mechanic or dealership.
In this guide, we walk you through every step needed to turn off that annoying reminder. We cover different model years, common troubleshooting tips, and the mistakes many people make during the process. By the end, you will know exactly how to clear the maintenance light and keep your dashboard clean.
The Toyota 4Runner is one of the most reliable SUVs on the road. But even the best vehicles need regular upkeep. The maintenance reminder system helps you stay on track with oil changes, tire rotations, and other essential services. Once you complete the work, resetting the light is the final step. Let us get into it.
Key Takeaways
- Easy DIY Process: Resetting the maintenance light on a Toyota 4Runner requires just a few button presses on your dashboard.
- Model Year Matters: The exact steps vary depending on your 4Runner’s model year and trim level.
- Oil Change First: Always complete your oil change or scheduled service before attempting the reset.
- Common Mistakes Exist: Holding buttons too long or skipping steps can cause issues with the maintenance reminder system.
- Multiple Methods Available: There are several ways to reset the light, including the trip meter method and the steering wheel controls.
- Persistent Light? If the light stays on after resetting, there may be an underlying issue that needs attention.
📑 Table of Contents
Understanding the Maintenance Light on Your Toyota 4Runner
Before you reset anything, it helps to understand what the light actually means. The maintenance required indicator is part of your vehicle’s onboard diagnostics. It is not a warning about a broken part. Instead, it is a friendly reminder that your car is due for scheduled service.
What Triggers the Maintenance Light?
The light typically activates based on mileage intervals. Most Toyota 4Runner models are programmed to remind you every 5,000 miles. However, some older models use a 3,000-mile interval. The system tracks your odometer reading and triggers the light when you reach the preset distance since your last reset.
Several factors can also influence when the light comes on:
- Oil life monitor: Modern 4Runners use an algorithm that considers driving conditions, temperature, and engine load.
- Time-based reminders: Even if you do not drive many miles, the system may trigger the light after a certain period.
- Other service items: Some maintenance tasks like fluid checks or filter replacements can also activate the reminder.
Is It Safe to Drive With the Maintenance Light On?
Yes, it is generally safe. The maintenance light is not an emergency indicator like the check engine light or the oil pressure warning. However, ignoring it for too long means you risk missing important service intervals. Over time, skipping oil changes or inspections can lead to engine wear and reduced performance.
If you are planning a long road trip, it is a good idea to address the light before you go. You can learn more about driving with maintenance lights on in our article Can I Drive With a Maintenance Required Light On in a Toyota.
How to Reset the Maintenance Light on a Toyota 4Runner
Now for the part you have been waiting for. The reset process is straightforward, but the exact steps depend on your model year. Below, we cover the most common methods used across different generations of the Toyota 4Runner.
Method 1: The Trip Meter Reset Method
This is the most widely used approach and works on many 4Runner models from the 2000s through the 2020s. Here is how to do it:
- Turn the ignition to the “ON” position. Do not start the engine. Just press the start button or turn the key to the accessory position.
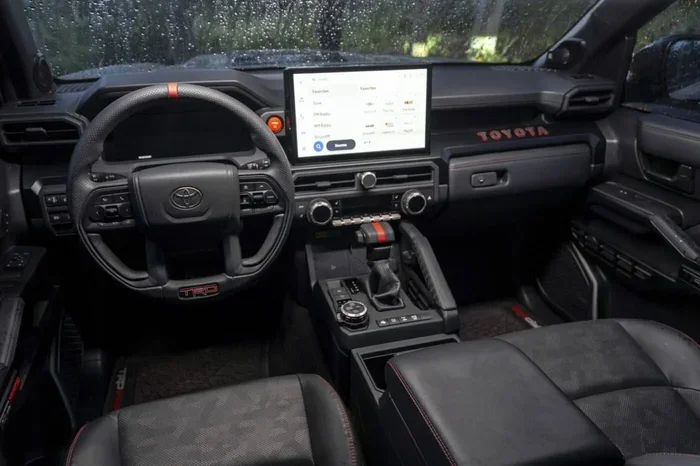
- Locate the trip meter reset button. This is usually found on the dashboard cluster, near the speedometer or on the steering wheel controls.
- Press and hold the trip meter reset stalk or button. Hold it down firmly.
- While holding the button, turn the ignition to the “OFF” position and then back to “ON.” Keep holding the button during this transition.
- Continue holding for about 3 to 5 seconds. You should see the maintenance light flicker or go out.
- Release the button. The light should now be off, and the service interval counter has been reset.
This method works because it tells the vehicle’s computer that you have completed the scheduled service. The oil life monitor resets along with the maintenance light, giving you a fresh start for the next 5,000 miles.
Method 2: Using the Steering Wheel Controls
Newer 4Runner models, especially those from 2010 and later, may use steering wheel-mounted controls instead of a trip meter stalk. Here is the process:
- Press the “ODO/TRIP” button on the steering wheel. This cycles through the display options on your instrument cluster.
- Find the maintenance menu. Scroll through the options until you see the service reminder or maintenance interval display.
- Press and hold the “RESET” button. Hold it for several seconds until the display resets to zero.
- Turn the ignition off and back on. Check that the maintenance light on the dashboard has turned off.
If you own a more recent model, check your owner’s manual for the exact button layout. The steering wheel controls can vary slightly between trims and model years.
Method 3: Using a Diagnostic Tool
For stubborn lights or models where the manual method does not work, a diagnostic scanner offers a reliable alternative. You can purchase an OBD-II scanner for under $50 at most auto parts stores. Here is what to do:
- Plug the scanner into the OBD-II port. This port is usually located under the dashboard on the driver’s side.
- Turn the ignition to the “ON” position.
- Follow the scanner’s menu to access the maintenance system.
- Select “Clear Maintenance Reminder” or a similar option.
- Confirm the reset. The scanner will clear the code and turn off the light.
This method is especially useful if the light keeps coming back after a reset. A diagnostic tool can also reveal any hidden fault codes that might be causing the issue.
Common Mistakes When Resetting the Maintenance Light
Resetting the maintenance light sounds simple, but small mistakes can cause frustration. Here are the most common errors people make and how to avoid them.
Releasing the Button Too Early
One of the biggest mistakes is letting go of the reset button too soon. You need to hold it for a full 3 to 5 seconds while cycling the ignition. If you release it early, the system may not register the command. Try again and be patient. Hold that button down firmly.
Not Completing the Service First
Some people reset the light before actually doing the oil change or scheduled service. This defeats the purpose of the reminder system. Always complete the maintenance task first, then reset the light. This way, the service interval starts fresh and you get an accurate reminder for the next visit.
Confusing the Maintenance Light With the Check Engine Light
The maintenance light and the check engine light are completely different. The maintenance light is a scheduled reminder. The check engine light indicates an actual problem with the engine or emissions system. If both lights are on at the same time, you should address the check engine light first. You can read more about this in our guide Can I Drive My Toyota Camry With The Check Engine Light On.
Ignoring a Persistent Light
What if you follow all the steps correctly and the light still does not go off? Do not panic. A persistent maintenance light can indicate a few things:
- The oil life monitor may need a manual reset separate from the maintenance light.
- There could be a loose gas cap or sensor issue triggering a secondary warning.
- The vehicle’s computer may need a full reboot by disconnecting the battery briefly.
In rare cases, a faulty dashboard bulb or a wiring issue could be the culprit. If none of the standard fixes work, it is time to visit a qualified mechanic or a Toyota dealership.
Maintenance Schedule for the Toyota 4Runner
Knowing how to reset the light is only half the battle. Staying on top of your Toyota 4Runner maintenance schedule is what keeps your vehicle running strong for years. Here is a quick overview of the recommended service intervals.
| Service Item | Interval | Notes |
|---|---|---|
| Oil Change | Every 5,000 miles | Use synthetic or conventional oil as specified in the owner’s manual |
| Tire Rotation | Every 5,000–7,500 miles | Often done at the same time as an oil change |
| Air Filter Replacement | Every 15,000–30,000 miles | More frequent in dusty or off-road conditions |
| Cabin Air Filter | Every 15,000–30,000 miles | Helps maintain clean air inside the cabin |
| Brake Fluid Flush | Every 30,000 miles | Prevents moisture buildup in the brake system |
| Transmission Fluid | Every 60,000 miles | Check the owner’s manual for your specific model year |
| Coolant Flush | Every 60,000 miles | Important for preventing engine overheating |
| Spark Plugs | Every 30,000–60,000 miles | Depends on spark plug type and driving conditions |
Sticking to this maintenance schedule ensures your 4Runner stays reliable and retains its value. Every time you complete a service, reset the maintenance light so your records stay accurate.
Quick Tips for a Smooth Reset Process
Here are some practical tips that make the reset process easier and help you avoid common headaches:
- Have your owner’s manual nearby. Different model years have slightly different procedures. The manual gives you the exact steps for your specific vehicle.
- Make sure the vehicle is in Park. For automatic transmissions, always set the gear selector to Park before working with dashboard controls.
- Check the battery voltage. A weak battery can interfere with the reset process. If your battery is old, consider replacing it first.
- Take a photo of the dashboard display. This helps you track what you have already tried and what the screen shows before and after the reset.
- Do not rush. The process takes about 60 seconds. Rushing leads to mistakes. Be patient and follow each step carefully.
When to Seek Professional Help
Most of the time, resetting the maintenance light is a quick DIY job. But there are situations where professional help makes sense. If the light keeps coming back after multiple reset attempts, there may be an underlying issue with the vehicle’s computer system. Similarly, if the maintenance light is accompanied by other warning lights like the check engine light or the oil pressure gauge, do not ignore it.
A Toyota dealership or certified mechanic has access to professional-grade diagnostic tools that can read and clear codes more thoroughly than a basic OBD-II scanner. They can also inspect your vehicle for any hidden problems that might be causing the light to persist.
For those wondering about other dashboard lights and what they mean, understanding the difference between various warning indicators is important. The maintenance light is just one piece of the puzzle. If you are curious about other lights, you can explore our article Does The Maintenance Light Stay On for more details.
Conclusion
Resetting the maintenance light on a Toyota 4Runner is a quick and satisfying task that anyone can do at home. Whether you use the trip meter method, the steering wheel controls, or a diagnostic scanner, the process is straightforward once you know the steps. The key is to be patient, follow the correct sequence for your model year, and always complete the actual maintenance before resetting the light.
Keeping your Toyota 4Runner on a regular service schedule not only clears that annoying dashboard light but also protects your investment. A well-maintained 4Runner can easily last 300,000 miles or more with proper care. So take a few minutes after each service, reset the reminder, and enjoy the peace of mind that comes with knowing your vehicle is in top shape.
Remember, if the light persists or you notice other issues, do not hesitate to consult a professional. Your 4Runner is a tough, reliable machine, and with the right maintenance routine, it will keep serving you well for years to come.
Frequently Asked Questions
Can I reset the maintenance light without starting the engine?
Yes, you can. The reset process only requires you to turn the ignition to the “ON” position, not start the engine. Just press the start button once or turn the key to the accessory position and follow the reset steps outlined in this guide.
Why does my maintenance light keep coming back after I reset it?
If the light returns shortly after resetting, it usually means the underlying service has not been completed yet. The vehicle’s computer tracks actual mileage and driving conditions. If you reset the light prematurely, the system will trigger it again once it detects the service interval has been reached.
What is the difference between the maintenance light and the check engine light?
The maintenance light is a scheduled reminder for routine service like oil changes and inspections. The check engine light indicates an actual mechanical or electrical problem. If the check engine light is on, you should address it promptly rather than just resetting it.
How often should I reset the maintenance light on my Toyota 4Runner?
You should reset the light every time you complete a scheduled service, typically every 5,000 miles. This keeps the maintenance reminder system accurate and ensures you do not miss any important service intervals.
Will resetting the maintenance light clear any error codes?
No, the maintenance light reset only clears the service reminder. It does not clear diagnostic trouble codes. If you have stored error codes in the vehicle’s computer, you will need a diagnostic scanner to clear those separately.
Do I need special tools to reset the maintenance light on a 4Runner?
No special tools are needed for most model years. You only need access to the dashboard controls or steering wheel buttons. For older models or stubborn lights, a basic OBD-II scanner can be helpful but is not required.