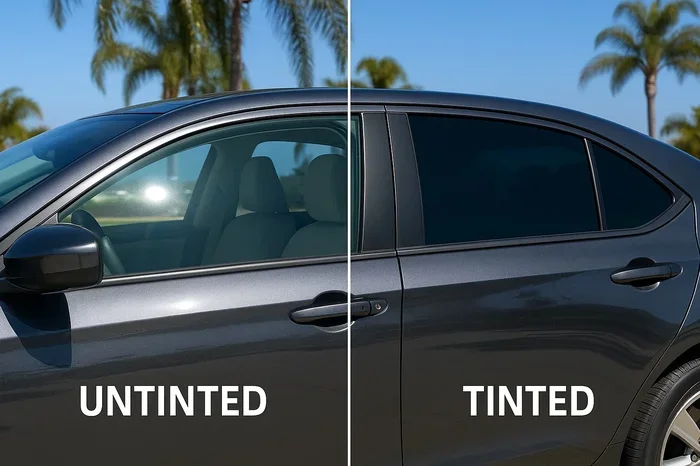
Common Car Window Tinting Mistakes Every Driver Should Avoid
Car window tinting mistakes can cost you money, time, and even lead to legal trouble. This guide covers the most common errors drivers make when tinting their windows and how to avoid them. Whether you DIY or hire a pro, these tips will help you get flawless results.
Car window tinting is one of the best upgrades you can make to your vehicle. It looks great, reduces glare, and blocks harmful UV rays. But here is the thing — many drivers make mistakes that turn a simple upgrade into a headache. Whether you are a first-timer or have tinted windows before, knowing what to avoid saves you time, money, and frustration.
In this guide, we break down the most common car window tinting mistakes every driver should avoid. We will walk you through each error step by step and give you practical tips to get it right the first time. No fluff, no filler — just honest advice from people who know window tinting inside and out.
Key Takeaways
- Wrong Tint Shade: Choosing the wrong darkness level can lead to tickets and poor visibility.
- Skipping Local Laws: Every state has different legal tint limits you must follow.
- DIY Without Practice: Bubble formation and peeling are common when you skip professional help.
- Ignoring Curing Time: Rushing the drying process ruins adhesion and causes bubbling.
- Cheap Film Quality: Low-quality window tint film fades, peels, and offers poor UV protection.
- Overlooking Heat Rejection: The right tint keeps your car cooler and protects your interior.
- Missing Edge Prep: Dirty or wet windows cause adhesive residue and premature tint failure.
📑 Table of Contents
- Choosing the Wrong Tint Shade
- Ignoring Local Tint Laws and Regulations
- Skipping Professional Installation
- Using Low-Quality Tint Film
- Neglecting Window Preparation
- Rushing the Curing Process
- Overlooking Heat Rejection and UV Protection
- Tinting Over Existing Tint
- Common Mistakes During the Tinting Process
- Expert Insights on Avoiding Tinting Mistakes
- Quick Tips for Perfect Window Tinting
- Conclusion
Choosing the Wrong Tint Shade
One of the biggest car window tinting mistakes is picking the wrong shade. Tint films come in a range of darkness levels, measured in percentage. The lower the number, the darker the tint. A 5% tint is very dark, while a 70% tint is barely noticeable.
Why Shade Matters More Than You Think
Your tint shade affects two things: looks and legality. Pick a shade that is too dark, and you might face a fine. Pick one that is too light, and you will not get the heat rejection or privacy you want.
Here is what most drivers do not realize. The front side windows usually have strict legal limits. Many states only allow a 35% tint shade on the driver and passenger windows. The rear windows and rear windshield often allow darker shades.
- 5% to 20%: Very dark. Great for privacy. Often illegal on front windows.
- 25% to 35%: Medium tint. Popular choice for balance and style.
- 50% to 70%: Light tint. Good for glare reduction without darkening too much.
Always check your local legal tint limits before buying film. A quick online search for your state or city rules will save you from a costly ticket.
Ignoring Local Tint Laws and Regulations
Every state, and sometimes every city, has its own rules about window tinting. These laws exist for safety reasons. Tint that is too dark reduces visibility, especially at night. Ignoring these rules is one of the most common car window tinting mistakes drivers make.
What Happens If You Break Tint Laws?
The consequences are not just a warning. Depending on where you live, you could face fines ranging from $50 to $500 or more. In some states, you may be required to remove the tint entirely. That means paying for removal and reapplication — a double hit to your wallet.
Here are a few things to keep in mind:
- Tint laws vary by state. What is legal in Arizona may be illegal in New York.
- Medical exemptions exist in some states for drivers who need extra UV protection.
- Law enforcement can pull you over if your tint appears too dark.
- Stickers or certifications may be required to prove your tint is legal.
Do your homework before you tint. Contact your local DMV or check your state’s department of transportation website. Knowing the legal tint limits keeps you safe and keeps your wallet full.
Skipping Professional Installation
DIY window tinting kits are tempting. They are cheap, and there are plenty of YouTube tutorials. But here is the truth — professional installation makes a huge difference. One of the most frequent car window tinting mistakes is trying to save a few dollars and doing it yourself without experience.
The Risks of DIY Tinting
When you install tint yourself, small mistakes lead to big problems. Dust gets trapped under the film. The film wrinkles. Edges peel within weeks. These issues do not just look bad — they affect how well the tint works.
Consider these points before grabbing a DIY kit:
- Bubble Formation: Air bubbles are almost impossible to remove once the film sets.
- Uneven Cuts: Improperly cut film leaves gaps or overlaps that look messy.
- Adhesive Residue: Cheap DIY adhesives leave sticky residue on your windows.
- Wasted Money: Removing bad DIY tint and starting over costs more than professional work.
Professional installers have the right tools, clean environments, and experience. They know how to handle curves, edges, and rear windshields with embedded heating elements. The result is a smooth, bubble-free finish that lasts for years.
Using Low-Quality Tint Film
Not all window tint film is created equal. Cheap film fades, bubbles, and peels fast. Investing in quality film is one of the smartest decisions you can make. Low-quality tint is another top car window tinting mistake that drivers regret.
What to Look for in Quality Tint
When shopping for tint, look for these features:
- UV Protection: Good tint blocks up to 99% of harmful UV rays. This protects your skin and your car’s interior.
- Heat Rejection: Quality film keeps your car cooler in summer. It reduces the need for constant AC use.
- Scratch Resistance: Durable film resists scratches from daily use and cleaning.
- Warranty: Reputable brands offer tint warranty coverage against bubbling, peeling, and fading.
A side-by-side comparison makes the difference clear:
| Feature | Cheap Film | Quality Film |
|---|---|---|
| UV Protection | Poor (50-70%) | Excellent (99%) |
| Heat Rejection | Low | High |
| Durability | 1-2 years | 5-10 years |
| Bubble Risk | High | Low |
| Warranty | None or limited | Full coverage |
Spending a bit more on quality window tint film pays off in the long run. Your car stays cooler, your interior lasts longer, and you avoid the hassle of early tint failure.
Neglecting Window Preparation
This step is where many installers go wrong, even professionals sometimes rush it. Proper window preparation is critical for tint adhesion. Skipping this step leads to peeling, bubbling, and adhesive residue.
How to Prep Windows the Right Way
Before any film goes on, the window must be perfectly clean. Here is a simple process to follow:
- Clean thoroughly: Use a glass cleaner with no ammonia. Ammonia can interfere with the adhesive.
- Shave the edges: Any old adhesive or paint residue must be removed. A razor blade works carefully.
- Dry completely: No moisture should remain on the glass. Even a tiny drop causes bubbles.
- Avoid touching the glass: Oils from your fingers create spots where the film will not stick.
Think of it like painting a wall. If the surface is dirty or wet, the paint will not hold. The same rule applies to window tint film. Taking the time to prep properly is one of the easiest ways to avoid car window tinting mistakes.
Rushing the Curing Process
Tint needs time to cure. This is the process where the adhesive fully bonds to the glass. Many drivers roll down their windows too soon or drive through car washes before the tint is ready. This is a sneaky mistake that causes peeling and edge lifting.
How Long Should You Wait?
The curing time depends on the type of tint and the weather. Here are general guidelines:
- Standard tint: Wait at least 3 to 4 days before rolling down windows.
- Ceramic or carbon tint: These need 5 to 7 days minimum.
- Winter or humid conditions: Curing takes longer. Give it an extra few days.
- Car washes: Avoid automatic car washes for at least one week.
During the curing period, you might notice some haziness or small water pockets. This is normal. The film is still bonding to the glass. Once it fully cures, the clarity improves significantly.
Patience is your best friend here. Rushing the curing process is one of those car window tinting mistakes that can ruin an otherwise perfect job.
Overlooking Heat Rejection and UV Protection
Tint is not just about looks. A big part of why people tint their windows is for heat rejection and UV protection. Choosing the wrong type of film means missing out on these benefits entirely.
Why UV and Heat Protection Matter
Your car’s interior takes a beating from the sun. Dashboards crack, seats fade, and your skin absorbs harmful UV rays even while driving. Quality tint with strong heat rejection keeps your car cooler and your interior in better shape.
Here are the benefits you should expect from good tint:
- Up to 99% UV blockage: Protects your skin and reduces skin aging while driving.
- Significant heat reduction: Some films reject up to 65% of solar heat.
- Glare reduction: Makes driving safer and more comfortable on bright days.
- Interior protection: Your seats, dashboard, and steering wheel last longer.
If your tint does not offer these features, you are basically just putting a dark film on your window. That defeats the purpose. Always ask your installer about the heat rejection and UV protection ratings of the film they use.
Tinting Over Existing Tint
Some drivers want darker tint and think they can just lay new film over old tint. This is one of the most problematic car window tinting mistakes. It causes bubbling, peeling, and a messy look that is hard to fix.
Old tint traps heat and moisture. When you add new film on top, the adhesive does not bond properly. Over time, you will see bubbles forming between the layers. The result looks terrible and needs complete removal to fix.
If you want to change your tint shade, the right approach is simple:
- Have the old tint completely removed.
- Clean the windows thoroughly.
- Apply new film to clean, bare glass.
Yes, this costs a bit more upfront. But it saves you from the frustration of dealing with bubbling and peeling tint down the road.
Common Mistakes During the Tinting Process
Even with the right film and a good installer, things can go wrong during the actual tinting process. Here are a few car window tinting mistakes that happen in the application phase and how to prevent them.
Cutting the Film Too Small
The film needs to overlap the window edges slightly. Cutting it too small leaves gaps at the sides. These gaps collect dirt and moisture, which leads to peeling.
Using the Wrong Squeegee Technique
Applying too much pressure with the squeegee can stretch the film. This causes wrinkles and thin spots that weaken the tint. A gentle but firm motion works best.
Not Using Enough Squeegee Solution
The application solution helps the film slide into place. Too little solution means the film sticks before it is properly positioned. This leads to misalignment and bubbles.
These small details matter a lot. A smooth, professional finish comes down to the little things done right.
Expert Insights on Avoiding Tinting Mistakes
We spoke with professional installers about the mistakes they see most often. Here is what they had to say:
“The number one mistake I see is people choosing tint based on looks alone,” says Jake Morales, a certified window tint installer with over 12 years of experience. “They pick the darkest shade without checking the legal limits or understanding what the film actually does for heat rejection and UV protection.”
“Another big one is skipping the curing period,” he adds. “I see customers roll down their windows the next day. That single action can peel the edges and ruin the entire job.”
His advice? “Invest in quality film, hire a pro, and be patient. Your tint should last 5 to 10 years if you do it right.”
Quick Tips for Perfect Window Tinting
Want to make sure your tint job turns out great? Follow these quick tips:
- Always check your state’s legal tint limits before purchasing.
- Choose a reputable installer with good reviews and a work guarantee.
- Ask about the tint warranty before signing any agreement.
- Wait at least 3 to 7 days before rolling down windows.
- Use ammonia-free cleaners on your tinted windows.
- Avoid parking in direct sunlight for the first 48 hours.
- Clean your tinted windows with a soft microfiber cloth only.
These simple steps go a long way in protecting your investment and keeping your tint looking great for years.
Conclusion
Car window tinting is a fantastic upgrade when done right. It protects your skin, keeps your car cooler, and gives your vehicle a sleek look. But making even one of these car window tinting mistakes can undo all the benefits.
The key is preparation. Know your local laws. Choose quality film. Hire a professional or learn the proper technique if you DIY. Prep your windows correctly. And most importantly, be patient during the curing process.
Avoid these common errors, and your tint will look amazing for years to come. Take your time, do your research, and enjoy the results. Your car — and your driving experience — will thank you.
Frequently Asked Questions
Can I tint my car windows myself?
Yes, but DIY tinting comes with risks. Bubble formation, peeling, and uneven cuts are common without experience. Professional installation gives better results and a longer-lasting finish.
How long does car window tint take to cure?
Standard tint usually cures in 3 to 4 days. Ceramic or carbon tint may take 5 to 7 days. Weather conditions also affect curing time, so always wait at least a week before rolling down windows or washing your car.
What is the legal tint limit for front windows?
Most states allow a 35% tint shade on front side windows. However, laws vary widely. Always check your local regulations before tinting to avoid fines or removal orders.
Does tinting reduce visibility at night?
Darker tints can reduce night visibility. This is why many states have stricter limits for front windows. Choosing a medium shade like 35% balances style and safety for nighttime driving.
How much does professional car window tinting cost?
Costs vary based on the number of windows, film type, and location. A full car tint typically ranges from $200 to $500. Ceramic tint costs more but offers superior heat rejection and UV protection.
Can I remove old tint and apply new tint at the same time?
Yes, most installers will remove old tint and apply new film in one visit. This ensures proper adhesion and avoids the bubbling issues that come from layering new tint over old film.
=== CONCLUSION ===
Car window tinting mistakes are easy to avoid when you know what to look for. From choosing the right shade to respecting curing time, every step matters. The best approach is simple: do your research, invest in quality materials, and work with a trusted professional. Your tinted windows will look great, last longer, and give you the comfort and protection you paid for. Start your tinting project the right way — your car deserves it.