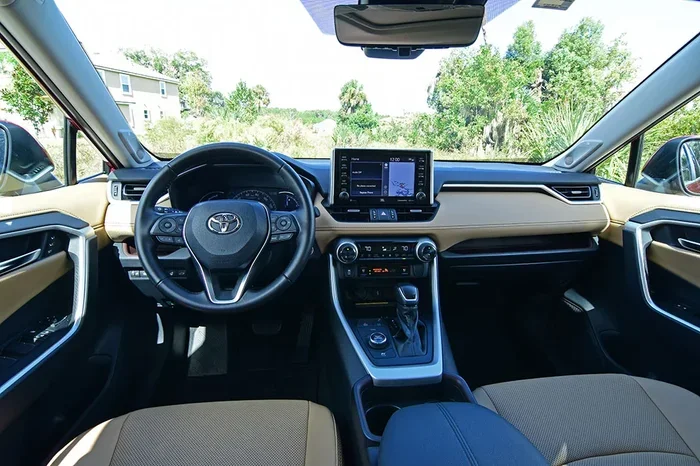
How to Turn Off the Check Engine Light on a 2013 Toyota RAV4
The check engine light on a 2013 Toyota RAV4 can feel scary, but it often has a simple fix. Whether it is a loose gas cap, a faulty sensor, or a deeper engine issue, this guide walks you through every step to diagnose and turn off the check engine light on your RAV4. You will learn how to use an OBD-II scanner, reset the light yourself, and know when a trip to the mechanic is necessary.
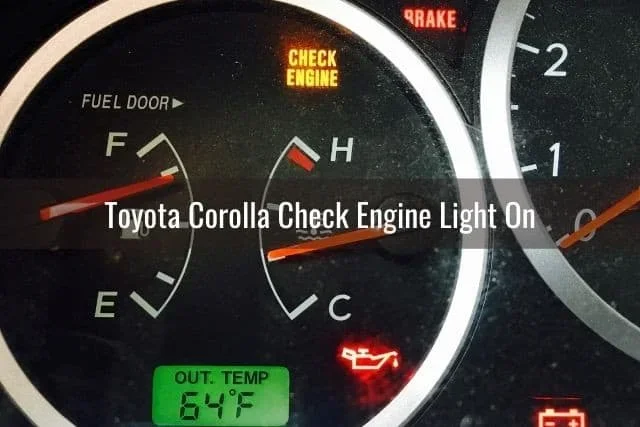
That little orange engine symbol on your dashboard can really spike your anxiety. You are driving your 2013 Toyota RAV4, everything seems fine, and then — there it is. The check engine light is on. What do you do? Do you keep driving? Do you pull over right now? Should you panic?
Take a breath. A check engine light does not always mean your car is about to break down. In many cases, the fix is quick, cheap, and something you can handle yourself. This guide will show you exactly how to turn off the check engine light on your 2013 Toyota RAV4, step by step. We will cover the most common causes, the tools you need, and when it is smart to call a professional.
The 2013 Toyota RAV4 is a reliable SUV, but like any vehicle, it has its quirks. The check engine light is part of the onboard diagnostics system. It watches dozens of sensors and systems in your engine. When something is off, it triggers the light to warn you. Understanding what that light is trying to tell you is the first step to fixing the problem and turning it off.
Key Takeaways
- A loose gas cap is the most common reason the check engine light comes on in a 2013 Toyota RAV4.
- An OBD-II scanner helps you read diagnostic trouble codes quickly and accurately at home.
- You can reset the check engine light after fixing the problem using a scanner or by disconnecting the battery.
- A flashing check engine light means urgent attention is needed to avoid serious engine damage.
- Ignoring the light can lead to costly repairs and failed emissions tests down the road.
- Some fixes are simple DIY jobs, but others require a professional Toyota mechanic.
📑 Table of Contents
- Why Did the Check Engine Light Come On in My 2013 RAV4?
- How to Diagnose the Problem Using an OBD-II Scanner
- How to Turn Off the Check Engine Light on a 2013 Toyota RAV4
- When Should You Not Ignore the Check Engine Light?
- Can You Prevent the Check Engine Light from Coming Back?
- Expert Insights on the 2013 RAV4 Check Engine Light
- Key Takeaways
- Frequently Asked Questions
- Final Thoughts
Why Did the Check Engine Light Come On in My 2013 RAV4?
The check engine light is not one single alarm. It is a general warning that something in your vehicle needs attention. The onboard diagnostics system (called OBD-II) stores a code for each problem it detects. These codes help you and your mechanic figure out exactly what is wrong.
Common Causes of the Check Engine Light
Here are the most frequent reasons a 2013 Toyota RAV4 triggers the check engine light:
- Loose or faulty gas cap — This is the number one cause. A loose cap lets fuel vapors escape, which trips the EVAP system.
- Faulty oxygen sensor — The O2 sensor measures unburned oxygen in the exhaust. When it fails, fuel economy drops and emissions rise.
- Worn spark plugs or plug wires — Old spark plugs cause misfires, which the system detects and flags.
- Catalytic converter issues — A failing catalytic converter is a more expensive problem that needs attention fast.
- Mass airflow sensor failure — The MAF sensor tells the computer how much air is entering the engine. A bad reading causes poor performance.
- EVAP system leak — The evaporative emission control system can develop small leaks that trigger the light.
- Battery or alternator problems — Low voltage can confuse the onboard computer and light up the dashboard.
Each of these issues produces a specific diagnostic trouble code, or DTC. You can read these codes with the right tool, which we will cover next.
How to Diagnose the Problem Using an OBD-II Scanner
An OBD-II scanner is the best tool for figuring out why your check engine light is on. These devices plug into a port under your dashboard and read the codes stored in your vehicle’s computer. They are affordable and easy to use. You can buy one at any auto parts store for under $50.
Step-by-Step Scanner Use
Follow these steps to diagnose your 2013 RAV4:
- Locate the OBD-II port. On the 2013 Toyota RAV4, it is under the dashboard on the driver side, near the steering column. It is a small rectangular plug.
- Turn the ignition to the “On” position. Do not start the engine. Just turn the key so the dashboard lights come on.
- Plug the scanner into the port. Push it in firmly until it clicks.
- Turn the scanner on and wait for it to connect. Most modern scanners pair automatically. You may need to enter your vehicle make, model, and year.
- Read the diagnostic codes. The scanner will display one or more codes. Write them down or take a photo with your phone.
- Look up each code. Use the scanner’s built-in guide or search the code online. This tells you what system or part is affected.
Some popular OBD-II scanners include the Autel MX300, the Innova 3160g, and the BlueDriver Bluetooth Pro. Each of these works well with the 2013 RAV4 and gives clear explanations of the codes they read.
Once you know the code, you can decide whether the fix is something you can do yourself or if you need a Toyota dealership or mechanic. For example, a loose gas cap needs no tools at all. But a catalytic converter problem will likely require professional help.
If you want to learn more about driving with the light on before you fix it, you can check out our guide on Can I Drive My Toyota Camry With The Check Engine Light On for general advice that applies to Toyota vehicles as well.
How to Turn Off the Check Engine Light on a 2013 Toyota RAV4
Now for the part you have been waiting for — actually turning off the light. But here is the most important rule: never reset the light before fixing the actual problem. Resetting the light without fixing the issue just hides the warning. The light will come right back on, and you could be causing more damage to your engine.
Method 1: Fix the Problem First, Then Reset
This is the best and safest approach. Once you have identified and fixed the issue, the light will usually turn off on its own after a few drive cycles. A drive cycle means starting the engine, driving for a while, turning it off, and letting the car sit. The onboard computer runs self-tests during this process. If all the tests pass, the light goes off automatically.
Here are some quick fixes you can try yourself:
- Tighten or replace the gas cap. Turn it clockwise until it clicks. If the cap is cracked or damaged, buy a new one. They cost around $15 to $20 at any auto parts store.
- Replace worn spark plugs. The 2013 RAV4 uses standard spark plugs that are easy to access and replace. A new set costs about $20 to $40.
- Clean the MAF sensor. Use a special MAF cleaner spray. Spray it gently on the sensor wire and let it dry. This often fixes the light if the MAF sensor was dirty.
- Check the battery voltage. A weak battery can trigger the light. Use a multimeter to test it. It should read 12.6 volts or higher when the engine is off.
Method 2: Use an OBD-II Scanner to Reset the Light
After you have fixed the problem, you can use your OBD-II scanner to clear the codes and turn off the light manually. Here is how:
- Plug the scanner back into the OBD-II port.
- Turn the ignition to the “On” position.
- Navigate to the “Clear Codes” or “Erase DTCs” option. The exact steps vary by scanner model.
- Confirm the action. The scanner will erase all stored codes from the vehicle’s computer.
- Turn the ignition off and wait 30 seconds.
- Start the engine and check the dashboard. The check engine light should be off.
If the light comes back on after a few days, the problem was not fully fixed. Go back and recheck your work or visit a mechanic.
Method 3: Disconnect the Battery
Some people prefer to disconnect the battery to reset the check engine light. This method works, but it has some downsides. It will also reset your radio presets, clock, and other settings. Here is how to do it:
- Turn off the engine and all accessories.
- Open the hood and locate the negative battery terminal. It is marked with a minus sign (-) and usually has a black cable.
- Use a wrench to loosen the nut on the negative terminal.
- Remove the cable and move it away from the battery.
- Wait at least 15 minutes. This gives the computer time to fully reset.
- Reconnect the cable and tighten the nut.
- Start the engine and check the dashboard.
If the light returns quickly, there is still an unresolved issue that needs your attention. You can also check our article on How Do I Manually Clear My Car Codes for more detailed guidance on clearing engine codes across different Toyota models.
When Should You Not Ignore the Check Engine Light?
Not all check engine lights are the same. The way the light behaves tells you how urgent the situation is.
Solid Light vs. Flashing Light
A solid check engine light means there is a problem, but it is usually not an emergency. You can drive a short distance to get it checked. However, you should not ignore it for weeks or months.
A flashing check engine light is a different story entirely. A flashing light means there is a severe misfire happening right now. Unburned fuel is entering the exhaust system, which can damage the catalytic converter. If your light is flashing, pull over safely and get the vehicle towed to a repair shop. Continuing to drive with a flashing light can cause thousands of dollars in damage.
Other Warning Signs to Watch For
The check engine light rarely comes on alone. Pay attention to these other signs that something is wrong with your 2013 RAV4:
- Rough idling or stalling — The engine feels shaky when you are stopped.
- Loss of power — The vehicle feels sluggish when you press the accelerator.
- Strange smells — A rotten egg smell often points to a catalytic converter issue.
- Unusual noises — Knocking or pinging sounds from the engine bay.
- Reduced fuel economy — You are filling up more often than usual.
- Dashboard warning lights — Other lights like the oil pressure or battery light may also be on.
If you notice any of these signs along with the check engine light, take your RAV4 to a mechanic as soon as possible. The longer you wait, the worse the problem can get.
Can You Prevent the Check Engine Light from Coming Back?
Once you have turned off the light and fixed the issue, you probably want to keep it off. Regular maintenance is the best way to prevent the check engine light from returning. Here are some tips that help keep your 2013 Toyota RAV4 running smoothly:
- Check your gas cap regularly. Make sure it is tight and not cracked. Replace it every few years.
- Change your spark plugs on schedule. The 2013 RAV4 recommends spark plug replacement around 100,000 miles, but check your owner’s manual.
- Use the right fuel. The RAV4 runs fine on regular 87 octane gas. Using a lower octane can cause engine knock and trigger the light.
- Keep up with oil changes. Fresh oil keeps the engine running cleanly and prevents many issues.
- Address small problems early. Do not wait for a small issue to become a big one. A $20 sensor fix today can save you a $500 repair tomorrow.
- Get regular inspections. A quick check at a Toyota dealership or independent shop can catch problems before the light even comes on.
Following these simple habits keeps your RAV4 healthy and your dashboard warning-free. For more information on Toyota maintenance lights, you might also want to read our article on Does The Maintenance Light Stay On to understand how Toyota’s maintenance reminder system works.
Expert Insights on the 2013 RAV4 Check Engine Light
Many Toyota owners face the same frustration with the check engine light. Here are some expert insights from experienced mechanics who work on RAV4s regularly:
Start with the simplest fix first. Most techs will tell you that a loose gas cap causes more false alarms than any other issue. Before spending money on parts or diagnostics, check the cap. It costs nothing and takes five seconds.
Do not clear codes blindly. A good mechanic reads the codes first, then fixes the problem, and then clears the codes. Clearing codes without a diagnosis is like turning off a smoke alarm without checking for fire.
Keep your scanner. Once you buy an OBD-II scanner, keep it in your garage. It pays for itself the first time it saves you a diagnostic fee at the shop. You can even check codes before you go to the mechanic, so you know what you are walking into.
Trust your instincts. If something feels off with your RAV4 and the light is on, get it checked. You know your vehicle better than anyone. Do not let a warning light sit for too long.
Key Takeaways
- A loose gas cap is the most common reason the check engine light comes on in a 2013 Toyota RAV4.
- An OBD-II scanner helps you read diagnostic trouble codes quickly and accurately at home.
- You can reset the check engine light after fixing the problem using a scanner or by disconnecting the battery.
- A flashing check engine light means urgent attention is needed to avoid serious engine damage.
- Ignoring the light can lead to costly repairs and failed emissions tests down the road.
- Some fixes are simple DIY jobs, but others require a professional Toyota mechanic.
Frequently Asked Questions
Is it safe to drive my 2013 Toyota RAV4 with the check engine light on?
It depends on the situation. If the light is solid and your vehicle is running normally, you can drive a short distance to a repair shop. However, if the light is flashing, you should stop driving immediately and have the vehicle towed. A flashing light indicates a serious misfire that can damage your catalytic converter quickly.
How much does it cost to fix the check engine light on a 2013 RAV4?
The cost varies widely depending on the cause. A loose gas cap fix costs nothing or around $20 for a replacement cap. Oxygen sensor repairs typically run $200 to $350. Spark plug replacements cost about $50 to $100. Catalytic converter repairs can range from $500 to $2,000 or more. The best way to know the exact cost is to get a proper diagnosis first.
Will the check engine light reset itself on a 2013 Toyota RAV4?
Yes, in many cases. After you fix the problem, the light will turn off automatically after a few drive cycles. The vehicle’s computer runs self-tests each time you drive. Once all tests pass without detecting the problem, the light shuts off on its own. If it does not go off after a week of normal driving, you may need to manually reset it with a scanner.
Can a bad gas cap really cause the check engine light to come on?
Absolutely. A loose or cracked gas cap is the single most common cause of the check engine light in Toyota vehicles. The cap seals the fuel system and prevents vapors from escaping. When it is not sealed properly, the EVAP system detects a leak and triggers the warning light. Tightening the cap or replacing it often solves the problem immediately.
What is the difference between the check engine light and the maintenance required light?
The check engine light is a warning about an engine or emissions problem. It means something needs to be diagnosed and fixed. The maintenance required light is simply a reminder that your vehicle is due for scheduled service, like an oil change or tire rotation. The two lights serve very different purposes and require different responses.
How often should I get my 2013 RAV4 checked to prevent check engine light issues?
Following the factory maintenance schedule is your best defense. The 2013 RAV4 needs an oil change every 5,000 to 10,000 miles, depending on driving conditions. A full inspection once a year can catch small problems before they trigger the check engine light. Staying on top of routine maintenance keeps your RAV4 running strong and your dashboard clear.
Final Thoughts
The check engine light on a 2013 Toyota RAV4 does not have to be a source of stress. With the right knowledge and a few basic tools, you can diagnose the problem, fix it yourself, and turn off the light in no time. Start by grabbing an OBD-II scanner and reading the codes. Most of the time, the fix is simpler than you think. Whether it is a loose gas cap, old spark plugs, or a sensor that needs replacing, acting quickly saves you money and keeps your RAV4 on the road.
Remember, the check engine light is your vehicle talking to you. Listen to it, take it seriously, and do not ignore it. A small problem today can become a big repair tomorrow. But with the steps in this guide, you have everything you need to handle the situation confidently and get back to enjoying your drive.