How to Adjust Headlights on a Mazda 6 the Easy Way
Adjusting the headlights on your Mazda 6 is a simple DIY task that anyone can do at home. Proper headlight alignment ensures better visibility on dark roads and keeps you safe. This guide walks you through every step, from gathering tools to making the final adjustments, so you can aim both low and high beams correctly in under 30 minutes.
Have you ever driven your Mazda 6 at night and noticed that the headlights just do not seem right? Maybe they are pointing too high and blinding oncoming drivers. Or perhaps they are aimed too low and you can barely see the road ahead. Either way, adjusting the headlights on a Mazda 6 is easier than most people think.
Proper headlight alignment is one of the most overlooked parts of car maintenance. Yet it plays a huge role in your safety every time you drive after dark. When headlights are misaligned, you lose visibility and you also create a hazard for other drivers. The good news is that you do not need expensive tools or a trip to the mechanic. With a few basic items and about 30 minutes, you can do this yourself at home.
This guide will show you exactly how to adjust headlights on a Mazda 6, no matter what year you drive. We will cover everything from the tools you need to the step-by-step process. By the end, you will feel confident making this adjustment on your own.
Key Takeaways
- Easy DIY Process: You can adjust your Mazda 6 headlights at home with basic tools and a flat wall.
- Better Safety: Properly aligned headlights improve night driving visibility and reduce glare for oncoming drivers.
- Two Adjustment Screws: Each headlight has vertical and horizontal screws that control beam direction.
- Model Year Matters: The process varies slightly between Mazda 6 generations, so check your specific year.
- Quick Results: Most headlight adjustments take 20 to 30 minutes to complete.
- When to Get Help: If screws are stripped or the housing is damaged, a professional mechanic can help.
📑 Table of Contents
- Why Proper Headlight Alignment Matters on a Mazda 6
- Tools You Will Need to Adjust Headlights on a Mazda 6
- Step-by-Step Guide to Adjusting Headlights on a Mazda 6
- Common Mazda 6 Headlight Problems and Solutions
- Tips for Maintaining Your Mazda 6 Headlights
- When to Seek Professional Help for Headlight Adjustment
- Mazda 6 Headlight Adjustment by Model Year
- Key Takeaways
- Conclusion
Why Proper Headlight Alignment Matters on a Mazda 6
Safety First: Protecting Yourself and Others
Misaligned headlights are more than just an inconvenience. They are a real safety risk on the road. When your headlights point too high, they can blind drivers coming toward you. This is especially dangerous on dark highways where there are no streetlights. On the other hand, headlights that are too low mean you cannot see far enough ahead to react to hazards.
The Mazda 6 is a midsize sedan that many people use for daily commuting and long road trips. Whether you drive the sport trim or the grand touring version, your headlights need to be properly aimed. Headlight alignment directly affects your driving visibility at night, in rain, and in foggy conditions. Even a small degree of misalignment can reduce your effective sight range by several feet.
Legal Requirements for Headlight Aim
Many people do not realize that there are laws about headlight alignment. In most states, your headlights must be aimed within a specific range. If your headlights are too high, you could get pulled over and receive a ticket. Some states also require a headlight aim check during vehicle inspections.
Keeping your headlights properly adjusted helps you stay on the right side of the law. It also shows that you take vehicle maintenance seriously. This is a simple part of Mazda 6 maintenance that pays off in both safety and compliance.
Tools You Will Need to Adjust Headlights on a Mazda 6
Basic Tools for Headlight Adjustment
Before you start, gather everything you need. You do not need anything fancy, but having the right tools makes the process much smoother. Here is what you will need:
- A flat, blank wall (a garage door works great)
- Measuring tape or a ruler
- A Phillips-head screwdriver
- A flat-head screwdriver
- Masking tape or painter’s tape
- A helper (optional but very helpful)
You might also want a headlight alignment tool if you want extra precision. These tools clip onto the headlight housing and give you a visual guide for aiming. However, they are not required. The wall method works just as well for most people.
Why the Right Screwdriver Matters
The adjustment screws on a Mazda 6 are typically small Phillips-head screws. Using the wrong size screwdriver can strip them, which turns a simple fix into a bigger problem. Take a moment to check your screwdriver size before you start. If the screws feel tight or resistant, do not force them. The process is similar to tightening other components on your car, like how you would tighten a loose heat shield on your engine. Gentle, steady pressure is all you need.
Step-by-Step Guide to Adjusting Headlights on a Mazda 6
Step 1: Park Your Mazda 6 in the Right Position
The first step is all about positioning. Park your Mazda 6 on a flat, level surface about 25 feet from a blank wall. Make sure the car is perpendicular to the wall. This means the front of the car faces straight at the wall, not at an angle.
Why does this matter? Because you need a true reference point to measure against. If the car is even slightly angled, your headlight aim will be off. Also, make sure the tires are properly inflated and the fuel tank is about half full. This ensures the car sits at its normal ride height.
Quick Tip: If you are working in a driveway on a slope, use wheel chocks to keep the car level. Even a slight tilt can throw off your headlight aim and give you inaccurate results.
Step 2: Locate the Headlight Adjustment Screws
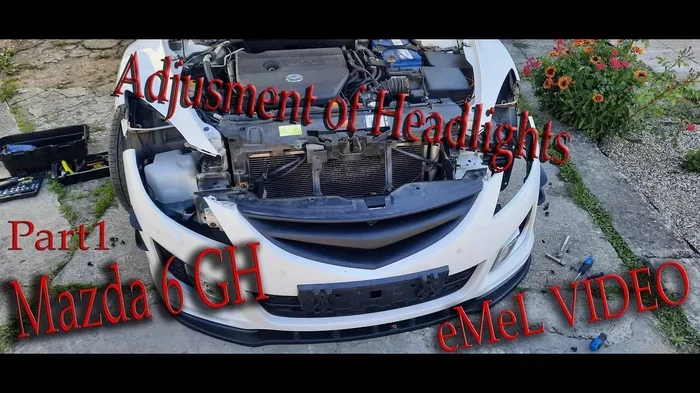
Open the hood and look behind each headlight assembly. On most Mazda 6 models, you will find two screws per headlight:
- The vertical adjustment screw controls the up-and-down aim of the beam
- The horizontal adjustment screw controls the left-and-right aim of the beam
These screws are usually located at the top and the side of the headlight housing. They may have plastic caps on them. If so, gently pry them off with a flat-head screwdriver before you start turning.
Common Mistake: Many people confuse the vertical and horizontal screws. The vertical screw typically controls up-and-down movement and is usually at the top of the housing. The horizontal screw is often on the side. If you are unsure, gently turn each screw a tiny bit and watch which direction the beam moves before committing to full adjustments.
Step 3: Mark the Current Headlight Position
Before you make any adjustments, use masking tape to mark the current position of each headlight beam on the wall. Have a helper turn on the low beam headlights. Place a small piece of tape where the center of each light hits the wall.
This gives you a before-and-after reference. It is incredibly helpful when you are making small adjustments and need to compare the results. Without these marks, it is easy to lose track of what you changed.
Expert Insight: Some experienced mechanics also mark the center of the headlight housing itself on the wall. This gives you a secondary reference point that makes it easier to see whether the beam is centered or off to one side.
Step 4: Make the Vertical Adjustment
Now it is time to adjust the height. Look for the vertical adjustment screw. Turn it clockwise to raise the beam or counterclockwise to lower it. Make small turns, about a quarter at a time.
The goal is to have the center of the low beam hit the wall at a specific height. For most Mazda 6 models, the center of the beam should be at or slightly below the height of the headlight housing. Check your owner’s manual for the exact specification.
Adjust the vertical aim first on the driver’s side, then on the passenger side. Take your time and check the beam position after each small turn.
Quick Tip: If you do not have your owner’s manual, a good general rule is to aim the center of the low beam about 2 inches below the height of the headlight housing at 25 feet from the wall. This keeps the beam low enough to avoid blinding other drivers while still giving you good road visibility.
Step 5: Make the Horizontal Adjustment
Once the vertical aim is set, move on to the horizontal adjustment. Use the horizontal screw to move the beam left or right. For most driving situations, you want the beam aimed slightly to the right (away from oncoming traffic).
The horizontal center of the beam should be close to the center mark you made on the wall. Again, make small adjustments and check frequently. This is a process of patience and small changes.
Common Mistake: Do not aim the headlights too far to the right. While you want to avoid pointing them directly at oncoming traffic, aiming them too far to the side can leave a dark spot in the center of the road where you need visibility the most.
Step 6: Test the High Beams
After adjusting the low beams, check the high beams as well. Have your helper turn on the high beams and observe where the beam hits the wall. High beams should be aimed slightly higher than the low beams but still within a safe range.
If the high beams are pointing too high, they can also blind other drivers. Adjust them the same way you adjusted the low beams, using the same screws.
Quick Tip: Have your helper toggle between low and high beams several times while you watch from the front of the car. This lets you confirm that both beam levels are consistent and that the transition between them looks smooth.
Common Mazda 6 Headlight Problems and Solutions
Headlights That Point Too High
One of the most common issues is headlights that are aimed too high. This usually happens after replacing a headlight bulb or after a minor collision. If your headlights are pointing too high, you risk blinding oncoming drivers.
The fix is straightforward. Simply turn the vertical adjustment screw counterclockwise to lower the beam. Make small adjustments and recheck the aim on the wall. If the screw feels like it is not moving, it may be stuck or stripped. In that case, you may need professional help.
Headlights That Point Too Low
Headlights aimed too low reduce your visibility on the road. You may find yourself struggling to see obstacles, signs, or pedestrians in time. This is especially dangerous on unlit roads or in bad weather.
Turn the vertical adjustment screw clockwise to raise the beam. Be careful not to overcorrect. You want the beam high enough for good visibility but not so high that it blinds other drivers.
Headlights That Are Aimed to One Side
If one headlight is aimed to the left and the other to the right, you have a horizontal alignment problem. This creates an uneven lighting pattern that is both unsafe and ineffective.
Use the horizontal adjustment screw on each headlight individually to center the beams. Compare the beam positions on the wall to make sure they are symmetrical. A helper is very useful for this step.
When Headlight Adjustment Does Not Fix the Problem
Sometimes the problem is not the aim but the headlight itself. If you have adjusted the screws and the beam still looks wrong, the issue might be a cracked headlight housing, a foggy lens, or a failing bulb. In these cases, adjusting the screws will not solve the problem. You may need to look into headlight restoration or bulb replacement instead.
If you are unsure whether the problem is alignment or something else, consider getting a full car diagnostic done. A diagnostic check can reveal electrical or sensor issues that affect headlight performance. These checks help you understand whether the problem is mechanical or electrical.
Tips for Maintaining Your Mazda 6 Headlights
Check Your Headlights Regularly
Headlight alignment can shift over time. Vibrations from driving, potholes, and minor bumps can all gradually move the aim of your headlights. Make it a habit to check your headlight aim at least twice a year.
A quick check is easy to do. Park your car about 25 feet from a wall and turn on the headlights. Look at where the beams hit. If they seem off, spend a few minutes making adjustments. Catching the problem early keeps you safe and prevents the issue from getting worse.
Replace Bulbs in Pairs
When one headlight bulb burns out, the other is usually not far behind. Replacing bulbs in pairs ensures that both sides have matching brightness and color temperature. This gives you the most consistent and effective lighting on the road.
If your Mazda 6 has projector headlights or LED headlights, the replacement process may be slightly different from older models. Always refer to your owner’s manual for specific bulb type and replacement instructions.
Keep the Headlight Lenses Clean
Dirty or foggy headlight lenses reduce the amount of light that reaches the road. Even perfectly aimed headlights will not perform well if the lenses are cloudy or yellowed. Clean your headlight lenses regularly with a mild automotive cleaner.
If the lenses are heavily oxidized, consider a headlight restoration kit. These kits sand and polish the lens surface to restore clarity. This is a cheap and effective way to improve your driving visibility without replacing the entire headlight assembly.
Be Careful When Replacing Bulbs
One of the most common reasons headlights become misaligned is during bulb replacement. When you remove and reinstall the headlight housing, it is easy to bump the assembly slightly out of position. After changing a bulb, always do a quick aim check. Adjusting the headlights after a bulb swap takes just a few minutes and saves you from driving with poorly aimed lights.
When to Seek Professional Help for Headlight Adjustment
Stripped or Broken Adjustment Screws
If you try to turn the adjustment screws and they do not move, they may be stripped or broken. This can happen if someone previously forced the screws or if they have corroded over time. Attempting to force them further can cause more damage.
A professional mechanic has the tools and experience to remove stripped screws and replace them if needed. They can also assess whether the headlight housing itself is damaged.
Headlights That Keep Drifting Out of Alignment
If you adjust your headlights and they drift out of alignment again within a few weeks, there may be a deeper issue. This could indicate a damaged headlight mounting bracket, a worn suspension component, or a problem with the headlight housing.
In these situations, a mechanic can diagnose the root cause and provide a lasting fix. Do not keep adjusting headlights that will not hold their aim. It is a sign that something else needs attention.
Safety First: Driving with Misaligned Headlights
Driving with misaligned headlights is dangerous. Much like driving with a maintenance required light on, ignoring headlight alignment can lead to bigger problems down the road. Poor headlight aim reduces your ability to see the road and increases the risk of accidents.
If you are ever unsure about your headlight alignment, do not hesitate to visit a trusted mechanic. A quick inspection can give you peace of mind and keep you safe on the road.
Mazda 6 Headlight Adjustment by Model Year
Differences Across Mazda 6 Generations
The Mazda 6 has been produced in several generations since its introduction. Each generation has slight differences in the headlight adjustment process. Here is a quick comparison of what to expect across different model years:
- 2003-2007 (First Generation): The headlight screws are located behind the headlight assembly. Access is straightforward from the engine bay.
- 2008-2012 (Second Generation): Similar to the first generation but with slightly different screw placement. The horizontal screw may be near the top of the housing.
- 2013-2018 (Third Generation): These models may have adaptive headlight systems that require a different adjustment approach. Check your owner’s manual.
- 2019+ (Fourth Generation): The latest models feature LED and projector headlights with more complex adjustment mechanisms. Professional adjustment may be recommended.
This comparison shows that the basic process is similar across most years. However, if you own a newer model with advanced lighting systems, you may want to consult a professional. The headlight housing design and screw locations can vary enough between generations that a one-size-fits-all approach may not work perfectly.
Key Takeaways
- Easy DIY Process: You can adjust your Mazda 6 headlights at home with basic tools and a flat wall.
- Better Safety: Properly aligned headlights improve night driving visibility and reduce glare for oncoming drivers.
- Two Adjustment Screws: Each headlight has vertical and horizontal screws that control beam direction.
- Model Year Matters: The process varies slightly between Mazda 6 generations, so check your specific year.
- Quick Results: Most headlight adjustments take 20 to 30 minutes to complete.
- When to Get Help: If screws are stripped or the housing is damaged, a professional mechanic can help.
Conclusion
Adjusting the headlights on your Mazda 6 is one of the simplest and most rewarding maintenance tasks you can do. It takes just a few tools, about half an hour, and a willingness to learn. Once you see the difference that proper alignment makes, you will wonder why you did not do it sooner.
Proper headlight adjustment gives you better driving visibility, protects oncoming drivers, and keeps your Mazda 6 road legal. Whether you are dealing with headlights that are too high, too low, or aimed to one side, the process is the same: park, mark, adjust, and check.
Do not let misaligned headlights compromise your safety on the road. Grab your screwdriver, find a flat wall, and spend 30 minutes making this important adjustment. Your Mazda 6 will thank you with clearer, safer lighting every time you drive after dark.
Remember, headlight alignment is not a one-time fix. It is something to check regularly as part of your routine Mazda 6 maintenance. A few minutes of attention every six months can make a big difference in how safely and effectively you see the road at night.
Frequently Asked Questions
How long does it take to adjust headlights on a Mazda 6?
For most people, the entire process takes about 20 to 30 minutes. If you are doing it for the first time, give yourself an extra 10 to 15 minutes to get comfortable with the process. Once you have done it a couple of times, it becomes much faster.
Can I adjust my Mazda 6 headlights without a wall?
The wall method is the most reliable way to adjust headlights at home. However, you can also park facing a garage door or a large flat surface. The key is to have a consistent reference point that is flat and level. Without a reference surface, it is very difficult to judge whether your aim is correct.
Do I need any special tools to adjust Mazda 6 headlights?
No special tools are needed. A Phillips-head screwdriver and a flat-head screwdriver are usually all you need. Some people also like to use masking tape to mark positions on the wall and a measuring tape to check the distance from the car to the wall. A headlight alignment tool is optional but can help with precision.
Why are my Mazda 6 headlights misaligned?
Headlights can become misaligned for several reasons. Normal driving vibrations over time can gradually shift the aim. Replacing a headlight bulb can sometimes disturb the alignment. Minor collisions or hitting a pothole hard can also knock the headlights out of position. Regular checks help catch misalignment early.
Is it illegal to drive with misaligned headlights?
In most states, yes. Headlights must be properly aimed within a specific range to be legal. Misaligned headlights that are too high can blind other drivers and result in a traffic citation. Keeping your headlights properly adjusted is an important part of vehicle safety and legal compliance.
Can I adjust the headlights myself or should I visit a mechanic?
Most Mazda 6 owners can adjust their headlights at home with basic tools. The process is straightforward and does not require professional expertise. However, if your adjustment screws are stripped, the housing is damaged, or your model has advanced adaptive headlights, it is best to visit a qualified mechanic for assistance.