How Do You Reset the Check Engine Light on a Toyota Corolla
Resetting the check engine light on a Toyota Corolla is simpler than most drivers think. Whether the light is triggered by a loose gas cap, a faulty sensor, or a deeper engine issue, you can clear the code using an OBD-II scanner, a manual reset, or even by driving a specific cycle. This guide walks you through every method safely and clearly. Always address the root cause first before attempting a reset to avoid recurring problems.
Key Takeaways
- Multiple Reset Methods: You can reset the check engine light using an OBD-II scanner, disconnecting the battery, or by completing a drive cycle.
- Address the Root Cause: Simply resetting the light without fixing the underlying problem will cause it to return quickly.
- Loose Gas Cap Is a Common Culprit: A loose or damaged gas cap is one of the most frequent triggers for the check engine light.
- Safety First: If the light is flashing, stop driving and seek professional help immediately.
- OBD-II Scanners Are Affordable: A basic scanner costs under $30 and gives you valuable diagnostic information.
- Battery Disconnect Works But Has Drawbacks: Clearing codes this way may also reset other settings in your Corolla.
📑 Table of Contents
- How Do You Reset the Check Engine Light on a Toyota Corolla?
- Common Reasons the Check Engine Light Comes On
- How to Reset the Check Engine Light on a Toyota Corolla
- Should You Drive Your Toyota Corolla With the Check Engine Light On?
- How to Prevent the Check Engine Light from Coming Back
- Expert Insights on Resetting the Check Engine Light
- When to See a Professional Mechanic
- Key Takeaways
- Frequently Asked Questions
- Conclusion
How Do You Reset the Check Engine Light on a Toyota Corolla?
That little yellow engine symbol on your dashboard can send anyone into a panic. You are driving your Toyota Corolla, everything feels fine, and then — boom — the check engine light comes on. It is one of the most common warnings drivers face, and it is also one of the most misunderstood.
The good news? Resetting the light is often straightforward. The better news? You do not need to visit a mechanic for every minor issue. With the right tools and a little patience, you can handle this yourself. This guide covers every method, every common cause, and every tip you need to get the job done right.
Before we dive in, let us be clear about one thing. The check engine light is your car’s way of telling you something needs attention. Resetting the light without understanding why it came on in the first place is like turning off a smoke alarm without putting out the fire. Always diagnose the problem first, then reset the light once the fix is in place.
What Does the Check Engine Light Mean on a Toyota Corolla?
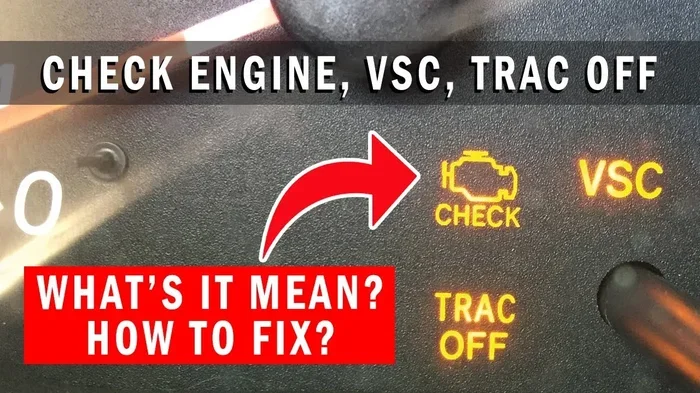
The check engine light, also called the MIL (Malfunction Indicator Lamp), is part of your Corolla’s onboard diagnostics system. When the car’s computer detects a problem it cannot correct on its own, it triggers the light. The system stores a Diagnostic Trouble Code, or DTC, that tells you exactly what went wrong.
The light can appear in two forms:
- Solid light: This means a non-emergency issue exists. You can usually drive safely, but you should get it checked soon.
- Flashing light: This signals a serious problem, often related to the engine misfire or catalytic converter. Stop driving immediately and get professional help.
Understanding the difference between a solid and flashing light is critical. A solid light gives you time to diagnose the issue at your own pace. A flashing light means your Toyota is telling you to act now.
Common Reasons the Check Engine Light Comes On
Before you reset anything, it helps to know what might have triggered the light in the first place. Toyota Corolla models across different years share several common triggers. Here are the most frequent ones.
1. Loose or Faulty Gas Cap
This is the number one cause of a check engine light in almost every car. The gas cap seals the fuel system and maintains proper pressure. When it is loose, cracked, or missing, the evaporative emission system detects a leak and triggers the warning. If you just filled up at the gas station, this is the first thing you should check.
2. Faulty Oxygen Sensor
The oxygen sensor measures unburned oxygen in your exhaust. Over time, these sensors can degrade or get contaminated. A failing sensor reduces fuel efficiency and can eventually cause other problems if left unaddressed.
3. Worn Spark Plugs or Ignition Coils
Spark plugs ignite the air-fuel mixture in your engine’s cylinders. When they wear out, the combustion process becomes less efficient. This can trigger misfire codes that turn on the engine warning light. Toyota Corolla owners should check their spark plugs around the 30,000 to 50,000-mile mark.
4. Catalytic Converter Issues
The catalytic converter reduces harmful emissions. When it fails, the light comes on and you may notice reduced performance or a rotten egg smell from the exhaust. Catalytic converter repairs can be expensive, so early detection matters.
5. Mass Airflow Sensor Problems
The mass airflow sensor measures the amount of air entering the engine. Dirt, oil, or debris can contaminate it over time. A dirty sensor leads to poor fuel economy, rough idling, and stalling.
How to Reset the Check Engine Light on a Toyota Corolla
Now for the part you have been waiting for — actually resetting the light. There are three main methods you can use on your Toyota Corolla. Each has its pros and cons, so choose the one that fits your situation and comfort level.
Method 1: Use an OBD-II Scanner (Recommended)
An OBD-II scanner is the most reliable and informative way to reset the check engine light. OBD stands for On-Board Diagnostics, and every Toyota made after 1996 has an OBD-II port. This small device plugs directly into your car’s computer system.
Here is how to do it step by step:
- Locate the OBD-II port. On most Toyota Corolla models, it is under the dashboard on the driver’s side, near the steering column. You may need to look down and slightly to the left.
- Plug in the scanner. Connect the OBD-II device to the port. The connector clicks into place easily.
- Turn the ignition to the “ON” position. Do not start the engine. Just turn the key to the position where the dashboard lights up.
- Read the diagnostic codes. The scanner will display error codes stored in your car’s computer. Write these down or take a photo.
- Look up the codes. Use the scanner’s built-in database or search the codes online. Each code tells you the specific problem your Corolla detected.
- Fix the issue. Address whatever problem the codes reveal. This might be replacing a sensor, tightening the gas cap, or something else.
- Clear the codes. Once the fix is complete, use the scanner to clear the diagnostic trouble codes. The check engine light should turn off.
Pro Tip: Basic OBD-II scanners cost between $20 and $50. Investing in one saves you money on diagnostic fees at the shop. Many scanners also let you monitor live data from your sensors in real time.
Method 2: Disconnect the Battery
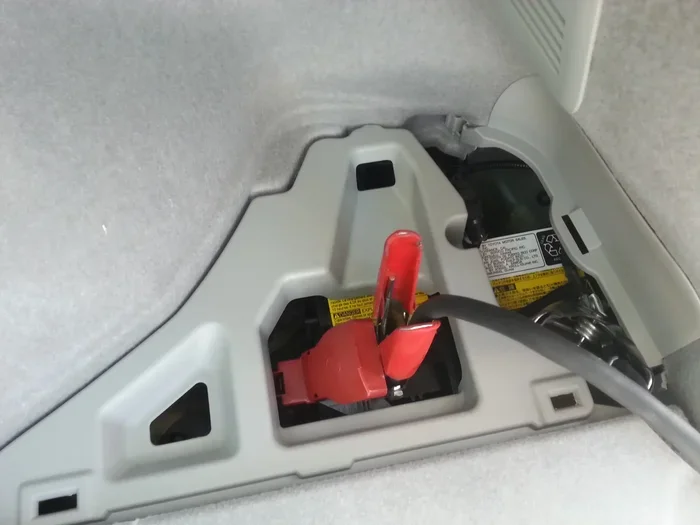
If you do not have an OBD-II scanner, you can reset the light by disconnecting the battery. This method clears all stored codes from the car’s computer. However, it also resets other settings like your radio presets, clock, and power window calibration.
Here is how to do it safely:
- Turn off the engine. Make sure your Toyota Corolla is completely powered down.
- Open the hood. Locate the battery. On most Corolla models, it is in the engine bay on the right side.
- Disconnect the negative terminal first. Use a wrench to loosen the nut on the negative cable (it has a minus symbol). Carefully pull the cable off the battery post.
- Wait 10 to 15 minutes. This allows the car’s computer to fully reset its memory.
- Reconnect the negative terminal. Place the cable back on the post and tighten the nut securely.
- Start the engine. The check engine light should be off now. If it stays on, the underlying issue has not been resolved.
Important: Some newer Toyota models may require a specific reset procedure after a battery disconnect. If the light returns immediately, try Method 1 instead.
Method 3: Complete a Drive Cycle
A drive cycle is a series of driving conditions that allow your car’s computer to re-evaluate all systems. If the issue that triggered the light has been fixed, completing a drive cycle can clear the code naturally. This method works best after you have addressed the root cause, such as replacing a faulty sensor or tightening the gas cap.
A typical drive cycle for a Toyota Corolla includes:
- Cold start. Start the engine when the car has been sitting for at least a few hours. Let it idle for about two minutes.
- Slow acceleration. Drive at 25 to 30 mph for about five minutes.
- Steady highway speed. Get on a highway and maintain 55 to 65 mph for about ten minutes.
- Slow deceleration. Let off the gas and coast down to a stop without braking hard.
- Repeat the cycle. The car’s computer needs multiple cycles to confirm all systems are working properly.
After completing the drive cycle, the check engine light should turn off if the problem has been resolved. If it comes back, the issue is not fully fixed yet.
Should You Drive Your Toyota Corolla With the Check Engine Light On?
This is one of the most common questions Toyota owners ask. The answer depends on the severity of the issue and how the light appears.
If the light is solid and your car is running normally, you can usually drive to a shop or home safely. However, you should not ignore it. A minor issue like a loose gas cap can become a bigger problem if left alone. If you notice any unusual symptoms — such as reduced power, strange noises, or poor fuel economy — get the car checked right away.
If the light is flashing, the situation is more urgent. A flashing check engine light often indicates an engine misfire that can damage the catalytic converter. Continuing to drive with a flashing light can lead to expensive repairs. In this case, pull over safely and call for roadside assistance.
Many drivers wonder whether they can continue their daily commute with the light on. While a solid light does not always mean immediate danger, prolonged driving with an unresolved issue can cause additional damage over time. Think of the check engine light as your car’s way of asking for help — listen to it.
If you are unsure about the severity, you can always pull over and check the gas cap first. A loose cap is a quick fix that resolves the issue in many cases. Just tighten it until you hear it click, and the light may turn off within a few days of normal driving.
How to Prevent the Check Engine Light from Coming Back
Resetting the light feels great, but nobody wants to see it come back a week later. Prevention is always better than cure, especially when it comes to your Toyota Corolla’s engine health.
1. Perform Regular Maintenance
Stick to the Toyota maintenance schedule for your specific model year. Regular oil changes, spark plug replacements, and air filter changes keep your engine running smoothly. Skipping maintenance is one of the leading causes of recurring check engine light issues.
2. Check the Gas Cap After Every Fill-Up
Make it a habit to tighten the gas cap every time you refuel. A properly seated gas cap prevents fuel vapor leaks that trigger the emission system warning. If your gas cap is cracked or worn, replace it. They are inexpensive and easy to find.
3. Address Warning Signs Early
Do not wait for the light to come on. If you notice unusual sounds, smells, or changes in performance, investigate immediately. Early detection of problems saves you from costly repairs down the road.
4. Use Quality Fuel and Parts
Using low-quality fuel or aftermarket parts that do not meet Toyota specifications can trigger the check engine light. Stick with recommended fuel grades and OEM or certified replacement parts whenever possible.
5. Keep an OBD-II Scanner in Your Trunk
Having a scanner on hand means you can check codes yourself before visiting a mechanic. This saves time and money. Many modern scanners connect to your smartphone via Bluetooth, making diagnostics even easier.
Expert Insights on Resetting the Check Engine Light
Certified Toyota technicians often see drivers make the same mistakes when dealing with the check engine light. Here are some expert tips to keep in mind.
Do Not Ignore the Light
Many drivers simply disconnect the battery and hope the problem goes away. While this clears the light temporarily, it does not fix the underlying issue. The code will return, and the longer you wait, the worse the problem can get.
Use a Quality Scanner
Cheap scanners may not read all codes correctly. Invest in a reputable brand that supports Toyota-specific protocols. Some advanced scanners also provide live data streams, freeze frame data, and readiness monitor status.
Clear Codes Only After the Repair
Never clear the codes before fixing the problem. If you clear them and the light returns immediately, you know the issue is still present. Clearing codes after a confirmed repair gives you a clean baseline to work from.
Check for Recalls
Sometimes the check engine light is triggered by a known issue that Toyota has already addressed with a recall. Always check for recalls on your specific model year before assuming the worst. This can save you hundreds of dollars in unnecessary repairs.
When to See a Professional Mechanic
While many check engine light issues can be handled at home, some situations require professional help. Here are the signs that it is time to visit a mechanic:
- The check engine light is flashing and the car feels rough or loses power.
- You have tried resetting the light multiple times and it keeps coming back.
- The car exhibits serious symptoms like stalling, overheating, or unusual noises.
- You have checked the common causes (gas cap, spark plugs, sensors) and the light persists.
- You are uncomfortable working with your car’s electrical or fuel systems.
A professional mechanic has access to advanced diagnostic tools and factory-level repair information. They can pinpoint the exact problem faster than most DIY methods. If you are near a Toyota dealership, they will have the most up-to-date software for your specific model year.
Keep in mind that some Toyota Corolla issues are covered under warranty. Before paying for repairs, check whether your vehicle is still under the factory warranty or an extended warranty. This can save you a significant amount of money.
Also, if you recently had work done and the light came on shortly after, the repair shop may have made an error. Go back to your mechanic and ask them to recheck their work. Many shops will diagnose and fix the issue at no additional cost if their work caused the problem.
Key Takeaways
- Reset the light only after fixing the root cause: Simply clearing codes without addressing the problem will not solve anything.
- An OBD-II scanner is the best tool: It gives you diagnostic codes and lets you reset the light with confidence.
- A loose gas cap is the most common trigger: Always check this first before assuming something serious.
- Do not ignore a flashing light: A flashing check engine light requires immediate attention.
- Drive cycles can clear codes naturally: After a repair, completing a drive cycle allows the computer to re-evaluate the system.
- Prevention through regular maintenance: Staying on top of your Toyota Corolla’s service schedule prevents most issues that trigger the light.
Frequently Asked Questions
Can I Drive My Toyota Corolla With the Check Engine Light On?
Yes, you can usually drive with a solid check engine light if the car is running normally. However, you should get the issue diagnosed as soon as possible. If the light is flashing, stop driving immediately and seek professional help.
How Much Does It Cost to Reset the Check Engine Light?
If you use an OBD-II scanner, the cost is just the price of the scanner, which ranges from $20 to $50. If you visit a mechanic or auto parts store, many will read and clear codes for free as a way to attract your business for repairs.
Will the Check Engine Light Reset Itself?
In some cases, yes. If the issue that triggered the light was minor, such as a loose gas cap, the light may turn off on its own after a few drive cycles. However, if the problem persists, the light will stay on or return.
How Long Does It Take to Reset the Check Engine Light?
Using an OBD-II scanner, the reset takes only a few minutes. Disconnecting the battery takes about 15 to 20 minutes including the wait time. A drive cycle can take anywhere from 30 minutes to an hour depending on driving conditions.
What Is the Most Common Reason the Check Engine Light Comes On in a Toyota Corolla?
The most common cause is a loose or faulty gas cap. Other frequent triggers include failing oxygen sensors, worn spark plugs, and mass airflow sensor issues. Always check the simplest causes first before diving into complex repairs.
Can a Dead Battery Cause the Check Engine Light to Come On?
Yes, a weak or dead battery can cause voltage irregularities that trigger the check engine light. If you have recently had battery issues and the light appeared afterward, the battery may be the culprit. Have your battery tested before assuming a more serious engine problem.
Conclusion
Resetting the check engine light on a Toyota Corolla is a task most drivers can handle themselves. Whether you use an OBD-II scanner, disconnect the battery, or complete a drive cycle, the key is to address the root cause first. Never just clear the codes and hope for the best — that approach only leads to recurring problems and potential damage.
Start with the simplest fixes, like tightening the gas cap or checking the spark plugs. Use a quality scanner to read the codes and understand what your car is telling you. Stay on top of regular maintenance and the check engine light will stay off where it belongs — hidden on your dashboard.
Your Toyota Corolla is a reliable, long-lasting vehicle. With the right knowledge and a little attention, you can keep it running smoothly for years to come. The next time that yellow light appears, you will know exactly what to do.