How Do You Clean the Inside of Your Car Windscreen
Cleaning the inside of your car windscreen is one of the most overlooked yet essential car maintenance tasks. A dirty interior glass surface causes glare, reduces visibility, and makes night driving dangerous. This guide walks you through everything you need to know about cleaning the inside of a car windscreen using simple household items and professional-grade products. You will learn the best techniques, common mistakes to avoid, and how to keep your windscreen crystal clear all year round.
Have you ever noticed a greasy, hazy film on the inside of your car windscreen? You are not alone. Many drivers deal with this problem every single day. The good news is that cleaning the inside of a car windscreen is much easier than most people think. With the right approach and a few simple tools, you can restore crystal-clear visibility in just minutes.
Your car windscreen faces a unique challenge on the inside. Unlike the outside, which deals with rain, bugs, and road grime, the inside of your windscreen battles off-gassing from plastics, dust, and fingerprints. Over time, this buildup creates a stubborn film that regular wiping cannot remove. This is why knowing how to clean the inside of a car windscreen properly matters so much.
Whether you are preparing for a long road trip or just want to improve your daily driving experience, this guide has you covered. We will walk you through every step, from the supplies you need to the techniques that deliver professional results. Let us get started.
Key Takeaways
- Regular cleaning prevents haze: Interior windscreen grime builds up fast from off-gassing and dust, so cleaning every two weeks keeps visibility high.
- Use the right tools: A microfiber cloth and a quality ammonia-free cleaner are the best combo for a streak-free finish.
- Avoid common mistakes: Using paper towels or household glass sprays with ammonia can damage your car’s interior and leave streaks.
- Steam cleaning works wonders: A handheld steamer loosens stubborn grease and residue that wipes alone cannot remove.
- Prevention is key: Parking in the shade and using a sunshade reduces interior grime buildup significantly.
- DIY solutions are effective: White vinegar and water make an affordable and powerful interior windscreen cleaner.
📑 Table of Contents
- Why Cleaning the Inside of Your Windscreen Matters
- Best Products for Cleaning the Inside of a Car Windscreen
- Tools You Need for a Streak-Free Finish
- Step-by-Step Guide to Cleaning the Inside of a Car Windscreen
- Common Mistakes to Avoid When Cleaning Your Windscreen
- How to Deal with Stubborn Interior Windscreen Haze
- Prevention Tips to Keep Your Windscreen Clean Longer
- How Often Should You Clean the Inside of Your Windscreen?
- Expert Insights: Pro Tips for Perfect Windscreen Clarity
- Conclusion
Why Cleaning the Inside of Your Windscreen Matters
Most drivers focus on the outside of their windscreen. They wash it, wax it, and chase away water spots. But the inside of the glass often gets ignored. This is a big mistake. The interior surface of your windscreen plays a huge role in how safely you drive, especially at night or in bright sunlight.
When grime accumulates on the inside, it scatters light. This causes blinding glare from oncoming headlights. It also creates a hazy look that makes your view of the road less sharp. Studies show that a dirty interior windscreen can reduce visibility by up to 30 percent. That is a serious safety risk.
Beyond safety, a filthy interior windscreen looks terrible. It makes your entire car feel dirty even if the rest is spotless. Regular interior windshield cleaning keeps your car looking great and your driving experience much more pleasant.
The Science Behind Interior Windscreen Grime
So what exactly is that greasy film? It comes from a process called off-gassing. Your car’s dashboard, seats, and trim release volatile organic compounds (VOCs) over time. These chemicals settle on the glass and form a sticky residue. Add in dust, skin cells, and moisture, and you get a tough haze that is hard to remove.
Heat makes this problem worse. On hot days, off-gassing speeds up. That is why cars parked in the sun often have worse interior grime. This is also why cleaning the inside of a car windscreen should be a regular part of your car maintenance routine, not a one-time job.
Best Products for Cleaning the Inside of a Car Windscreen
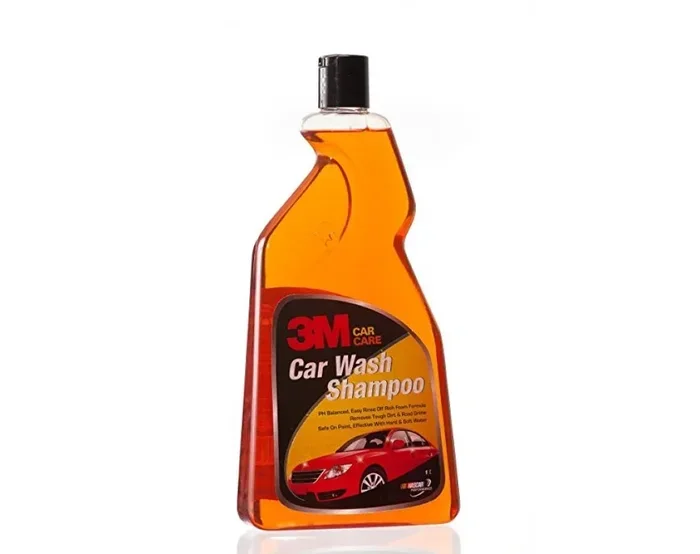
Using the right products makes all the difference. You do not need expensive specialty items, but you do need to choose wisely. Some common household cleaners can actually damage your car’s interior or leave behind streaks that make things worse.
Top Recommended Cleaners
Here are the best options for interior windshield cleaning:
- Ammonia-free glass cleaner: This is the safest and most effective choice. Ammonia can damage your car’s vinyl and plastic surfaces over time.
- White vinegar solution: Mix equal parts white vinegar and water. This natural cleaner cuts through grease and removes haze without any harsh chemicals.
- Automotive-specific interior glass cleaners: Brands like Invisible Glass and Stoner produce excellent products designed for car interiors.
- Isopropyl alcohol solution: A mix of 70 percent isopropyl alcohol and 30 percent water works great on stubborn grease and fingerprints.
Why Ammonia-Free Matters
Many standard household glass sprays contain ammonia. These work well on home windows but are a bad choice for car interiors. Ammonia can dry out and crack your dashboard plastic. It can also damage window seals and tinting. Always check the label and choose an ammonia-free cleaner for your car.
Tools You Need for a Streak-Free Finish
Having the right tools is just as important as using the right cleaner. The wrong cloth or paper towel can scratch your glass or leave lint behind. Here is what you need to gather before you start.
Essential Cleaning Tools
- Microfiber cloths: These are the gold standard for interior glass cleaning. They trap dirt, absorb moisture, and leave zero streaks. Use at least two cloths, one for applying cleaner and one for buffing dry.
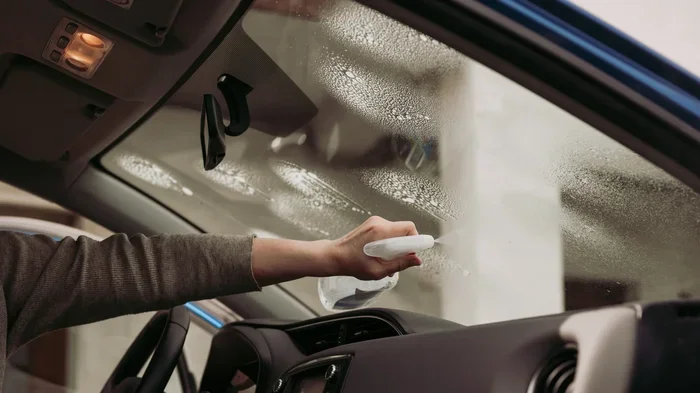
- Spray bottle: Use this to apply your cleaning solution evenly across the glass surface.
- Soft-bristle brush: A small detailing brush helps loosen dirt from corners and edges of the windscreen.
- Steam cleaner (optional): A handheld steam cleaner is a game-changer for heavy buildup. It melts away grease without any chemicals at all.
- Glass wipes: Pre-moistened glass wipes are convenient for quick cleanups between deep cleans.
Why Microfiber Cloths Are Essential
Never use paper towels or regular rags on your car windscreen. Paper towels can scratch the glass and leave behind tiny fibers. Old t-shirts and towels often contain rough fibers that create streaks. A high-quality microfiber cloth is soft enough to protect your glass and absorbent enough to remove all residue. This is the secret to a truly streak-free finish.
Step-by-Step Guide to Cleaning the Inside of a Car Windscreen
Now that you have your supplies ready, let us walk through the actual cleaning process. Follow these steps in order for the best results.
Step 1: Park in a Shaded Area
Start by parking your car in a shaded spot or a cool garage. Direct sunlight causes your cleaning solution to dry too quickly. When cleaner dries on the glass before you wipe it, it leaves behind streaks and residue. A cool surface gives you time to work the cleaner properly.
Step 2: Remove Loose Dust and Debris
Before you spray anything, use a dry microfiber cloth or a soft brush to remove loose dust from the windscreen. This prevents you from grinding dirt particles into the glass during the wet cleaning phase. Pay extra attention to the edges and corners where dust tends to collect.
Step 3: Apply Your Cleaning Solution
Spray your chosen cleaner onto a microfiber cloth, not directly onto the windscreen. Spraying directly can cause the solution to seep into the car’s interior trim and electronics. A lightly damp cloth is all you need. Work in sections, starting from the top of the windscreen and moving downward.
Step 4: Wipe in a Circular Motion
Use gentle, overlapping circular motions to clean the glass. This pattern lifts grime effectively and helps you see which areas still need attention. Avoid pressing too hard. Let the cleaner do the work for you.
Step 5: Buff Dry with a Clean Cloth
Switch to a dry microfiber cloth and buff the glass in straight, overlapping strokes. This removes any remaining moisture and prevents streaks. Keep flipping the cloth to a clean side as you go. You want to always be using a clean surface against the glass.
Step 6: Inspect and Repeat if Needed
Once you have cleaned the entire windscreen, hold it at an angle and check for any remaining haze or streaks. If you see any, repeat the process on those spots. A second pass with a fresh cloth usually solves the problem.
Common Mistakes to Avoid When Cleaning Your Windscreen
Even with the best intentions, people make mistakes that can cause damage or leave their windscreen worse than before. Here are the most common errors and how to avoid them.
Using Household Glass Cleaners
As mentioned earlier, many household glass sprays contain ammonia or other harsh chemicals. These are designed for home windows, not car interiors. They can damage your dashboard, seat covers, and window seals. Always use a cleaner specifically formulated for automotive glass.
Skipping the Pre-Clean Dust Removal
Jumping straight to spraying and wiping without removing loose dust first is a recipe for scratches. Tiny dust particles act like sandpaper on your glass. Always dry-dust the surface first, no matter how clean it looks.
Using Too Much Cleaner
More product does not mean better results. Excess cleaner leaves behind a sticky residue that attracts more dust. Use just enough to lightly dampen your cloth. You can always add a little more if needed.
Neglecting the Edges and Corners
The edges of your windscreen where it meets the rubber seal are prime spots for grime buildup. This area is often ignored during cleaning. Use a small detailing brush or a corner of your cloth to clean these spots thoroughly.
How to Deal with Stubborn Interior Windscreen Haze
Sometimes regular cleaning is not enough. You may face a thick, stubborn haze that refuses to budge. This is especially common in older cars or cars that have been parked in the sun for years. Here is how to tackle tough interior grime.
The Baking Soda Paste Method
Make a paste of baking soda and water. Apply it gently to the hazy areas with a damp microfiber cloth. Rub in small circles with light pressure. The mild abrasive in baking soda breaks down the grease film without scratching the glass. Wipe clean with a separate damp cloth and then buff dry.
Steam Cleaning for Deep Grime
A handheld steam cleaner is one of the most effective tools for heavy interior windscreen haze. The hot steam melts away grease and residue without any chemicals. Hold the steamer a few inches from the glass and move it slowly across the surface. Follow up with a microfiber cloth to wipe away the loosened grime.
When to Seek Professional Help
If you have tried everything and your windscreen still looks hazy, it might be time to visit a professional detailer. They have access to industrial-grade tools and cleaners that can handle even the worst buildup. A professional interior detailing session can transform your car’s interior and restore perfect visibility.
Prevention Tips to Keep Your Windscreen Clean Longer
Once you have put in the effort to clean your windscreen, you want the results to last. Prevention is always easier than cure. Here are simple habits that keep your interior glass cleaner for longer.
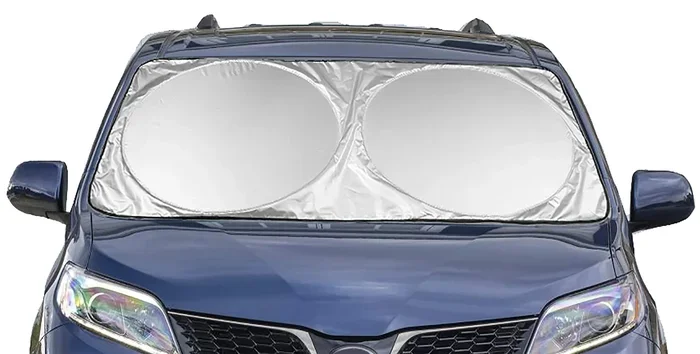
- Use a sunshade: Parking in the shade or using a windshield sunshade reduces heat and slows down off-gassing significantly.
- Wipe down after trips: A quick wipe with a dry microfiber cloth after each drive removes fingerprints and dust before they build up.
- Keep your car interior clean: Regular vacuuming and wiping of the dashboard and trim reduces the amount of dust that reaches your windscreen.
- Avoid eating in the car: Crumbs and food residue contribute to interior grime. Keeping food out of the car helps a lot.
- Apply a glass sealant: Some automotive glass sealants create a protective barrier on the inside of your windscreen. This makes future cleaning much easier.
How Often Should You Clean the Inside of Your Windscreen?
Frequency depends on your driving habits and environment. As a general rule, cleaning the inside of a car windscreen every two weeks is ideal. If you drive in dusty areas, have pets, or smoke in the car, you may need to clean it more often.
For most drivers, a thorough clean once a month combined with a quick wipe-down every week or two keeps the glass in great condition. Pay attention to your windscreen. If you notice glare increasing or a haze forming, it is time for a clean, regardless of your schedule.
Expert Insights: Pro Tips for Perfect Windscreen Clarity
Professional detailers share a few insider tips that take your windscreen cleaning to the next level:
- Clean in the morning: Morning air is cooler and less humid. This gives your cleaning solution more working time before it evaporates.
- Use two cloths at all times: One for wet application, one for dry buffing. Never reuse a dirty cloth on a clean surface.
- Check your cloths: If your microfiber cloth has been through the dryer with fabric softener, it will leave streaks. Wash cloths with plain water only or use a dedicated cleaner rinse.
- Clean the inside of your mirrors too: The same grime that affects your windscreen also builds up on your side and rearview mirrors. Clean them at the same time.
- Replace your cloths regularly: Worn microfiber cloths lose their effectiveness. Replace them every few months for best results.
Conclusion
Cleaning the inside of a car windscreen is a simple but incredibly important part of car maintenance. It boosts your safety by improving visibility, especially during night driving and bright sunlight. It also keeps your car looking and feeling its best. With the right products, the right tools, and the right technique, anyone can achieve a professional-quality result at home.
Make interior windshield cleaning a regular habit. A few minutes every two weeks saves you from the hassle of tackling heavy buildup later. Your efforts pay off in clearer views, better safety, and a more enjoyable driving experience every single time you get behind the wheel.
Start today. Grab a microfiber cloth and your favourite ammonia-free cleaner, and give your windscreen the care it deserves. You will be amazed at the difference a clean interior glass surface makes.
Frequently Asked Questions
What is the best cleaner for the inside of a car windscreen?
The best cleaner is an ammonia-free glass cleaner specifically designed for automotive use. White vinegar mixed with water is an excellent affordable alternative that works just as well for most grime and haze buildup.
Can I use paper towels to clean my car windscreen?
No, paper towels can scratch your glass and leave behind lint and fibers. Always use a clean microfiber cloth for both applying cleaner and buffing your windscreen dry for the best results.
How do I remove the greasy film on the inside of my windscreen?
A greasy film is caused by off-gassing from your car’s interior plastics. Use a baking soda paste or an isopropyl alcohol solution to break down the grease. A steam cleaner is also highly effective for removing stubborn oily residue.
How often should I clean the inside of my car windscreen?
Every two weeks is ideal for most drivers. If you drive in dusty conditions, have pets, or smoke in the car, you may need to clean it more frequently to maintain clear visibility.
Why does my windscreen get dirty so quickly on the inside?
This happens because of off-gassing from dashboard plastics and seat materials, combined with dust, skin cells, and moisture. Heat accelerates this process, which is why cars parked in the sun often develop haze faster.
Is steam cleaning safe for car windshields?
Yes, steam cleaning is completely safe and very effective for interior windscreen cleaning. The hot steam dissolves grease and residue without any chemicals. Just make sure to follow up with a microfiber cloth to wipe away the loosened grime.