Harley Air Shock Pressure Chart Your Ultimate Guide
The Harley Air Shock Pressure Chart is your go-to reference for dialing in the perfect suspension setup on your motorcycle. Whether you ride a touring bagger or a sporty Softail, getting the air pressure right transforms your ride quality, handling, and safety. This guide walks you through every number, every adjustment, and every pro tip you need to master your Harley’s suspension.
Riding a Harley-Davidson is one of life’s great pleasures. The rumble of the engine, the open road, the wind in your face — nothing quite matches it. But here is something that can ruin that experience fast: bad suspension. If your bike feels bouncy, bottoms out on bumps, or handles poorly in turns, your air shock pressure might be off. That is exactly why a Harley Air Shock Pressure Chart is so valuable. It gives you the exact numbers you need to get your suspension dialed in perfectly.
In this guide, we are going to break down everything you need to know about Harley air shock pressure. We will cover how air shocks work, what the chart numbers mean, and how to set the pressure for your specific model. Whether you ride a Road Glide, a Street Glide, a Softail, or a Sportster, this article has you covered. By the end, you will feel confident adjusting your shocks like a pro.
Key Takeaways
- Correct air pressure matters: Setting the right pressure on your Harley air shock improves ride comfort and stability dramatically.
- Every model is different: Touring bikes need higher pressure than sport models, and the chart reflects those differences clearly.
- Check your pressure regularly: Air leaks happen over time, and a quick check keeps your ride smooth and safe.
- Sag measurement is key: Measuring sag helps you fine-tune pressure beyond what the chart alone suggests.
- DIY adjustment is easy: With a simple air pump and the right chart, you can adjust your shocks at home in minutes.
- Warning signs are obvious: Bottoming out, excessive bounce, and uneven ride height all signal incorrect pressure.
📑 Table of Contents
- Understanding Harley Air Shocks
- Reading the Harley Air Shock Pressure Chart
- How to Set Your Air Shock Pressure
- Common Harley Models and Their Pressure Specs
- Signs Your Air Shock Pressure Is Wrong
- Tips for Maintaining Your Air Shocks
- Common Mistakes to Avoid
- Expert Insights on Harley Suspension Tuning
- Key Takeaways
- Conclusion
Understanding Harley Air Shocks
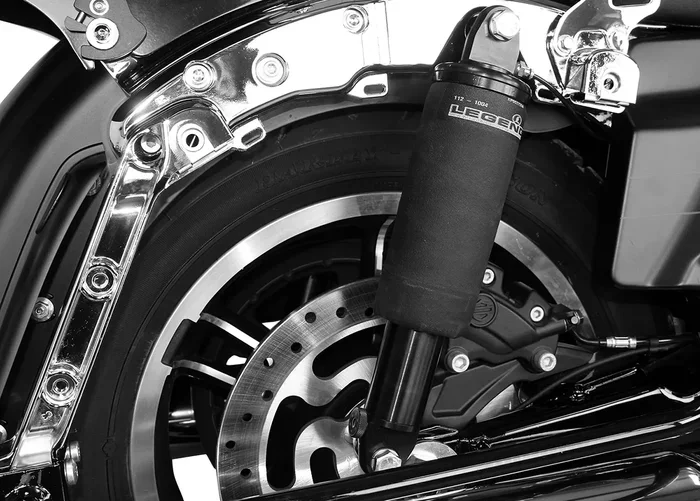
Before you can use a Harley air shock pressure chart, you need to understand what air shocks are and why they matter. Air shocks are a type of motorcycle suspension that uses compressed air instead of traditional coil springs. They are found on the rear wheel of most modern Harleys and sometimes on the front forks as well.
How Air Shocks Work
Air shocks have a sealed chamber filled with air. You pump more air in to increase pressure, which makes the shock stiffer. Let air out, and the shock becomes softer. This gives you precise control over how your bike handles load and absorbs bumps. The air spring inside the shock works hand in hand with oil damping to smooth out every bump in the road.
The beauty of air shocks is adjustability. Unlike coil springs that are fixed, you can change your air pressure based on your riding style, your weight, and how much gear you are carrying. A rider with a passenger and saddlebags needs more pressure than a solo rider. The Harley air shock pressure chart accounts for these differences.
Why Air Shocks Need the Right Pressure
Setting the wrong pressure causes real problems. Too little air, and your bike will sag low. It will bottom out on every bump, and the rear end will feel wallowy. Too much air, and the ride gets harsh. Every little pebble sends a jolt through the frame. Your tires lose contact with the road, which hurts both comfort and safety.
The right pressure keeps your motorcycle at the correct ride height. It ensures the suspension can travel enough to absorb bumps without hitting the stops. It also keeps your handling predictable. When you lean into a corner or hit a pothole, you want the bike to respond the way you expect. Correct air shock pressure makes that happen.
Reading the Harley Air Shock Pressure Chart
A Harley air shock pressure chart is a table or list that shows the recommended air pressure for different models and riding conditions. The numbers are measured in pounds per square inch, or PSI. Most Harley air shocks operate between 30 and 80 PSI, though this range varies by model and year.
What the Numbers Mean
Each row on the chart typically corresponds to a specific Harley model or model family. The columns show the recommended PSI for different scenarios. For example, a touring model with a solo rider might need 45 PSI, while the same model with a passenger and luggage might need 55 PSI.
Here is what you will typically find on a Harley air shock pressure chart:
- Model name and year: So you know the chart applies to your specific bike.
- Solo rider pressure: The baseline PSI for one rider without extra gear.
- Passenger pressure: Added PSI to support a second person.
- Loaded pressure: PSI for when you carry saddlebags, trunk, or other accessories.
- Track or aggressive riding pressure: Higher settings for spirited riding or competition use.
Where to Find Your Pressure Chart
Your owner’s manual is the first place to look. Harley-Davidson includes a shock pressure chart in most owner’s manuals. You can also find the chart on the Harley-Davidson website by entering your model and year. Some aftermarket shock manufacturers, like Progressive or Bilstein, provide their own air shock pressure charts that are even more detailed than the OEM version.
If you have aftermarket shocks installed, always check the manufacturer’s chart instead of the OEM one. Aftermarket shocks often have different pressure ranges and tuning characteristics. Using the wrong chart can lead to a poor setup and an uncomfortable ride.
How to Set Your Air Shock Pressure
Setting your Harley air shock pressure is straightforward once you know the steps. You do not need to be a mechanic. With the right tools and the chart in hand, you can do this at home in about 15 minutes.
Tools You Will Need
You do not need a garage full of tools. Here is what you need to get started:
- A motorcycle air pump with a pressure gauge. A bicycle pump with a PSI gauge works in a pinch, but a dedicated air pump is faster and more accurate.
- A shock pump designed for motorcycle suspension. These are available at most motorcycle shops and online for around $20 to $40.
- A tape measure or ruler to check ride height.
- Your Harley air shock pressure chart, either from the manual or downloaded from the website.
Step-by-Step Process
Follow these steps to set your air shock pressure correctly:
- Start with the bike on its center stand. This puts the suspension in a neutral, uncompressed state. It gives you a baseline reading.
- Remove the valve cap from the shock. It is a small rubber or metal cap on top of the shock body. Twist it off counterclockwise.
- Connect your air pump to the valve. Press the pump fitting firmly onto the valve stem. Make sure it seats properly so no air leaks out.
- Check the current pressure. Look at the gauge on your pump. Compare it to the recommended PSI on your air shock pressure chart.
- Add or release air as needed. To add air, pump slowly and check the gauge often. To release air, press the small valve core inside the pump fitting. Go in small increments.
- Replace the valve cap. This keeps dirt and moisture out of the shock valve.
- Check your ride height and sag. Get on the bike in your normal riding position. The rear end should settle to the height shown in your owner’s manual.
Measuring Sag for Fine-Tuning
The chart gives you a starting point, but sag measurement helps you fine-tune the setup. Sag is the amount the suspension compresses when you sit on the bike. Measure it with the bike on its side stand, then subtract the measurement with you sitting on the bike in riding position. The difference is your sag.
For most Harley models, the ideal sag is between 25 and 35 millimeters. If your sag is too low, add a little air. If it is too high, let some air out. This process takes a few tries, but once you get the feel for it, it becomes second nature.
Common Harley Models and Their Pressure Specs
Not all Harleys need the same pressure. The Harley air shock pressure chart varies by model because different bikes have different suspension designs, frame geometry, and intended use. Here is a look at some of the most popular models and their general pressure ranges.
Touring Models (Road King, Street Glide, Road Glide)
Touring Harleys carry a lot of weight. They come with large screens, saddlebags, and trunks. Because of this, they need higher air shock pressure to handle the load. For a solo rider, most touring models call for 40 to 50 PSI in the rear shock. Add a passenger, and you might need 50 to 60 PSI. With a fully loaded touring setup, 60 to 70 PSI is common.
The front fork on touring models also uses air pressure in many years. Check your manual for the fork pressure chart, which is separate from the rear shock chart. Getting both front and rear pressure right makes a huge difference in how the bike tracks on the highway.
Softail Models (Softail Standard, Fat Boy, Low Rider)
Softails have a different suspension feel because of their solid-looking rear frame. The air shock is hidden but still critical. Most Softail models recommend 35 to 45 PSI for a solo rider. The pressure is generally lower than touring models because these bikes are lighter and designed for a more responsive, upright riding position.
If you are running a Progressive air shock on a Softail, the pressure range might differ slightly. Progressive shocks often have a broader adjustment window, which gives you more tuning flexibility. Always refer to the shock manufacturer’s chart for the most accurate numbers.
Sport and Standard Models (Sportster, Iron, Forty-Eight)
Sportsters and smaller Harleys are lighter and more nimble. They need less air pressure in the rear shock. A solo rider on a Sportster typically runs 30 to 40 PSI. The front fork on older Sportsters uses conventional springs, but newer models may have air forks that follow a similar pressure logic.
Because these bikes are closer to the ground, getting the pressure right is especially important. Too much pressure lifts the rear end too high, which changes the steering geometry and makes the bike feel unstable at low speeds.
Signs Your Air Shock Pressure Is Wrong
You do not always need a chart to know something is off. Your bike will tell you when the air shock pressure is not right. Learning to read these signs helps you catch problems early before they cause damage or unsafe riding conditions.
Excessive Bouncing After Bumps
If your bike bounces more than once after hitting a bump, your pressure is likely too low. The shock does not have enough air support to control the movement. The suspension cycles too far and too fast, which is called excessive rebound. Add air in small increments until the bouncing stops.
Bottoming Out on Bumps
Bottoming out happens when the suspension hits its full compression and there is no travel left. You will feel a hard thump, and sometimes a loud bang. This is a clear sign of insufficient air pressure. The shock is too soft for your weight and riding conditions. Add pressure according to your chart.
Harsh Ride Over Small Imperfections
When the pressure is too high, every tiny bump feels harsh. The suspension cannot compress enough to absorb small road irregularities. The ride becomes jarring, especially at lower speeds. If you feel every crack and seam in the road, your pressure is probably too high. Let some air out and test ride again.
Uneven Ride Height
Stand behind your bike and look at it from the side. The rear end should be level or slightly tucked depending on the model. If one side sits lower than the other, it could indicate a leaking air shock. Air shocks can develop slow leaks from the valve seal or from a puncture in the air chamber. A slow leak means you will lose pressure over days or weeks, and the chart numbers will no longer be accurate.
Tips for Maintaining Your Air Shocks
Getting the right pressure is only half the battle. Proper maintenance keeps your Harley air shocks working their best for years. Here are some practical tips every Harley owner should follow.
- Check your pressure at least once a month. Air pressure naturally drops over time, even without a visible leak. A quick check with your gauge takes less than a minute.
- Inspect the shock body for damage. Look for dents, cracks, or oil leaks around the shock shaft. Any damage can compromise the seal and lead to pressure loss.
- Keep the valve clean. Dirt and road grime can build up around the valve stem. Wipe it down with a damp cloth during your regular bike cleaning routine.
- Replace shocks at the right interval. Even with perfect maintenance, air shocks wear out. Most manufacturers recommend inspecting them every 20,000 to 30,000 miles. If the shock feels mushy or does not hold pressure, it is time for a replacement.
- Use the right pump fitting. Different shocks use different valve sizes. Using the wrong fitting can damage the valve or give inaccurate readings. Ask your dealer or shock manufacturer for the correct fitting.
- Record your pressure settings. Keep a small notebook or use your phone to record the pressure you use for different riding scenarios. This saves time the next time you adjust.
Quick Tips for Better Suspension Performance
Here are some quick tips that make a real difference in how your Harley rides:
- Always measure pressure when the shocks are cold, before riding. Hot shocks give false readings because the air inside expands with heat.
- Adjust pressure in small increments of 2 to 3 PSI. Large jumps make it hard to find the sweet spot.
- Test ride after each adjustment. Your body feels changes the instruments cannot measure.
- If you carry a passenger often, keep a separate pressure setting saved in your phone or notebook.
- Consider upgrading to a high-quality aftermarket air shock if your stock shocks feel limiting. Brands like Progressive, Bilstein, and KYB offer excellent options with their own detailed pressure charts.
Common Mistakes to Avoid
Even experienced riders make mistakes when it comes to air shock pressure. Here are the most common ones and how to avoid them.
Relying only on the chart without checking sag. The chart is a starting point, not the final word. Every rider is different. Two people of the same weight can prefer different pressure settings based on their riding style. Always use sag measurement to confirm the chart recommendation works for you.
Ignoring front fork pressure. Many riders focus only on the rear shock and forget about the front forks. If your front forks are also air-adjusted, they need the same attention. An imbalance between front and rear pressure causes the bike to dive or squat unpredictably.
Overinflating for a “sporty” feel. Some riders think more pressure equals better handling. That is not true. Too much pressure makes the ride harsh and reduces traction. The tire loses its ability to conform to the road surface, which actually makes handling worse, not better.
Neglecting slow leaks. A slow leak might not be obvious at first. You might lose 2 or 3 PSI per week. Over time, this adds up and puts you far from your target pressure. If you find yourself adding air more often than usual, inspect the shock for leaks.
Expert Insights on Harley Suspension Tuning
Professional suspension tuners agree that the Harley air shock pressure chart is the foundation of a good setup, but it is not the whole picture. The real art of suspension tuning comes from understanding how pressure interacts with your weight, your riding style, and the road conditions you encounter most often.
Experienced tuners recommend starting with the chart baseline, then making small adjustments based on how the bike actually feels. They also emphasize the importance of compression damping and rebound damping on adjustable shocks. Pressure controls how much the shock supports your weight, while damping controls how fast the shock compresses and extends. Both work together to create the final ride quality.
If you are serious about your suspension setup, consider getting a professional suspension service. A shop with a shock dyno can test your shocks under load and show you exactly how they are performing. This is especially valuable if you are running aftermarket shocks and want to squeeze every bit of performance out of them.
Key Takeaways
- Correct air pressure matters: Setting the right pressure on your Harley air shock improves ride comfort and stability dramatically.
- Every model is different: Touring bikes need higher pressure than sport models, and the chart reflects those differences clearly.
- Check your pressure regularly: Air leaks happen over time, and a quick check keeps your ride smooth and safe.
- Sag measurement is key: Measuring sag helps you fine-tune pressure beyond what the chart alone suggests.
- DIY adjustment is easy: With a simple air pump and the right chart, you can adjust your shocks at home in minutes.
- Warning signs are obvious: Bottoming out, excessive bounce, and uneven ride height all signal incorrect pressure.
Conclusion
The Harley Air Shock Pressure Chart is one of the most useful tools you can have as a Harley owner. It takes the guesswork out of suspension setup and gives you a clear, reliable starting point. Whether you are a solo cruiser or a loaded touring rider, getting your air shock pressure right changes the way your bike feels and handles.
Remember, the chart is your guide, not your rulebook. Use it as a foundation, then fine-tune based on how your bike actually feels on the road. Check your pressure regularly, watch for warning signs of incorrect setup, and maintain your shocks properly. With the right pressure and a little attention, your Harley will ride smoother, handle better, and feel safer on every ride.
Take the time to get your suspension right. It is one of the best investments you can make in your riding experience. Pull out that Harley air shock pressure chart, grab your pump, and enjoy the difference a proper setup makes.
Frequently Asked Questions
What PSI should my Harley air shocks be set to?
The correct PSI depends on your specific Harley model, riding style, and whether you carry a passenger or luggage. Most touring models need 40 to 70 PSI, while Sportsters and Softails typically need 30 to 45 PSI. Always start with the numbers on your Harley air shock pressure chart and adjust from there based on sag measurement and ride feel.
Can I use a regular bicycle pump to fill my Harley air shocks?
Yes, in an emergency. A bicycle pump with a PSI gauge will work for adding small amounts of air. However, a dedicated motorcycle shock pump is faster, more accurate, and easier to use. The fitting on a shock pump is designed to seal properly on the shock valve, which reduces the risk of air leaking out during the process.
How often should I check my Harley air shock pressure?
Check your pressure at least once a month. Air shocks lose a small amount of pressure over time even without leaks. If you ride frequently or carry heavy loads, check before every long ride. Making it a habit takes only a minute and keeps your suspension performing at its best.
What happens if my air shock pressure is too low?
Low pressure causes the suspension to sag, bottom out on bumps, and feel wallowy. The rear end rides too close to the tire, which reduces ground clearance and handling precision. Over time, repeated bottoming out can damage the shock internals and other suspension components.
Do I need to adjust pressure when I add a passenger?
Yes, absolutely. A passenger adds significant weight to the rear of the motorcycle. The air shock pressure chart includes specific recommendations for passenger and loaded riding. Adding the correct extra pressure keeps your ride height and handling balanced with the additional weight.
Can I adjust my air shocks while the bike is on the kickstand?
You can check and adjust pressure with the bike on the center stand or kickstand, but the most accurate sag measurement is done with you sitting on the bike in your normal riding position. Adjust the pressure on the stand, then get on the bike and verify the sag. This two-step process gives you the best results.