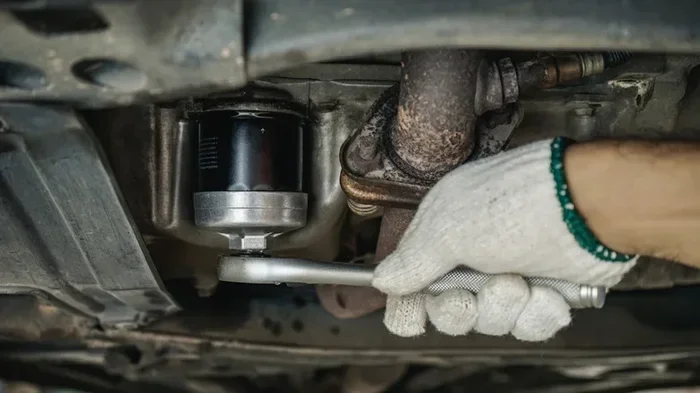
How to Get an Oil Filter Off Without a Wrench at All
You can remove an oil filter without a wrench using rubber gloves, a belt, or a simple oil filter plier alternative. This guide covers proven methods, safety tips, and common mistakes to avoid. Whether you are stranded or just do not have a wrench, you will find a workable solution here.
Getting an oil filter off without a wrench is easier than most people think. You do not need a fancy toolbox or professional mechanic skills. Whether you are on the side of the road or working in your garage, there are several simple methods you can use. In this guide, we walk you through every technique you need to know. You will learn how to remove a stubborn oil filter using everyday items found around your home.
The oil filter is one of the most important parts of your engine. It keeps dirt and debris from circulating through your engine oil. Over time, the filter gets clogged and needs to be replaced. Most people reach for a wrench when it is time to change the filter. But what happens when you do not have one? That is where this guide comes in. We will show you how to handle this common maintenance task with confidence.
Changing your oil filter is a key part of DIY oil change routines. Many car owners prefer doing it themselves to save money and learn more about their vehicle. The good news is that you do not always need a special tool. With the right approach, you can get the job done quickly and safely. Let us dive into the methods that actually work.
Key Takeaways
- Rubber Grip Method: Using rubber gloves or a rubber band gives you enough traction to twist off a tight oil filter by hand.
- Belt and Leverage Technique: A simple belt or strap wrapped around the filter provides the leverage you need to break it loose.
- Oil Filter Pliers Work Great: A pair of oil filter pliers or channel-lock pliers is a cheap and effective alternative to a traditional wrench.
- Heat Helps Loosen Stuck Filters: Warming the oil filter housing with a hair dryer or heat gun can break the seal and make removal much easier.
- Avoid Common Mistakes: Do not use excessive force, and always let the engine cool slightly before attempting removal to avoid injury.
- Prepare Before You Start: Having the right materials ready, like a drain pan and fresh oil, makes the entire process smoother and faster.
📑 Table of Contents
- Why Would You Need to Remove an Oil Filter Without a Wrench?
- Tools and Materials You Will Need
- Method 1: The Rubber Grip Technique
- Method 2: Using a Belt for Leverage
- Method 3: Pliers and Channel-Lock Alternatives
- Method 4: Using Heat to Loosen a Stuck Oil Filter
- Common Mistakes to Avoid When Removing an Oil Filter
- How to Know When Your Oil Filter Needs Replacement
- Tips for a Smooth Oil Filter Removal Every Time
- When to Call a Professional
- Final Thoughts on Removing an Oil Filter Without a Wrench
Why Would You Need to Remove an Oil Filter Without a Wrench?
There are many reasons you might find yourself without a wrench when it is time to change your oil filter. Sometimes the unexpected happens. Other times, it is simply a matter of convenience. Understanding these situations helps you prepare better for future maintenance.
You Are Stranded Away From Home
Imagine you are on a road trip and your oil filter starts leaking. You pull over, pop the hood, and realize you did not pack a wrench. This is a scary situation, but it does not have to be hopeless. Knowing how to remove the filter by hand or with a simple household item can save your trip. It also saves you from having to call a tow truck or visit an expensive mechanic.
Your Wrench Is the Wrong Size
Not every oil filter uses a standard wrench size. Some vehicles have unique filter housings that require specialty tools. If you have a stuck oil filter and the wrong wrench, you might strip the housing or make the problem worse. In these cases, using alternative methods is not just convenient, it is the smart choice.
You Want a Quick DIY Oil Change
Many car owners love the simplicity of a DIY oil change. It is empowering to handle your own vehicle maintenance. Skipping the wrench and using alternative methods makes the process even more accessible. You do not need to buy extra tools or spend money on specialty equipment.
Tools and Materials You Will Need
Before you start, gather a few common items you likely already have at home. You do not need a full garage setup. Most of these tools are things you use every day. Having them ready will make the oil filter removal process much smoother.
Essential Items for Oil Filter Removal
- Rubber gloves for better grip and hand protection
- A belt or strap that can wrap around the filter
- Pliers or channel-lock pliers as an oil filter plier alternative
- A hair dryer or heat gun to warm up the filter housing
- A drain pan to catch any remaining oil
- Rags or paper towels for cleaning up spills
- New oil filter and fresh engine oil for the replacement
Safety First
Always let your engine cool down before you start working on it. Hot oil and hot metal can cause serious burns. Wear rubber gloves to protect your hands from sharp edges and hot surfaces. Make sure your vehicle is parked on a flat surface and the engine is turned off. Safety should always come first when working on any car maintenance task.
Method 1: The Rubber Grip Technique
The rubber grip method is one of the simplest ways to remove an oil filter without a wrench. This technique works by increasing friction between your hand and the filter. It is perfect for filters that are not extremely tight. Most people can do this with items they already have at home.
How to Do It
- Put on a pair of thick rubber gloves. Rubber dishwashing gloves work great for this.
- Make sure the oil filter is cool enough to touch but not freezing cold.
- Wrap the rubber glove around the oil filter housing or the filter itself.
- Twist the filter counterclockwise with steady, even pressure.
- If the filter is tight, try wrapping a rubber band around it for extra grip.
Why This Works
Rubber creates friction that helps your hand grip the smooth metal or plastic surface of the oil filter. This extra traction gives you the leverage needed to break the seal. The oil filter gasket can sometimes stick tightly to the housing, but the rubber grip method helps overcome that resistance without damaging the filter or the housing.
Pro Tip: If you have a rubber jar opener handy, use it! It works just as well on oil filters as it does on stubborn jar lids. Keep one in your glove box for emergencies.
Method 2: Using a Belt for Leverage
The belt method is a clever trick that uses a simple strap to generate the torque needed to loosen a tight oil filter. This technique is especially useful when the filter is very tight and your hands alone are not enough.
Step-by-Step Instructions
- Find a sturdy belt or a long strap. A leather belt works best.
- Wrap the belt around the oil filter, crossing the ends over the top.
- Hold the belt ends and pull in opposite directions to create tension.
- While pulling, twist the filter counterclockwise.
- The leverage from the belt will help break the filter free from its housing.
When to Use This Method
This method works best on oil filters that are tight but not completely seized. If the filter is rusted or corroded, you may need to combine this method with heat. The belt technique is also great because it does not risk damaging the filter or the surrounding engine components. It distributes the force evenly around the filter body.
One thing to watch out for is making sure the belt does not slip. A leather belt with a good grip surface works much better than a fabric strap. If the belt keeps slipping, try wrapping it around the filter one more time for a tighter fit.
Method 3: Pliers and Channel-Lock Alternatives
If you have a pair of pliers or channel-lock pliers, you are in luck. These common tools work as an excellent oil filter wrench alternative. They provide a strong grip and allow you to apply significant torque without needing a specialized oil filter wrench.
How to Use Pliers Effectively
- Select a pair of channel-lock pliers or adjustable pliers.
- Open the jaws wide enough to fit around the oil filter body.
- Grip the filter firmly, making sure the pliers are aligned straight.
- Turn the filter counterclockwise with steady, controlled force.
- If the filter is very tight, gently tap the pliers with a mallet to break the seal first.
Protecting the Filter and Housing
One risk of using pliers is scratching or denting the oil filter housing. To avoid this, wrap a rag or piece of rubber around the filter before gripping it with the pliers. This protects the surface while still giving you a strong hold. Always apply force slowly and evenly to prevent damaging the oil filter housing or surrounding engine parts.
Quick Tip: Keep a pair of channel-lock pliers in your car’s emergency toolkit. They are inexpensive and incredibly useful for many tasks beyond oil filter removal. You can also use them for gripping pipes, hoses, and other tight-fitting components under the hood.
Method 4: Using Heat to Loosen a Stuck Oil Filter
Heat is one of the most effective ways to loosen a stuck oil filter. When metal heats up, it expands slightly. This expansion can break the seal between the filter and the housing, making removal much easier. This method works particularly well on older vehicles where filters may have been in place for a long time.
How to Apply Heat Safely
- Start by running your engine for about 10 minutes. This warms up the oil and the filter housing.
- Turn off the engine and let it cool for a few minutes so you do not burn yourself.
- Use a hair dryer or a heat gun on a low setting to warm the oil filter housing.
- Direct the heat at the base of the filter where it meets the housing.
- After heating for about 30 seconds, try removing the filter using one of the hand methods described above.
Why Heat Works So Well
The oil filter gasket seals the filter to the housing using a combination of pressure and temperature. When you apply heat, the metal housing expands slightly, breaking that seal. At the same time, the old oil inside the filter becomes thinner and less sticky. This combination makes it much easier to twist the filter free. The oil filter removal process becomes significantly less frustrating when heat is part of your approach.
Important Warning: Never use an open flame or torch near the oil filter or engine. Oil and engine components are flammable, and this creates a serious fire hazard. Stick to a hair dryer, heat gun, or even a warm cloth wrapped around the filter housing.
Common Mistakes to Avoid When Removing an Oil Filter
Even with the right technique, mistakes can happen. Knowing what to avoid saves you time, money, and potential engine damage. Here are the most common errors people make when trying to remove an oil filter without a wrench.
Using Too Much Force
One of the biggest mistakes is forcing the filter off with brute strength. This can damage the oil filter housing, crack the engine block, or strip the threading. If the filter will not budge, stop and try a different method. Applying heat or using a belt for leverage is much safer than yanking on it with all your might.
Forgetting to Drain the Oil First
Always make sure the oil has been drained before you attempt to remove the filter. If there is still oil inside the filter, it will spill out messily when you twist it free. Place a drain pan underneath the filter and let the oil drain completely. This also prevents hot oil from burning your skin during removal.
Using the Wrong Replacement Filter
Not all oil filters fit every vehicle. Using the wrong filter can lead to poor sealing, leaks, and engine damage. Always check your owner’s manual or consult a parts catalog to find the correct oil filter for your specific make and model. When in doubt, visit a dealership or auto parts store for guidance.
Skipping the New Gasket O-Ring
When you install a new oil filter, make sure the gasket or O-ring is properly seated. A common mistake is forgetting to lightly coat the new gasket with fresh oil before installation. This helps create a proper seal and makes future filter removal easier. A well-lubricated gasket also prevents the filter from becoming stuck again.
How to Know When Your Oil Filter Needs Replacement
Replacing your oil filter at the right time is essential for engine health. A clogged or worn filter can reduce oil flow and cause serious engine damage over time. Here are some signs that it is time for a new filter.
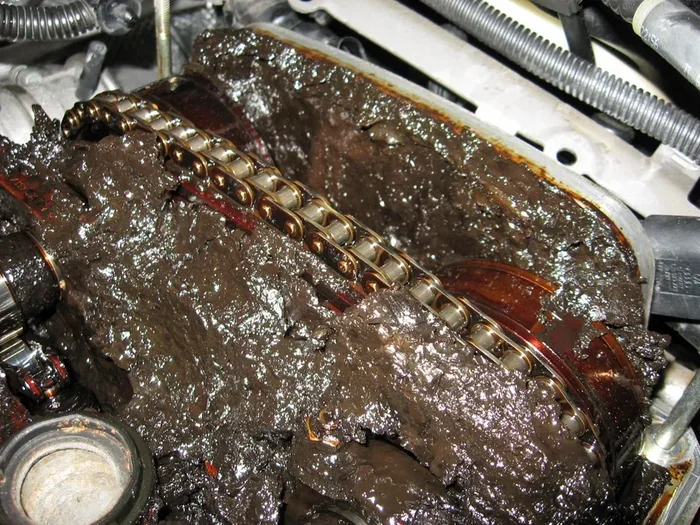
- Dirty or dark oil: If your oil looks black and gritty, the filter is likely clogged.
- Reduced engine performance: A dirty filter restricts oil flow, which can affect engine power.
- Oil pressure warning light: This dashboard light can indicate a clogged filter or low oil levels.
- Unusual engine noise: Knocking or ticking sounds may mean the filter is not allowing enough oil through.
- Oil leaks under the car: A loose or damaged filter housing can cause oil to leak from the bottom of the engine.
Most manufacturers recommend changing your oil filter every 3,000 to 5,000 miles, depending on your vehicle and driving conditions. If you are unsure, check your owner’s manual or ask a trusted mechanic. Keeping up with regular oil filter replacement is one of the best things you can do for your engine’s longevity.
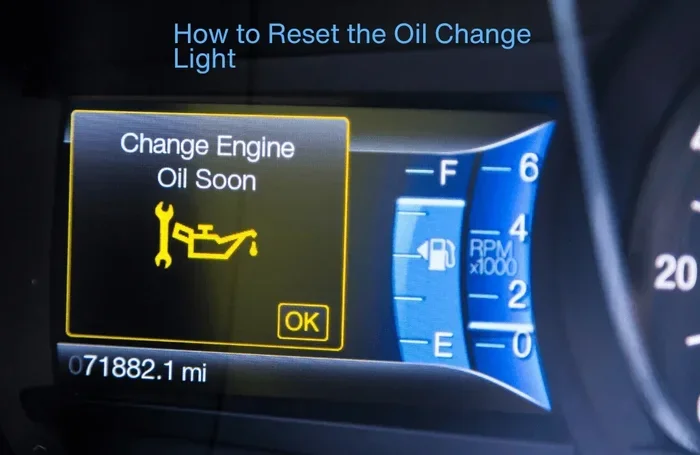
After you replace your oil filter, do not forget to reset your oil change reminder if your vehicle has one. Some newer models allow you to reset this through the dashboard menu. Proper maintenance, including timely oil changes, helps your car run smoothly and efficiently for years to come.
Tips for a Smooth Oil Filter Removal Every Time
A little preparation goes a long way when it comes to removing an oil filter. These practical tips will help you avoid frustration and get the job done right the first time.
- Warm up the engine first. Running the engine for a few minutes warms the oil and loosens the filter gasket.
- Have a drain pan ready. Place it directly under the filter before you start loosening it.
- Use a rag for grip. Wrapping a rag around the filter gives you extra traction and protects your hands.
- Work slowly and steadily. Do not rush the process. Steady pressure is more effective than sudden force.
- Keep a spare filter on hand. If the old filter breaks during removal, having a new one ready prevents delays.
- Clean the housing before installing the new filter. Wipe away any old gasket material or debris from the mounting surface.
- Hand-tighten the new filter. Over-tightening with tools can damage the housing and make future removal difficult.
These simple habits make every oil change easier and more efficient. Over time, you will find that removing an oil filter without a wrench becomes second nature. The more you practice, the more confident you will become in handling your own vehicle maintenance.
When to Call a Professional
While removing an oil filter without a wrench is often doable at home, there are times when professional help is the best choice. If the filter is completely seized or rusted in place, a mechanic has the tools and expertise to remove it safely. Attempting to force a seized filter can lead to expensive engine repairs.
Also, if you notice any unusual symptoms after replacing the filter, such as persistent leaks or low oil pressure, have a professional inspect the vehicle. Sometimes the issue is not the filter itself but a deeper problem with the engine or oil system. A qualified mechanic can diagnose and fix these issues quickly and safely.
For routine maintenance like oil changes, doing it yourself is a great way to save money and learn about your vehicle. But knowing when to seek professional help is equally important. A trusted mechanic can also check your transmission fluid and other fluids during an oil change visit, giving you extra peace of mind.
Final Thoughts on Removing an Oil Filter Without a Wrench
Removing an oil filter without a wrench is a practical skill every car owner should know. Whether you are dealing with a stuck oil filter, a missing wrench, or just prefer a tool-free approach, the methods in this guide have you covered. From the simple rubber grip technique to using heat and leverage with a belt, you now have multiple ways to get the job done.
Remember to always prioritize safety. Let the engine cool, wear protective gloves, and work on a flat surface. Take your time and do not force anything. With the right approach, you can handle this common maintenance task confidently and efficiently. Keep these tips in mind for your next DIY oil change, and you will be well prepared for any situation that comes your way.
Regular oil filter maintenance keeps your engine running smoothly and extends the life of your vehicle. Whether you change your oil at home or visit a service center, staying on top of this simple task pays off in the long run. Your engine will thank you for it.
Frequently Asked Questions
Can I remove an oil filter with just my bare hands?
Yes, you can remove many oil filters by hand, especially if they are not extremely tight. Wearing rubber gloves gives you a much better grip and makes the process easier. If the filter is very tight, try the rubber band method or use a belt for extra leverage. Always make sure the engine has cooled down before you attempt removal by hand.
What can I use if I do not have an oil filter wrench?
Several household items work as an oil filter wrench alternative. Rubber gloves, a belt, channel-lock pliers, and even a rubber jar opener can help you remove a tight oil filter. Heat from a hair dryer also loosens the seal between the filter and the housing. Having a few of these items in your garage makes DIY oil changes much more convenient.
Is it safe to use pliers to remove an oil filter?
Yes, it is safe as long as you take precautions. Wrap a rag around the filter before gripping it with pliers to prevent scratches and dents. Apply steady, even pressure and avoid jerking motions. If the filter is very tight, applying a small amount of heat first helps break the seal and reduces the force needed to remove it.
How do I know if my oil filter is stuck?
A stuck oil filter will not budge when you try to twist it by hand. You may feel resistance or hear a grinding sound. This usually happens when the old gasket has fused to the housing or when the filter has been over-tightened during the last installation. Applying heat and using a belt or pliers can help break the stuck seal safely.
Can heat damage my engine when removing an oil filter?
Using moderate heat from a hair dryer or heat gun on a low setting is safe and effective. Never use an open flame or high-heat source near the engine. Excessive heat can damage plastic components, wiring, or fluid lines in the engine bay. Keep the heat directed at the filter housing for no more than 30 to 60 seconds at a time.
How often should I replace my oil filter?
Most manufacturers recommend replacing the oil filter every 3,000 to 5,000 miles, but this varies by vehicle and driving conditions. Check your owner’s manual for the specific recommendation for your car. Regular replacement keeps your engine clean and prevents buildup that can lead to costly repairs over time.