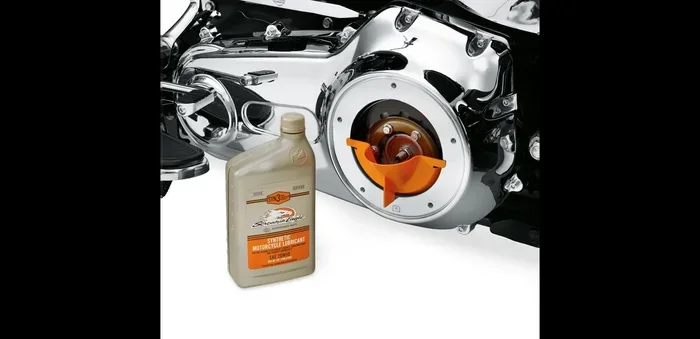
How to Check Primary Oil on a Harley-Davidson the Easy Way
Checking the primary oil on your Harley-Davidson is one of the easiest maintenance tasks you can do at home. This guide walks you through the entire process, from gathering your tools to verifying the correct oil level. You will learn why primary oil matters, how often to change it, and how to avoid common mistakes.
Owning a Harley-Davidson comes with a sense of freedom and pride. But with that pride comes responsibility. One of the simplest yet most important things you can do for your bike is checking the primary oil. Many riders overlook this task, and that can lead to serious transmission problems down the road.
If you have ever wondered how to check primary oil on a Harley-Davidson, you are in the right place. This guide breaks everything down into easy-to-follow steps. Whether you are a first-time Harley owner or a seasoned rider, you will find practical tips that make the process quick and painless. Primary oil keeps your transmission and primary drive chain running smoothly. Without the right level, you risk expensive repairs.
Think of primary oil as the lifeblood of your motorcycle’s drivetrain. It reduces friction, cools internal parts, and prevents wear. Just like you would not ignore a low oil level in your car, you should not ignore it in your Harley. The good news is that checking it takes only about 15 minutes. No mechanic skills needed. No fancy garage required. Just a few basic tools and a little confidence.
In this article, we cover everything from what primary oil does to how to drain and refill it. We also share common mistakes to avoid and answer the most frequently asked questions. By the end, you will feel confident tackling this maintenance task on your own. Let us get into it.
Key Takeaways
- Primary oil lubricates the transmission and primary drive chain: Keeping it at the right level protects your Harley’s internal components.
- You only need basic tools: A wrench, funnel, drain pan, and the correct oil type are all you require.
- Check the oil level with the bike level and the engine warm: This ensures an accurate reading every time.
- Change intervals matter: Most Harley-Davidsons need a primary oil change every 5,000 to 10,000 miles.
- Avoid overfilling: Too much oil can cause leaks and pressure buildup in the primary case.
- Use the right oil type: Harley-Davidson recommends specific primary oil grades for optimal performance.
📑 Table of Contents
- What Does Primary Oil Do on a Harley-Davidson?
- How to Check Primary Oil on a Harley-Davidson: Step-by-Step
- How Often Should You Check and Change Primary Oil?
- What Type of Oil Should You Use?
- Common Mistakes When Checking Primary Oil
- Quick Tips for Hassle-Free Primary Oil Checks
- When to See a Professional
- Conclusion
What Does Primary Oil Do on a Harley-Davidson?
Before you learn how to check primary oil on a Harley-Davidson, it helps to understand what it does. The primary oil sits inside the primary chain case, which is located between the engine and the transmission. It serves several critical functions that keep your bike running properly.
Lubrication
The primary chain, clutch assembly, and gears inside the transmission all rely on this oil for lubrication. Without it, metal parts would grind against each other. That creates heat, friction, and eventually, catastrophic failure. Think of it like the oil in your car engine, but for the drivetrain.
Cooling
Primary oil also helps dissipate heat. The transmission and primary drive generate a lot of warmth during operation. The oil absorbs that heat and carries it away from sensitive components. This keeps everything running within safe temperature ranges.
Cleaning
As the oil circulates, it picks up tiny metal particles and debris. This prevents buildup inside the case. Over time, the oil breaks down and loses its cleaning ability. That is why regular changes matter so much.
How to Check Primary Oil on a Harley-Davidson: Step-by-Step
Now let us get into the hands-on part. Checking the primary oil level is straightforward once you know the steps. Follow along and you will have it done in no time.
Step 1: Gather Your Tools
Before you start, make sure you have everything ready. You do not want to stop halfway through because you are missing something. Here is what you need:
- A socket wrench set (typically 32mm for Harley primary drain plug)
- A new primary oil fill plug gasket or O-ring
- The correct type of primary oil (Harley-Davidson Premium Primary Fluid or equivalent)
- A drain pan to catch the old oil
- A funnel (a narrow one works best)
- A clean rag or shop towel
- A level surface to park your bike on
Step 2: Warm Up the Engine
Start your Harley and let it idle for about 5 to 10 minutes. Warming the oil makes it thinner, so it drains more completely and gives you a more accurate reading. Do not let the bike get too hot, though. Just a gentle warm-up is enough.
Step 3: Position the Bike on a Level Surface
Park your Harley on a flat, level surface. If your bike has a center stand, use it. The primary oil level needs to be checked with the bike perfectly upright. If the bike is tilted, your reading will be off, and you might overfill or underfill the case.
Step 4: Locate the Primary Oil Fill Plug
Look at the left side of the engine. You will see the primary cover. The fill plug is located on the left side of this cover, near the front. It is a bolt with a rubber gasket. This is where you will check the oil level and add oil if needed.
Step 5: Remove the Fill Plug
Place your drain pan underneath. Using the correct socket size, carefully loosen and remove the fill plug. Be ready for a small amount of oil to drip out. Slowly pull the plug out and let the oil drain for a moment.
Step 6: Check the Oil Level
Here is the key part. Look inside the fill hole. You will see the oil level inside the primary case. The oil should reach just below the bottom of the fill hole threads. If the oil level is low, you need to add more. If it is at or above the threads, you are good to go.
Some riders wonder if they should also check the transmission fluid at the same time. While the primary oil and transmission fluid are separate systems on most Harley models, it is a good habit to inspect both during your maintenance routine. Many owners ask themselves, do mechanics check transmission fluid during an oil change? The answer is yes, professional technicians often check all fluid levels as part of a full service.
Step 7: Add Oil If Needed
If the oil level is low, use a narrow funnel to pour the primary oil into the fill hole. Add it slowly. You do not want to overfill. Pour a small amount, wait a few seconds, and check the level again. The oil should sit just below the bottom of the fill hole threads.
Overfilling is one of the most common mistakes riders make. Too much oil creates pressure inside the case. This can cause leaks around the seals and gaskets. If you have ever dealt with oil leaking from your primary case, overfilling is a likely culprit. For more on oil-related issues, check out our guide on Can You Tell If Your Car Is Low On Oil for general oil level awareness tips.
Step 8: Reinstall the Fill Plug
Once the oil level is correct, wipe any excess oil off the plug and the surrounding area. Install the fill plug with a new gasket or O-ring. Tighten it snugly but do not over-torque. You want a good seal without stripping the threads.
Step 9: Clean Up and Dispose of Old Oil Properly
Wipe down the area around the primary cover with a clean rag. Take your used oil and the drain pan to a local recycling center or auto parts store. Most shops will accept used oil for free. Never dump it on the ground or in the trash.
How Often Should You Check and Change Primary Oil?
Consistency is the key to keeping your Harley in great shape. So how often should you be checking and changing that primary oil?
Checking Intervals
Make it a habit to check your primary oil level at least once a month. You should also check it before any long ride. This takes just a few minutes and can save you from unexpected problems on the road.
Oil Change Intervals
Harley-Davidson recommends changing the primary oil every 5,000 to 10,000 miles, depending on your riding conditions. If you ride in dusty or wet conditions, you may want to change it more frequently. Here is a simple breakdown:
- Normal riding conditions: Change every 10,000 miles
- Frequent short trips or stop-and-go traffic: Change every 5,000 miles
- Racing or spirited riding: Change every 3,000 to 5,000 miles
- Extreme conditions (dust, rain, heat): Change every 3,000 miles
If you are unsure about your specific model, consult your owner’s manual. It will have the exact recommendations for your year and engine type. Staying on top of your motorcycle maintenance schedule keeps your bike running strong for years.
What Type of Oil Should You Use?
Not all oils are created equal, and your Harley deserves the right one. Harley-Davidson designs their motorcycles to work best with specific primary oil formulations.
Harley-Davidson Premium Primary Fluid
This is the OEM-recommended oil for Harley primary cases. It is engineered to provide excellent lubrication, thermal stability, and protection for the clutch plates. Using this oil ensures your warranty stays intact and your drivetrain performs as intended.
Alternative Oils
If you prefer aftermarket options, look for oils specifically formulated for motorcycle transmissions. Avoid using automotive engine oil or generic gear oil. These can contain friction modifiers that damage clutch plates and cause slipping. Always double-check the specifications before pouring anything into your primary case.
Common Mistakes When Checking Primary Oil
Even experienced riders can make mistakes when checking or changing primary oil. Here are the most common errors and how to avoid them.
Overfilling the Case
This is the number one mistake. When the oil level is too high, it creates excess pressure inside the primary case. That pressure can push past seals and gaskets, causing leaks. It can also cause the oil to foam, which reduces its lubricating ability. Always check the level carefully and add oil in small amounts.
Using the Wrong Oil Type
Using the wrong oil can lead to clutch slipping, increased wear, and poor performance. Stick with what Harley recommends or use a high-quality aftermarket oil specifically designed for motorcycle transmissions.
Skipping the Gasket
When you reinstall the fill plug, always use a new gasket or O-ring. Reusing an old one can cause a poor seal and leaks. It is a small part that costs very little but prevents big problems.
Checking Oil with a Cold Engine
Cold oil is thicker and does not flow as freely. This means your reading may not be accurate. Always warm the engine slightly before checking the level. This gives you a true picture of where the oil sits during normal operation.
Ignoring Leaks
If you notice oil around the primary cover or drain plug after checking, do not ignore it. Even a small leak can become a big problem over time. Address leaks immediately to prevent oil loss and potential transmission damage.
Quick Tips for Hassle-Free Primary Oil Checks
Here are some expert tips that make the process even smoother:
- Keep a maintenance log: Write down every oil change and check date. This helps you stay on track and catch patterns early.
- Use a magnetic drain plug: It catches metal particles and gives you a visual clue about internal wear.
- Check for metal shavings: When you drain the oil, look at it closely. A few tiny particles are normal. Large shavings or chunks mean it is time for a closer inspection.
- Invest in a quality funnel: A narrow funnel prevents spills and makes pouring oil into the fill hole much easier.
- Take photos of the process: This helps you remember the steps if you are doing it for the first time or need to reference them later.
When to See a Professional
Checking primary oil is a DIY-friendly task, but there are times when you should call in a pro. If you notice metal particles in the oil, hear unusual grinding noises from the transmission, or see persistent leaks no matter how much you tighten the plugs, it is time for a professional inspection. Sometimes underlying issues go beyond a simple oil change. A certified Harley technician can diagnose problems early and save you from costly repairs. If you are also dealing with warning lights on your dashboard, understanding what they mean is important. For instance, many riders ask, can you run diagnostics without a check engine light? The answer depends on your specific situation, and a professional can help clarify that.
Similarly, if you have experienced other fluid-related issues on your Harley or any vehicle, building a basic understanding of fluid maintenance goes a long way. Simple checks like verifying your oil levels regularly can prevent many common problems. For broader car maintenance knowledge, you might also find it helpful to explore whether certain fluid checks apply across different vehicle types and systems.
Conclusion
Checking the primary oil on your Harley-Davidson does not have to be intimidating. With the right tools, a little patience, and the steps outlined in this guide, you can do it yourself in under 30 minutes. Primary oil plays a vital role in protecting your transmission and drivetrain. Keeping it at the correct level and changing it on schedule is one of the best things you can do for your bike’s longevity.
Remember to use the right oil type, avoid overfilling, and never skip the gasket. Make it a regular part of your maintenance routine, and your Harley will reward you with smooth, reliable performance mile after mile. The next time you are wondering how to check primary oil on a Harley-Davidson, come back to this guide. You have got this. Now get out there and take care of your bike like the rider you are.
Frequently Asked Questions
What happens if I overfill my Harley primary oil?
Overfilling creates excess pressure inside the primary case. This can cause oil leaks around seals and gaskets. It can also make the oil foam, reducing its ability to lubricate properly. Always fill to just below the fill hole threads.
Can I use regular gear oil for my Harley primary?
It is best to use Harley-Davidson Premium Primary Fluid or an oil specifically formulated for motorcycle transmissions. Regular gear oil may contain additives that damage clutch plates and cause slipping. Always check the specifications first.
How do I know if my primary oil needs changing?
Dark, gritty oil is a clear sign it needs changing. You may also notice increased noise from the transmission or a burning smell while riding. Stick to the recommended change intervals based on your riding conditions.
Do I need special tools to check primary oil?
No special tools are required. You need a socket wrench (typically 32mm), a drain pan, a funnel, and a clean rag. Most of these are common tools any rider likely already has at home.
How long does it take to check and change primary oil?
Checking the oil level takes about 5 minutes. A full drain and refill takes around 20 to 30 minutes. It is a quick and satisfying maintenance task that anyone can do at home.
Is checking primary oil the same as checking engine oil?
No, they are different systems. Primary oil lubricates the transmission and primary drive chain, while engine oil lubricates the engine internals. Both are important, and each has its own check and change schedule.