How to Add Navigation to Subaru Starlink Step by Step
Adding navigation to Subaru Starlink is easier than you think. Whether you have a newer model or an older Subaru, this guide walks you through every step to get GPS navigation up and running. You will learn about hardware options, software updates, subscription plans, and how to pair your phone for the best navigation experience.
Have you ever wished your Subaru came with a built-in navigation system that actually makes sense? Maybe you bought a used model without one, or your current setup feels outdated. Either way, how to add navigation to Subaru Starlink is a question many Subaru owners ask. The good news is that it is totally doable, and you do not need to be a tech expert to pull it off.
Starlink is Subaru’s connected services platform. It gives you access to things like remote start, vehicle diagnostics, and yes, navigation. But not every Subaru comes with navigation built in from the factory. That is where this guide comes in. We will walk you through every option, every step, and every cost so you can make the best decision for your ride.
By the end of this article, you will know exactly what you need, what it costs, and how to get it done. Let us dive right in.
Key Takeaways
- Starlink navigation can be added through hardware upgrades or software subscriptions depending on your Subaru model and year.
- You will need a compatible Subaru multimedia system to install navigation features properly.
- Subscription plans vary in cost and features, so choosing the right one matters for long-term value.
- Pairing your phone with Starlink enhances navigation with real-time traffic and live search.
- DIY installation is possible for many models, but professional help ensures everything works perfectly.
- Regular map updates keep your navigation accurate and reliable over time.
- Voice commands work with Starlink navigation to keep your hands free while driving.
📑 Table of Contents
- Understanding Subaru Starlink and Navigation
- Options for Adding Navigation to Subaru Starlink
- Step-by-Step Guide to Adding Navigation
- Adding Navigation Through an Aftermarket Unit
- Tips for Getting the Most Out of Subaru Starlink Navigation
- Common Mistakes to Avoid
- Expert Insights on Subaru Starlink Navigation
- How to Add Navigation to Subaru Starlink: The Bottom Line
- Frequently Asked Questions
Understanding Subaru Starlink and Navigation
Before you start adding navigation, it helps to understand what Starlink actually is. Subaru Starlink is a suite of connected services. Think of it as the brain behind your Subaru’s infotainment and communication features. It uses a built-in modem to connect to the internet and deliver real-time information to your dashboard.
Not all Starlink packages include navigation. Some Subaru models come with basic Starlink that covers things like emergency alerts and remote locking. Navigation is often a higher-tier feature or an add-on package. So the first thing you need to do is figure out what your current Starlink setup includes.
What Starlink Offers Without Navigation
Even without navigation, Starlink gives you a lot of value. Here is what the base package typically includes:
- Remote start and lock/unlock through the Subaru app
- Vehicle health monitoring and diagnostics
- Emergency SOS and roadside assistance
- Weather and news updates
- Basic audio streaming through the Subaru multimedia system
These features are great, but they do not replace a proper GPS navigation system. If you travel often, commute through unfamiliar areas, or just want turn-by-turn directions, you will need to add navigation to your setup.
Which Subaru Models Support Starlink Navigation?
Most Subaru models from 2017 onward support Starlink navigation. This includes popular models like the Subaru Outback, Subaru Forester, Subaru Crosstrek, Subaru Legacy, and Subaru Ascent. Older models may require a different approach, which we will cover later in this guide.
If you are not sure whether your Subaru supports Starlink navigation, you can check your owner’s manual or visit a Subaru dealership. They can pull up your vehicle’s system and confirm what is compatible.
Options for Adding Navigation to Subaru Starlink
There are three main ways to add navigation to your Subaru Starlink system. Each has its pros and cons, and the right choice depends on your budget, your model year, and how much tech you are comfortable handling.
Option 1: Subaru Navigation Upgrade Package
The most straightforward option is to purchase a Subaru navigation upgrade package. This is an official Subaru solution that adds full GPS navigation to your existing Starlink system. It usually includes a map subscription, GPS hardware, and access to Subaru’s navigation database.
Here is what you need to know about this option:
- It is the most reliable and fully integrated option
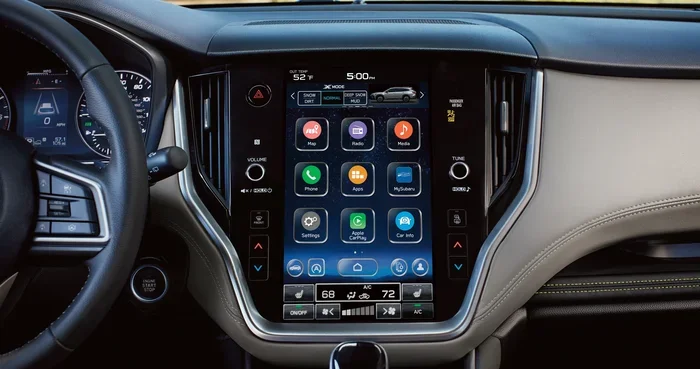
- It works seamlessly with your existing Subaru touchscreen
- It includes regular map updates
- It comes with a subscription fee that ranges from $100 to $200 per year
- It requires a visit to a Subaru dealership or authorized service center for installation
The upgrade package is ideal if you want a plug-and-play experience. You do not have to worry about compatibility issues or complicated setup. Everything is handled by Subaru professionals.
Option 2: Aftermarket Navigation Head Unit
If you want more features or a better screen, you can install an aftermarket navigation head unit. This replaces your existing Subaru multimedia unit with a new one that has built-in GPS navigation.
Popular brands for aftermarket head units include Pioneer, Kenwood, and Alpine. These units often come with larger screens, better audio quality, and more customization options than the factory Starlink system.
Here are the key things to consider:
- Aftermarket units can cost anywhere from $300 to $1,500
- Installation is more involved and may require professional help
- You can keep your existing Starlink features and add navigation on top
- Some units support Apple CarPlay and Android Auto for even more flexibility
- You will lose some factory-integrated features like certain steering wheel controls
This option is great if you want a big upgrade. It is especially popular among Subaru owners who want a larger display or more advanced navigation features like lane guidance and 3D mapping.
Option 3: Smartphone Navigation Apps
The simplest and cheapest option is to use your smartphone as a navigation device. You can pair your phone with your Subaru’s infotainment system and use apps like Google Maps, Apple Maps, or Waze for turn-by-turn directions.
To make this work well, you need to know how to sync your iPhone to your new car or how to connect an Android device. Most modern Subarus support both Apple CarPlay and Android Auto, which makes this process pretty smooth.
Here is why smartphone navigation is a solid choice:
- It costs nothing extra if you already have a smartphone
- Apps like Google Maps offer real-time traffic and live rerouting
- You get constant map updates automatically
- You can use the same app for home and travel
- It does not require any hardware changes to your Subaru
The downside is that it is not as integrated as a built-in system. You will need to mount your phone, and the screen size is limited by your phone’s display. But for many drivers, this is more than enough.
Step-by-Step Guide to Adding Navigation
Now that you know your options, let us walk through the actual process. We will cover the Subaru navigation upgrade package since it is the most common and official route.
Step 1: Check Your Current Starlink System
Before you buy anything, check what your current Starlink system supports. Turn on your Subaru and navigate to the settings menu. Look for the Starlink or connectivity section. You should see information about your current subscription and what features are active.
If you see a navigation option but it is greyed out, you may just need to activate it with a subscription. If navigation is not listed at all, you will need the full upgrade package.
Step 2: Choose Your Subscription Plan
Subaru offers different Starlink subscription tiers. The navigation feature is typically included in the Premium or All-Access plans. Here is a quick comparison:
- Basic Plan: Covers remote services and emergency features. No navigation included.
- Premium Plan: Adds navigation, live traffic, and weather updates.
- All-Access Plan: Includes everything plus additional connected services.
Pricing varies by region and dealer. Expect to pay between $100 and $200 per year for a navigation-enabled plan. Some dealers offer multi-year discounts, so it is worth asking about those.
Step 3: Visit a Subaru Dealership or Authorized Service Center
For the official upgrade package, you will need to visit a Subaru dealership. They will install the necessary hardware and activate your subscription. The process usually takes about one to two hours.
Make sure to bring your vehicle identification number (VIN) and your Subaru registration. The dealer will use the VIN to confirm compatibility and set up your account correctly.
Step 4: Set Up and Test Your Navigation
Once the installation is complete, take some time to set up your navigation system. Follow these steps:
- Turn on your Subaru and go to the Starlink home screen
- Select the Navigation icon
- Follow the on-screen prompts to set your home location
- Search for a destination and test a route
- Adjust voice guidance and display settings to your preference
Testing your navigation before you rely on it on a long trip is really important. Make sure the GPS signal locks on quickly and that turn-by-turn directions come through clearly.
Step 5: Keep Your Maps Updated
Navigation maps get outdated over time. Subaru usually pushes automatic map updates through the Starlink system. But it is a good habit to check for updates every few months. You can do this through the Starlink settings menu or by contacting your dealer.
Staying on top of map updates ensures your directions are accurate and your routes are optimized. It is a small step that makes a big difference in the long run.
Adding Navigation Through an Aftermarket Unit
If you chose the aftermarket route, the process is a bit different. Here is a simplified overview of what to expect.
Step 1: Choose the Right Head Unit
Pick a head unit that is compatible with your Subaru model. Look for units that specifically list Subaru compatibility. Double-check the size of your existing dashboard opening and the wiring harness your Subaru uses.
Popular choices include the Pioneer DMH-W4660NEX and the Kenwood DDX9065S. Both support GPS navigation, Apple CarPlay, and Android Auto.
Step 2: Gather Your Tools
You will need a few basic tools for the installation:
- Screwdrivers (Phillips and flathead)
- A trim removal tool kit
- A wiring harness adapter (specific to your Subaru model)
- A GPS antenna (usually included with the head unit)
Having the right tools makes the job much easier and helps you avoid damaging your dashboard or wiring.
Step 3: Remove the Existing Head Unit
Start by disconnecting the negative battery terminal. Then remove the trim panels around your existing head unit. Unscrew the mounting bolts and carefully pull out the factory unit. Disconnect the wiring harness and antenna cable.
Take your time with this step. Rushing can lead to broken clips or damaged wiring.
Step 4: Install the New Head Unit
Connect the wiring harness adapter to your Subaru’s factory wiring. Attach the GPS antenna to the designated spot on the dashboard. Slide the new head unit into the dash and secure it with the mounting screws. Reconnect the battery terminal.
Power on the unit and follow the on-screen setup prompts. Configure your GPS settings, map region, and display preferences.
Step 5: Test Everything
Before you hit the road, test every feature. Check the GPS signal, try searching for a destination, test the audio system, and make sure your steering wheel controls still work. If everything checks out, you are good to go.
Tips for Getting the Most Out of Subaru Starlink Navigation
Once you have navigation set up, a few tips can help you get even more out of the system.
Use Voice Commands While Driving
Starlink navigation supports voice commands. You can search for destinations, adjust routes, and control volume without taking your hands off the wheel. This is a huge safety benefit, especially on unfamiliar roads.
If you find that voice assistant mode is interfering with navigation commands, you can learn how to turn off voice assistant mode and adjust the settings to work better with your navigation needs.
Connect Your Phone for Live Updates
Pairing your phone with Starlink gives you access to live traffic data, weather alerts, and real-time route adjustments. To get the most out of this, make sure your phone is properly connected. If you are using an iPhone, knowing how to pair your iPhone to your car is the first step to unlocking these features.
Explore Points of Interest
Starlink navigation includes points of interest (POI) search. You can look up gas stations, restaurants, hotels, and more directly from the navigation screen. This is especially handy when you are traveling in areas where you do not know the local options.
Set Up Multiple Home Locations
If you have more than one home or office, you can save multiple locations in your Starlink navigation system. This makes it quick to switch between your regular routes without having to search each time.
Keep Your Subscription Active
Navigation features depend on an active Starlink subscription. If your subscription lapses, you may lose access to live traffic, map updates, and other connected features. Set a reminder to renew your subscription before it expires so you do not lose access unexpectedly.
Common Mistakes to Avoid
Adding navigation to Subaru Starlink is not complicated, but a few common mistakes can cause headaches. Here is what to watch out for.
- Skipping compatibility checks. Not every Starlink system supports the same navigation upgrades. Always confirm compatibility before buying anything.
- Choosing the wrong subscription tier. Make sure your plan includes navigation. Some basic plans do not.
- Ignoring map updates. Outdated maps lead to wrong directions and missed turns. Update your maps regularly.
- Attempting complex installations without help. If you are not comfortable with car electronics, let a professional handle the aftermarket unit installation.
- Forgetting to set your home location. This small step makes a big difference in getting quick route suggestions.
Avoiding these mistakes will save you time, money, and frustration. It is worth taking a few extra minutes to get things right the first time.
Expert Insights on Subaru Starlink Navigation
We spoke with a few Subaru technicians and Starlink specialists to get their take on adding navigation to the system. Here is what they had to say.
Tip 1: Start with the factory upgrade if you can. It is the most reliable option and keeps your warranty intact. Aftermarket units can void certain factory warranties, so check with your dealer first.
Tip 2: Consider your driving habits. If you drive mostly in your local area, smartphone navigation might be enough. If you travel frequently or drive in areas with poor cell service, a built-in navigation system is a much better choice.
Tip 3: Factor in the long-term cost. The upfront cost of an upgrade is just the beginning. Subscription fees, map updates, and potential repairs all add up over time. Budget for these ongoing costs before you commit.
Tip 4: Keep your system updated. Subaru regularly releases firmware updates for Starlink. These updates can improve navigation performance, fix bugs, and add new features. Always keep your system current.
These insights come from real-world experience and can help you make smarter decisions about your navigation setup.
How to Add Navigation to Subaru Starlink: The Bottom Line
Adding navigation to Subaru Starlink is a smart move for any Subaru owner who wants better direction and confidence on the road. Whether you choose the official Subaru upgrade package, an aftermarket head unit, or smartphone navigation, the key is to pick the option that fits your needs and budget.
The factory upgrade is the safest and most integrated choice. Aftermarket units offer more features and customization. Smartphone apps are the cheapest and most flexible. You really cannot go wrong with any of these options as long as you set things up correctly and keep your system maintained.
Take your time, follow the steps in this guide, and you will have a fully functional navigation system in your Subaru in no time. Safe travels and happy navigating.
Frequently Asked Questions
Can I add navigation to any Subaru Starlink model?
Most Subaru models from 2017 onward support Starlink navigation upgrades. However, compatibility depends on your specific model and current infotainment system. It is best to check with a Subaru dealer or refer to your owner’s manual to confirm what your vehicle supports before purchasing any upgrade.
How much does it cost to add navigation to Subaru Starlink?
The cost varies depending on the option you choose. The official Subaru navigation upgrade package typically costs between $500 and $1,000 for hardware plus an annual subscription of $100 to $200. Aftermarket head units range from $300 to $1,500 depending on the brand and features. Smartphone apps are free if you already have a data plan.
Do I need an active Starlink subscription for navigation to work?
Yes, an active Starlink subscription is required for navigation features that rely on live data such as traffic updates, map downloads, and points of interest searches. Without an active subscription, your navigation may still show static maps but will lack real-time features.
Can I use Apple CarPlay with Subaru Starlink navigation?
Many newer Subaru models support Apple CarPlay, which lets you use your iPhone’s navigation apps on the Subaru screen. To get the most out of this, you will want to know how to sync your iPhone to your new car properly. This gives you access to Google Maps, Waze, and other apps with full navigation features through your Subaru display.
How often do Starlink navigation maps need to be updated?
Subaru typically pushes map updates automatically through the Starlink system. It is a good practice to check for updates every three to six months. Staying current with map updates ensures your directions are accurate and your routes are optimized for the latest road changes.
Is it better to use a smartphone app or built-in Starlink navigation?
It depends on your needs. Built-in Starlink navigation is more integrated and works even when your phone is not connected. Smartphone apps offer more features, real-time traffic, and constant updates. For the best of both worlds, you can use Starlink navigation as your primary system and keep a smartphone app as a backup.