Car Window Rubber Seal Replacement Made Simple Today
Replacing your car window rubber seal is easier than most people think. This guide walks you through every step, from spotting worn seals to installing a new one. You will learn the tools you need, common mistakes to avoid, and how to keep your car dry and quiet. Save money by doing it yourself with our simple instructions.
Have you ever noticed water dripping inside your car after a rainstorm? Or maybe you hear a strange wind noise when you drive at highway speeds. These are classic signs that your car window rubber seal is wearing out. The good news is that replacing it is not as hard as it sounds. With the right tools and a little patience, you can do it yourself in under an hour.
A car window rubber seal keeps your vehicle dry, quiet, and safe from the elements. Over time, this rubber piece breaks down from sun exposure, age, and daily use. When it fails, it can lead to leaks, mold, and even damage to your car’s interior. This guide will show you exactly how to replace your car window rubber seal the right way. We will cover everything from identifying the problem to finishing the job like a pro.
Whether you are a beginner or a seasoned DIYer, this guide has something for you. We will break down each step into simple, easy-to-follow instructions. You will also learn about the different car window seal types available, how much the replacement costs, and what mistakes to avoid. By the end, you will feel confident tackling this repair on your own.
Key Takeaways
- Spotting early warning signs saves you from costly water damage and mold inside your vehicle.
- Gathering the right tools beforehand makes the entire process smoother and faster.
- Following a step-by-step approach ensures a clean, professional-looking seal every time.
- Avoiding common mistakes like stretching the rubber or using the wrong adhesive prevents repeat repairs.
- Knowing the cost helps you decide between DIY and professional installation.
- Regular maintenance extends the life of your new car window rubber seal by years.
- Choosing the right seal type for your vehicle model guarantees a perfect fit.
📑 Table of Contents
- What Is a Car Window Rubber Seal and Why Does It Matter?
- Signs Your Car Window Rubber Seal Needs Replacement
- Tools and Materials You Will Need
- Step-by-Step Car Window Rubber Seal Replacement Guide
- Common Mistakes to Avoid During Replacement
- How Much Does Car Window Rubber Seal Replacement Cost?
- How to Maintain Your New Car Window Rubber Seal
- When to Call a Professional Instead of DIY
- Conclusion
What Is a Car Window Rubber Seal and Why Does It Matter?
The car window rubber seal is a flexible rubber strip that sits around the edge of your car window. It creates a tight barrier between the glass and the car body. This barrier does two important jobs. First, it keeps water out of your cabin. Second, it blocks wind noise and drafts while you drive.
Most cars use a rubber weatherstrip around the windows. This is the same material used on doors and trunks. The rubber is designed to flex and spring back as you roll your window up and down. Over months and years, however, the rubber loses its elasticity. It becomes hard, cracked, and brittle. Once that happens, the seal no longer works properly.
How the Seal Protects Your Car
Your window rubber seal does more than just block water. It also keeps dust, pollen, and debris out of your car. It helps maintain the temperature inside your cabin, which means your air conditioning works more efficiently. A worn seal can even affect the structural rigidity of your car door.
When the seal deteriorates, small gaps appear between the glass and the frame. Water seeps through these gaps and pools inside the door panel. This can cause rust on metal parts and mold on fabric seats. In worst cases, water can reach your car’s electrical wiring and cause short circuits. That is why replacing a car window rubber seal early is so important.
Signs Your Car Window Rubber Seal Needs Replacement
Catching the problem early saves you a lot of trouble. Here are the most common signs that your car window rubber seal is failing.
Water Leaks Inside the Car
The number one sign is water inside your car. You might notice wet carpet on the floor or water streaks on the inside of the door panel. Sometimes the leak only happens when you drive through heavy rain. Other times it appears after a car wash. If you see moisture where it should not be, check your window seal leak right away.
Wind Noise and Drafts
Do you hear a whistling sound when you drive? This often means air is getting past the seal. A healthy car window seal keeps the cabin quiet. If you feel air blowing near the windows at highway speeds, the rubber is likely worn out. This not only makes your drive uncomfortable but also reduces fuel efficiency.
Visible Cracks and Gaps
Sometimes you can see the problem with your own eyes. Run your finger along the rubber seal. Feel for cracks, tears, or gaps. A good seal should feel smooth and flexible. If it feels hard, brittle, or loose in spots, it is time for a replacement. You might also notice the rubber has pulled away from the glass in certain areas.
Mold or Mildew Smell
A musty smell inside your car is never a good sign. Moisture trapped by a broken seal creates the perfect environment for mold. If you notice a damp or moldy odor near the windows, inspect the rubber weatherstrip immediately. Mold can affect your health and damage the interior of your car.
Window Rattling
If your window glass rattles when you drive over bumps, the seal may no longer hold it firmly in place. A proper car window rubber seal keeps the glass snug and secure. Rattling is not just annoying; it can also cause the glass to shift and crack over time.
Tools and Materials You Will Need
Before you start, gather everything you need. Having the right tools makes the job much easier and faster.
Essential Tools
- Flathead screwdriver — for prying off the old seal carefully.
- Plastic trim tool — to avoid scratching the car body.
- Rubbing alcohol or adhesive remover — for cleaning the surface.
- Clean cloths or microfiber towels — for wiping down the area.
- Hairdryer or heat gun — to warm up the old rubber for easier removal.
- Utility knife or scissors — for trimming the new seal if needed.
Materials You Will Need
- Replacement car window rubber seal — make sure it matches your vehicle model.
- Car window seal adhesive — a quality adhesive helps the new seal stick properly.
- Rubber sealant or protectant spray — to keep the new rubber flexible.
- Masking tape — to protect nearby surfaces during installation.
You can find replacement seals at auto parts stores or online. Make sure you get the right car window seal type for your specific car make and model. Some vehicles use a single continuous strip while others have separate pieces for each window.
Step-by-Step Car Window Rubber Seal Replacement Guide
Now let us get into the actual replacement process. Follow these steps carefully for the best results.
Step 1: Remove the Window Glass (If Necessary)
In most cases, you need to lower the window glass partially to access the seal. If the seal is on the side of the window, you may need to remove the glass entirely. Use your window regulator to lower the glass as far as it will go. Then carefully lift it out of the frame. Place the glass on a soft towel to avoid scratching it.
Be very gentle when handling the glass. If you are not comfortable removing it, you can work around the window while it is still in the car. However, removing the glass gives you much better access to the entire seal.
Step 2: Remove the Old Seal
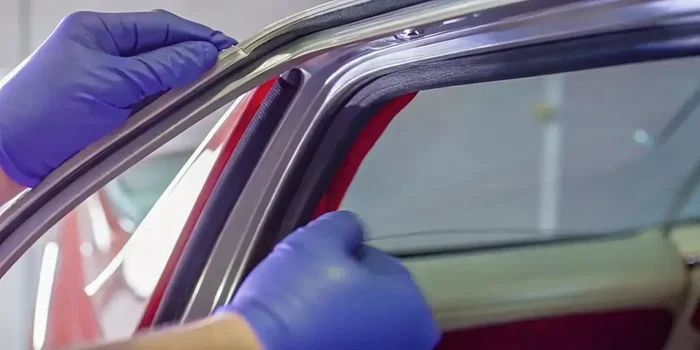
Start at one corner of the window frame. Use your flathead screwdriver or plastic trim tool to gently pry up the old seal. Work slowly and carefully. You do not want to scratch the paint or damage the window channel.
Use a hairdryer or heat gun to warm up the old rubber. Heat makes the rubber more pliable and easier to remove. As you pry, pull the seal out gradually. Do not yank it, as this can break the rubber into small pieces that are hard to clean up.
Step 3: Clean the Window Channel Thoroughly
This step is critical and often overlooked. Use rubbing alcohol and a clean cloth to wipe down the entire window channel. Remove all old adhesive, dirt, and debris. The surface must be completely clean and dry before you install the new seal.
Check for any rust or damage inside the channel. If you see rust, treat it with a rust converter before proceeding. A clean surface ensures the new car window rubber seal adheres properly and lasts longer.
Step 4: Apply Adhesive (If Needed)
Some replacement seals come with adhesive already applied. Others do not. Check the instructions that come with your new seal. If you need to apply adhesive, do so evenly along the window channel. Use a thin, consistent layer. Too much adhesive can squeeze out and create a mess.
Let the adhesive become tacky before you press the new seal into place. This usually takes about 5 to 10 minutes, depending on the product. Follow the manufacturer’s instructions for the best results.
Step 5: Install the New Seal
Start at one corner of the window frame. Press the new window rubber seal into the channel firmly. Work your way around the entire window, pressing the seal into place as you go. Make sure the seal sits evenly in the channel with no twists or gaps.
Use your fingers or a plastic trim tool to push the seal into the channel. Go slowly and check your work as you go. If the seal has a lip that sits against the glass, make sure it aligns properly with the edge of the glass.
Step 6: Reinstall the Window Glass
Once the seal is in place, carefully lower the window glass back into the frame. Make sure it sits properly in the seal channel. Roll the window up and down a few times to check that it moves smoothly and the seal is not pinched.
If the window sticks or does not move freely, the seal may be misaligned. Remove the glass again and adjust the seal. It is better to fix this now than to deal with a stuck window later.
Step 7: Test the Seal
After installation, test the seal thoroughly. Roll the window up and down several times. Check for any gaps between the seal and the glass. Run your hand along the seal to feel for uneven spots.
You can also do a water test. Spray water along the window frame with a garden hose and check inside the car for leaks. If you see any water coming through, the seal may need adjustment. Apply a small amount of rubber sealant to any problem areas.
Common Mistakes to Avoid During Replacement
Even with a good guide, mistakes can happen. Here are the most common errors people make when replacing their car window rubber seal.
Using the Wrong Seal Type
Not all seals are the same. Different cars use different car window seal types and profiles. Using the wrong seal will result in a poor fit and leaks. Always double-check that the replacement seal matches your vehicle make, model, and year.
Skipping the Cleaning Step
A dirty surface is the number one reason new seals fail early. If you do not clean the window channel properly, the new seal will not adhere well. Take your time with this step. It only takes a few minutes but makes a huge difference in how long the new seal lasts.
Stretching the Rubber Too Much
When you install the new seal, do not stretch it aggressively. Rubber weatherstrip can only stretch so far before it loses its shape. If you stretch it too much, it will not return to its proper size and will create gaps. Work gently and let the seal naturally fit into the channel.
Applying Too Much Adhesive
More adhesive is not better. A thick layer of adhesive can ooze out and create bumps that interfere with the window movement. Apply a thin, even layer and let it become tacky before pressing the seal into place.
Forgetting to Apply Seal Protectant
After installation, apply a rubber sealant or protectant spray to the new seal. This keeps the rubber soft and flexible. It also protects the seal from UV damage, which is one of the main causes of seal deterioration. Reapply the protectant every few months for the best results.
How Much Does Car Window Rubber Seal Replacement Cost?
The car window seal cost varies depending on your vehicle and whether you do it yourself or hire a professional. Let us break down the costs.
A replacement car window rubber seal typically costs between $15 and $60 for the part alone. Premium seals or seals for luxury vehicles may cost more. The adhesive and tools you need will add another $10 to $25 if you do not already have them at home.
If you take your car to a mechanic, the labor cost for window seal replacement cost can range from $100 to $300. This depends on your location and the complexity of the job. Doing it yourself can save you a significant amount of money.
Overall, a DIY replacement usually costs between $25 and $80 total. That is a fraction of what you would pay for professional service. Plus, you get the satisfaction of completing the repair with your own hands.
| Option | Cost Range | Time Required |
|---|---|---|
| DIY Replacement | $25 – $80 | 1 – 2 hours |
| Professional Replacement | $100 – $300 | 1 – 3 hours |
| Dealership Replacement | $150 – $400 | 2 – 4 hours |
How to Maintain Your New Car Window Rubber Seal
Your new car window rubber seal will last longer with proper care. Here are some simple maintenance tips.
Apply a rubber protectant spray every 2 to 3 months. This keeps the rubber supple and prevents cracking. Avoid using harsh chemicals or abrasive cleaners on the seal. Stick to mild soap and water for regular cleaning.
Inspect the seal every few months for early signs of wear. Look for cracks, gaps, or areas where the seal has pulled away from the glass. Catching these issues early means you can fix them before water damage occurs.
During winter, avoid using ice scrapers directly on the rubber seal. The metal edge of the scraper can cut and tear the rubber. Use a plastic scraper instead and be gentle around the seal area.
If you park your car outside, try to park in the shade when possible. UV rays from the sun are the biggest enemy of rubber seals. A car window seal that is protected from direct sunlight will last significantly longer.
Also, be mindful of how you use your window. Roll the window up and down smoothly. Avoid slamming the window shut, as this can damage the seal over time. Gentle operation goes a long way in preserving the integrity of your window rubber seal.
When to Call a Professional Instead of DIY
While replacing a car window rubber seal is a manageable DIY project for most people, there are times when you should call a professional. If the window regulator is broken or the window channel is damaged, you may need specialized tools and expertise to fix it.
Also, if you notice rust inside the window channel, it is best to have a professional assess the damage. Rust can weaken the structure of your car door and may require more extensive repairs. A professional will also have access to OEM-quality seals that may not be available for DIY purchase.
If you are not comfortable working with your car’s glass, that is perfectly okay. A window seal leak fix done by a trained technician will be done correctly and safely. Sometimes paying a little extra for peace of mind is worth it.
Conclusion
Replacing your car window rubber seal is a straightforward repair that anyone can do with basic tools and a little patience. By catching the problem early and following the steps in this guide, you can keep your car dry, quiet, and protected from the elements. The entire process takes just one to two hours and costs a fraction of what professional repair would.
Remember to choose the right car window seal type for your vehicle, clean the channel thoroughly, and apply adhesive carefully. Avoid the common mistakes we discussed, and your new seal will serve you well for years to come. Regular maintenance with a rubber protectant will keep the seal flexible and in great condition.
Do not wait until a small leak turns into a big problem. If you notice any signs of a failing seal, grab your tools and get to work. Your car window rubber seal is one of those simple repairs that makes a huge difference in your daily driving experience. Take on this project today and enjoy a drier, quieter, and more comfortable ride tomorrow.
Frequently Asked Questions
How long does a car window rubber seal last?
A car window rubber seal typically lasts between 5 and 10 years, depending on climate and usage. Vehicles parked in sunny or harsh environments may need replacement sooner. Regular maintenance with rubber protectant can extend the lifespan significantly.
Can I replace just one side of the window seal?
Yes, you can replace just one side if the damage is localized. However, if the seal is old and worn, replacing the entire seal around the window is recommended. This ensures a consistent seal and prevents future leaks on other sides of the window.
What is the best adhesive for car window rubber seal replacement?
Look for a high-quality car window seal adhesive designed specifically for automotive rubber. Products like 3M Super Trim Adhesive or OEM-specific adhesives work well. Always check that the adhesive is compatible with your vehicle’s rubber and paint surfaces.
Can a window seal leak cause electrical problems?
Yes, water entering through a window seal leak can reach your car’s wiring and cause electrical issues. This is especially common in modern vehicles with sensors and electronic components near the window channels. Fixing a worn seal promptly prevents costly electrical repairs.
Is it hard to find the right replacement seal for my car?
Finding the right car window rubber seal is easy if you know your vehicle make, model, and year. Auto parts stores carry seals for most popular vehicles. Online retailers also offer a wide selection with detailed fitment guides to help you find the perfect match.
How can I prevent my window seal from deteriorating quickly?
Apply a rubber protectant spray every few months to keep the seal flexible. Park in the shade or a garage when possible to reduce UV exposure. Avoid using harsh chemicals on the seal and roll your windows gently. These simple habits will significantly slow down window seal deterioration and extend the life of your rubber seal.
=== CONCLUSION ===
Replacing your car window rubber seal is one of the most rewarding DIY repairs you can do. It protects your car from water damage, reduces noise, and keeps your interior in great shape. With the right tools, a quality replacement seal, and the steps outlined in this guide, you can complete the job quickly and confidently. Take action today and give your car the protection it deserves.