Do I Need to Sand Before Touch-Up Paint Expert Answers
Do I Need to Sand Before Touch-Up Paint? The short answer is: it depends on the damage and the surface. Light scratches and small paint chips often don’t need sanding at all. But deeper damage, rust spots, or areas where old paint meets new paint almost always require proper surface prep. Sanding creates a rough surface that helps primer and paint stick properly, which is the key to a long-lasting touch-up paint job.
You just noticed a fresh scratch on your car door. Or maybe a rock kicked up a paint chip on your hood. Your first instinct might be to grab a touch-up paint pen and go to town. But then a question hits you: Do I Need to Sand Before Touch-Up Paint?
This is one of the most common questions car owners ask, and for good reason. Sanding feels like extra work. It takes time. And if you do it wrong, you might make things worse. But the truth is, sanding plays a big role in how well your repair holds up over time.
In this guide, we will walk through everything you need to know about sanding before automotive touch-up. We will cover when you should sand, when you can skip it, and exactly how to prep your surface the right way. Whether you are dealing with a tiny chip or a deep scratch, you will find clear answers here.
The goal is simple: help you fix your car paint chips and scratches with confidence. No guesswork. No wasted effort. Just practical advice that works in your garage this weekend.
Key Takeaways
- Light damage often needs no sanding: Small chips and surface scratches can usually be repaired without any sanding at all.
- Deep scratches and rust require sanding: Proper surface prep is essential for paint adhesion and a smooth finish.
- Scuffing is a middle ground: A light scuff with fine-grit sandpaper can help paint blending without removing too much clear coat.
- Wet sanding gives better results: Using water with fine-grit paper prevents scratches and gives a smoother finish for auto body repair.
- Skipping prep causes peeling: The most common mistake is not preparing the surface, which leads to touch-up paint that flakes off quickly.
- Right tools matter: Using the correct sandpaper grit and proper technique makes all the difference in your spot repair outcome.
- Patience pays off: Taking time to prep properly saves you from doing the job over again.
📑 Table of Contents
- What Is Touch-Up Paint and When Do You Need It
- Why Sanding Matters for Paint Adhesion
- When You Can Skip Sanding Before Touch-Up Paint
- How to Sand Properly Before Touch-Up Paint
- Step-by-Step Touch-Up Paint Process With Sanding
- Common Mistakes to Avoid When Sanding Before Touch-Up Paint
- Expert Tips for a Flawless Touch-Up Paint Repair
- Do I Need to Sand Before Touch-Up Paint: Final Verdict
What Is Touch-Up Paint and When Do You Need It
Touch-up paint is a small can or pen of automotive paint matched to your car’s original color code. People use it to fix minor damage like paint chips, small scratches, and scuffs. It is a quick and affordable way to protect your car from rust and make it look better without visiting a body shop.
You typically need touch-up paint when:
- Your car has small stone chips from highway driving
- Light scratches have worn through the clear coat
- You notice surface oxidation or fading on the paint
- A minor dent has damaged the paint layer
- You want to prevent rust from forming on exposed metal
Not all damage requires the same level of repair. A tiny chip on your bumper needs a very different approach than a deep scratch down to bare metal. That is where the sanding question comes in. Do I Need to Sand Before Touch-Up Paint really depends on how deep the damage goes and what layers of paint have been affected.
Understanding Your Car’s Paint Layers
Your car’s paint is not just one layer. It has three main parts. The first is the primer, which sits directly on the metal. The second is the base coat, which gives your car its color. The third is the clear coat, which protects everything underneath and gives that shiny finish.
When you know which layers are damaged, it becomes much easier to decide on your repair approach. Surface-level scratches only touch the clear coat. Medium scratches reach the base coat. Deep damage goes all the way to the primer or bare metal. Each level requires a different prep method.
Why Sanding Matters for Paint Adhesion
Do I Need to Sand Before Touch-Up Paint in certain situations? Absolutely yes. The reason comes down to one simple word: adhesion. Paint sticks better to a slightly rough surface than to a smooth one. When you sand an area lightly, you create tiny grooves that help the primer and paint grip the surface.
Without proper sanding, your touch-up paint sits on top of the existing surface. Over time, it will peel, chip, or flake off. That means your repair fails within weeks instead of lasting for years. Nobody wants to redo a paint job twice.
The Science Behind Paint Adhesion
When you apply automotive paint to a smooth surface, there is very little for it to grip onto. Think of it like trying to stick a sticker on a greasy table. It just slides off. But when you create a slightly textured surface through sanding, the paint has something to bond with.
Sanding also helps remove any contaminants on the surface. Things like wax, grease, and old clear coat can prevent proper bonding. A quick sand removes all of that and gives you a clean surface for your auto body repair.
When Sanding Makes or Breaks Your Repair
Here is a simple way to think about it. If you are doing a surface-level spot repair, you might not need to sand at all. But if you are going down to bare metal or applying primer, sanding is non-negotiable. The difference between a repair that lasts five years and one that fails in five months often comes down to this one step.
Many people skip sanding because they are in a hurry or they are afraid of making mistakes. But taking five extra minutes to prep your surface properly will save you hours of frustration later. It is the unsung hero of any successful car scratch fix.
When You Can Skip Sanding Before Touch-Up Paint
Not every repair requires sanding. In fact, many touch-up paint jobs look best when you skip this step entirely. Here are the situations where you can safely apply paint without any sanding at all.
Small Paint Chips That Have Not Rusted
If you have a tiny chip where the paint is missing but the metal underneath is still intact, you do not need to sand. Clean the area with soap and water, let it dry, and apply your touch-up paint directly. The paint will bond with the existing clear coat just fine.
Surface Scratches That Have Not Gone Through the Clear Coat
Light swirl marks and surface scuffs only affect the very top layer. Sanding these areas would actually damage the clear coat more. Instead, use a polishing compound or a touch-up paint pen that matches your car’s color. These products are designed to fill in minor imperfections without any prep work.
Fresh Damage With No Contamination
If the damage just happened and the area is clean, you can often apply automotive touch-up paint right away. There is no rust, no dirt, and no old wax blocking the surface. In these cases, the existing paint provides a good base for the new paint to bond with.
The key takeaway here is that less is sometimes more. Over-preparing a surface that does not need it can actually weaken your repair. Know when to leave well enough alone.
How to Sand Properly Before Touch-Up Paint
When sanding is necessary, doing it right matters a lot. Wrong sanding can create deep scratches, remove too much paint, or leave the surface uneven. Here is how to do it correctly every time.
Choosing the Right Sandpaper Grit
The grit number on sandpaper tells you how coarse it is. Lower numbers are rougher, and higher numbers are finer. For touch-up paint prep, you usually want to use a fine grit between 600 and 1000.
- 600-grit: Use this for heavier rust removal or when stripping old paint down to bare metal
- 800-grit: Great for general surface prep before applying primer
- 1000-grit: Ideal for light scuffing and final smoothing before paint application
- 2000-grit and above: Use for wet sanding after paint is applied to smooth out imperfections
For most auto body repair projects, 800-grit sandpaper is the sweet spot. It creates enough texture for good adhesion without damaging the surrounding paint.
Wet Sanding vs. Dry Sanding
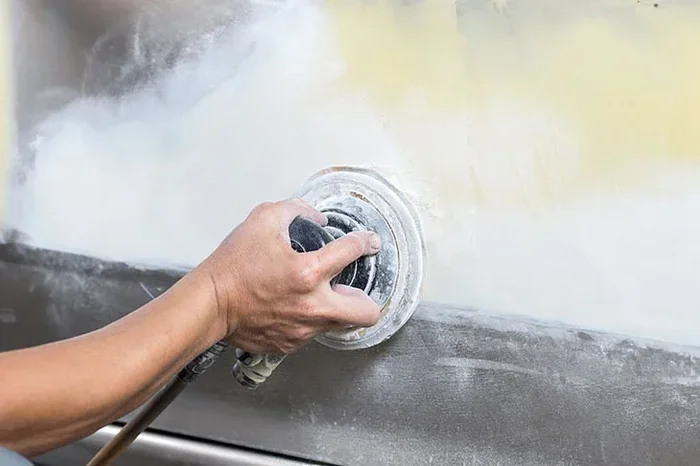
Wet sanding uses water to lubricate the sandpaper and keep dust from building up. It gives a much smoother finish and reduces the risk of scratching too deep. Dry sanding works fine for rough removal but creates a lot of dust and is harder to control.
For surface prep before touch-up paint, wet sanding is almost always the better choice. Just keep the area wet, use light pressure, and sand in smooth circular motions. Rinse the area frequently to see your progress clearly.
The Right Sanding Technique
Here is a quick step-by-step for proper sanding before automotive touch-up:
- Clean the area thoroughly with wax and grease remover
- Tear off a small piece of sandpaper, about the size of a postage stamp
- Dip it in water or use a sanding block with water
- Sand in gentle circular motions over the damaged area
- Stop when the surface looks evenly matte, not shiny
- Wipe away all dust with a clean microfiber cloth
- Apply primer within 24 hours to prevent flash rust
Do not press too hard. Let the sandpaper do the work. Heavy pressure can cut through the paint layers you are trying to preserve. The goal is to create a light texture, not to remove everything.
Step-by-Step Touch-Up Paint Process With Sanding
Now that you understand the sanding part, let us walk through the full touch-up paint process from start to finish. This is the exact sequence that gives professional-looking results at home.
Step 1: Clean and Inspect the Damage
Start by washing the area with car wash soap and water. Remove all dirt, wax, and grease. Then inspect the damage closely. Is it just a surface scratch? Does it go down to bare metal? Is there any rust forming? Your answers to these questions determine whether you need to sand.
Step 2: Sand If Necessary
If the damage goes through the clear coat and into the base coat or primer, sand the area lightly with 800-grit sandpaper. Use the wet sanding technique described above. Remove any loose paint or rust. The surface should feel slightly rough to the touch but not deeply scratched.
Step 3: Apply Primer
For any damage that exposes bare metal, always apply a coat of primer first. Primer protects the metal from rust and gives the touch-up paint something to bond to. Let the primer dry completely before moving to the next step. This usually takes about 30 minutes to an hour.
Step 4: Apply Touch-Up Paint
Using a small brush or the applicator pen that comes with your touch-up paint kit, apply the paint in thin layers. It is better to apply three thin coats than one thick one. Let each coat dry for about 15 to 20 minutes before adding the next.
Step 5: Blend the Edges
Once the paint is dry, use a fine sanding block with 1500-grit or 2000-grit sandpaper to gently blend the edges of the repair into the surrounding paint. This step is crucial for making the repair invisible. Wet sand lightly and check your progress often.
Step 6: Apply Clear Coat
The final step is applying a clear coat over the repair. This restores the glossy finish and protects the color underneath. Apply two to three thin coats, letting each one dry fully. After the last coat, let it cure for at least 24 hours before washing your car.
Follow this process, and your car scratch fix will look like it was done by a professional. The paint blending will be smooth, and the repair will hold up for years.
Common Mistakes to Avoid When Sanding Before Touch-Up Paint
Even with the best intentions, people make mistakes that ruin their auto body repair. Here are the most common ones and how to avoid them.
Using the Wrong Grit Sandpaper
Using sandpaper that is too coarse, like 200 or 320 grit, will leave deep scratches that are impossible to fix with touch-up paint. Always start with at least 600-grit and work your way up. Going too coarse is one of the fastest ways to make your repair look worse than before.
Sanding Too Much Area
You only need to sand the damaged area and a small border around it. Sanding a huge section of your car removes clear coat that was perfectly fine. This creates a shiny spot that stands out and looks worse than the original damage. Keep your sanding tight and focused.
Skipping the Cleaning Step
After sanding, dust and particles will be left on the surface. If you apply automotive paint over this dust, it will create bumps and imperfections. Always wipe the area with a tack cloth or a microfiber cloth dampened with wax and grease remover before painting.
Not Letting Primer Dry Fully
Patience is important here. If you apply paint before the primer is completely dry, the moisture gets trapped underneath and causes bubbling. Give your primer the full drying time recommended on the can. Rushing this step is one of the top reasons spot repair jobs fail.
Applying Paint in Thick Coats
Thick paint takes longer to dry and is more likely to drip or sag. It also shrinks as it dries, which can cause cracks and peeling. Keep your coats thin and build up gradually. This is the secret to a smooth, durable finish that blends perfectly with the surrounding paint.
Expert Tips for a Flawless Touch-Up Paint Repair
Want your automotive touch-up to look amazing? Here are some pro tips that make a real difference.
- Match your color code exactly: Every car has a unique color code on a sticker usually found in the door jamb. Use this code to get the right touch-up paint match.
- Work in a shaded area: Direct sunlight causes paint to dry too fast and can leave visible brush marks.
- Use a paint pen for small chips: These are easier to control than a brush and reduce the risk of overspray.
- Apply painter’s tape around the repair: This protects the surrounding paint and gives you clean edges.
- Consider a paint spray can for larger areas: For repairs bigger than a quarter, a spray can gives better coverage and a more even finish.
- Buff and polish after curing: Once the repair is fully dry, use a polishing compound to blend the finish with the rest of the car.
These small extra steps separate a mediocre repair from one that looks factory-fresh. The time you invest in proper preparation and finishing makes all the difference.
Do I Need to Sand Before Touch-Up Paint: Final Verdict
So, do I need to sand before touch-up paint? The answer is: it depends on the depth of the damage. For surface-level scratches and small paint chips with no rust, you can skip sanding entirely. But for deeper damage, exposed metal, or repairs that require primer, sanding is an essential step that you should never skip.
The right approach is to assess the damage first. Look closely at what layers of paint have been affected. If you can see bare metal or if the scratch goes past the clear coat, take the time to sand properly. If it is just a surface issue, clean the area and go straight to painting.
Remember, the goal of any auto body repair is not just to look good right now. It is to protect your car from rust and damage for years to come. Proper surface preparation through sanding when needed is what turns a quick fix into a lasting repair. Take your time, follow the steps outlined in this guide, and your touch-up paint job will look great and hold up well.
Your car deserves to look its best, and with the right approach, you can achieve professional-quality results from your own garage. Whether you are doing a simple car scratch fix or a more involved rust repair, the principles remain the same. Prep the surface properly, apply your materials in thin layers, and give everything time to dry and cure. Follow these guidelines, and you will get excellent results every time.
Frequently Asked Questions
Can I apply touch-up paint without sanding if the scratch is deep?
No, deep scratches that expose bare metal or primer should always be sanded before painting. Sanding removes loose paint and rust while creating a surface that helps primer and new paint bond properly. Skipping this step on deep damage will cause the repair to peel and fail quickly.
What happens if I don’t sand before touch-up paint?
If the damage requires sanding and you skip it, the paint will not adhere properly. Over time, the touch-up paint will peel, chip, or flake off, leaving the area vulnerable to rust. The repair will look worse than before and you will need to redo it sooner.
Can I use a sanding sponge instead of sandpaper for automotive touch-up?
Yes, a sanding sponge works great for surface prep before touch-up paint. The sponge gives you better control and conforms to curved surfaces more easily than flat sandpaper. Just make sure to use a fine grit between 800 and 1000 for best results.
How do I know if I need primer before touch-up paint?
You need primer anytime the damage reaches bare metal or goes through the primer layer. Look closely at the scratched area. If you see silver or gray metal showing, you must apply primer after sanding. Primer prevents rust and gives the paint something to stick to.
Is wet sanding better than dry sanding for touch-up paint prep?
Yes, wet sanding is generally better for automotive spot repair because it produces less dust, prevents clogging, and gives a smoother finish. The water also helps you see your progress more clearly. Use fine-grit sandpaper (800 or higher) and keep the area wet throughout the process.
How long should I wait to wash my car after a touch-up paint repair?
Wait at least 24 to 48 hours before washing your car after a touch-up paint repair. The clear coat needs full time to cure and harden. Washing too soon can leave water spots, smear the paint, or cause the repair to peel. If possible, wait a full week for the best results.
=== CONCLUSION ===
Do I Need to Sand Before Touch-Up Paint? The answer really comes down to how deep the damage goes. For light chips and surface scratches, skip the sanding and go straight to painting. For deeper damage that exposes metal or goes through multiple paint layers, proper sanding is essential for a repair that lasts.
The key is to assess each situation individually. Take a close look at the damage, understand what layers are affected, and choose the right prep method. Whether you are doing a quick spot repair or a full auto body repair, proper surface preparation makes all the difference.
Use the steps and tips in this guide to approach every touch-up paint project with confidence. Sand when needed, skip when you can, and always take the time to do the job right. Your car will thank you with a repair that looks great and stands the test of time.